Thursday, December 16, 2010

Resolutions and a completely awesome recipe for Enchiladas

Happy New Year!!!!

As far as resolutions for 2011 go, does anyone have any good ones to share? I'm considering some of the following:

1. Be better about accessorizing. No, seriously. I never wear jewelry (except for my wedding ring) and I am always impressed by people who can accessorize well. It really takes things up a notch or two and I would love to learn the art of styling/accessorizing with panache.

2. Be better about keeping touch with my friends all around the world-even the ones close to home. I really tend to get lost in my own little nest of domesticity and I miss out on hearing about my friends' adventures (large and small.)

3. Write more. In general. More letters, more blogging, more emails, more stories, more journal entries, etc.

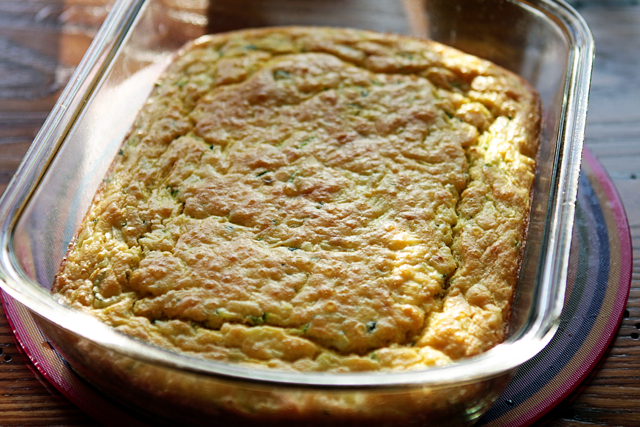
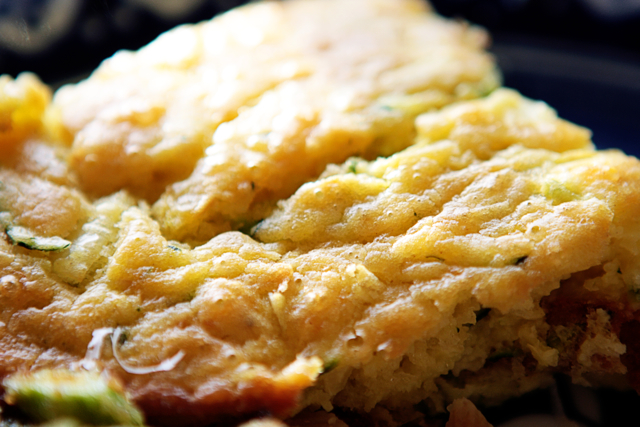
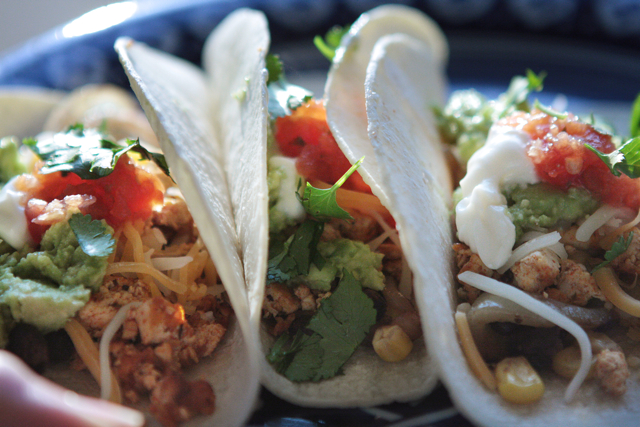
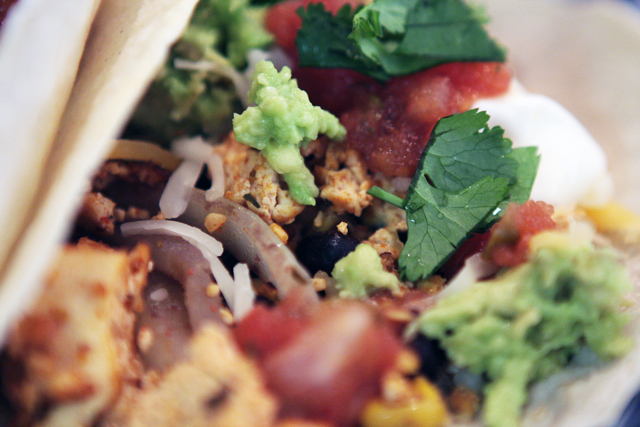
I'm sure starting tomorrow most of us (myself included) will be trying to cook nothing but steamed chicken, brown rice, and vegetables and will be working out for at least an hour seven days a week (as is usually the case around New Year's.) And yet, for some reason I thought that this recipe for New Mexican Green Chile Chicken Enchiladas (given to me by my fabulous friend and native New Mexican, Angelica) was a perfectly festive, fun, easy, DELICIOUS way to ring in the new year. I just love this stuff. And if you have leftover chicken from a roast, etc. it comes together so quickly- in single digit minutes. Then you can stick it in the oven and have time to go work out or something :)


Angelica's New Mexican Chicken Enchilada Casserole

10 ounces cream of mushroom soup (Note: This is the first time in my life I have
ever done one of those "soup" recipes-I never thought I would, nor did I think
I would LOVE it.  But it's good to be less snobby about food, right?  And you
could always buy the organic, reduced guilt kind, right?)
1/4 cup chopped green chile** (canned is ok, but not as awesome)
 1/3 cup milk  (I use skim)           
 1/2 cup chopped onion 
1 1/2 cups cooked shredded chicken     
 cooking spray 
1/2 teaspoon salt (optional)                
12 corn tortillas 
1/2 teaspoon garlic salt/garlic flakes 
3 cups grated cheddar cheese (I use the reduced fat pre-shredded stuff but I say go for the 
real stuff and no guilt!)

Preheat oven to 350. 
1. Heat cooking oil/spray in a heavy pan at medium-high heat. 
2. Lightly warm each tortilla in the sprayed pan to soften. 
3. Heat the soup and milk over medium heat on the stove top and then
add the cooked shredded or diced chicken, garlic flakes, and green chile to taste.
4. Alternate ingredients in a lightly greased, 2-quart casserole dish,
   beginning with the tortillas, then cheese, then a sprinkle of onions 
and then a layer of the soup mix and repeat. The top layer should have            
 the last layer of tortillas with some cheese sprinkled on top.
5. Cover casserole dish with foil and bake in a 350°F oven for 25-30    minutes.


Wednesday, December 15, 2010

Cookie exchange and superb Blondie recipe


It's been a big week for my kitchen. I had Prof. Hubs' Russian Feast to prepare for all of his students and a cookie exchange to attend within 24 hours of each other.
They both went off without a hitch. Well, sort of. I had originally planned to bring three dozen parisian macarons (pumpkin flavored, of course) to the cookie exchange. I worked so hard on them for hours-I even PIPED the meringue into the perfect little discs hoping to achieve that gorgeous, smooth, footed shell for my macarons... Alas, it was not to be. My macarons were hideous. This was partly due to a food dye incident which caused them to be BRIGHTPINK instead of light orange, but mostly due to the fact that they were bumpy, footless, and not at all shiny and gorgeous. I had to toss them. But what to bring to the cookie exchange?
Enter the blondie.

I took a Zingerman's recipe and messed with it some (I did not feel like/have the ingredients for making a separate praline) to make a perfectly gorgeous blondie. It comes together lightning fast and tastes really homey and delicious... Especially if, like me, you take them out a smidgen early so that the center bars are still really goey and chewy :)

Desperate Housediva's Gorgeous Blondies
inspired by a recipe from the Zingerman's bakehouse

Makes 16 large blondies

1 cup butter, melted

1 cup brown sugar

2 large eggs

2 tsp vanilla

2 Tbsp dark Rum or Cognac

1.5 cups cake or all purpose flour

1/2 tsp sea salt

1 tsp baking powder

1 to 1.5 cups bittersweet chocolate chips

Preheat oven to 325

Melt the butter. In a large bowl (or standing mixer) combine melted butter and brown sugar. Mix well until emulsified. Add vanilla, rum and eggs. Gently add dry ingredients and mix until just combined. Add chocolate chips.

Pour into greased 8X8 pan and bake for 35-40 minutes, until set and toothpick inserted into center comes out clean. Cool on rack.


Sunday, December 12, 2010

Breathing...and the world's greatest brownies...


When I started this blog it was a way to keep myself occupied as I made the transition from a New York City single girl to an Ohio housewife. It was also to be something of a record of our first year here in Midwestia and a place to share recipes old and new. I kept it up pretty regularly for a year but then something happened:
I didn't need a blog to keep me busy anymore. I was busy already. Somehow life and its engagements caught up with me-I was so busy I didn't quite know what to do with myself. Suddenly, instead of a respite from my nebulous days it became yet another thing I needed to do in my ever-increasingly scheduled life. So I took some time off the blogging. I checked my priorities. I re-checked them. I decided to focus on family, on health, on re-invigorated my photography business, and several other things, but you know what? I missed my food blog :) And so did you, internet, so did you! I have had so many people, acquaintances, relatives, and friends (both flesh and internet) ask me to start posting again that it's been really awesome. So here I am. Breathing and blogging. And cooking...

I hereby re-instate the Desperate Housediva food blog with the world's best brownies!
My favorite brownies in the entire world would be the Zingerman's Magic Brownies, no contest. Though the La Brea bakery in LA comes in at a distant second (they're quite delish.)
When I worked at Zingerman's in college I must have eaten two of these gorgeous chocolate bricks a week (at least.) They are more of a cakey, dense chocolatey and nutty brownie than a goey, fudgie one, but to me that's part of what makes them so good.
This recipe is obviously altered from the real recipe in that it's made for home cooks to produce one pan of perfect Zing brownies and not a commercial amount. But I must say the flavors don't suffer one bit. I really feel like they are as good as the real thing, especially if you use the highest quality ingredients you can get your hands on (and in Midwestia that's not nearly as high as most anywhere else!)


The Zingerman's Magic Brownies.
(no, they don't have anything "magic" in them, you junkies, you! They just contain delicious chocolate, lots of butter and wholesome goodness throughout!)

Ingredients
13 tablespoons butter (no substitutes)
6-1/2 ounces unsweetened chocolate, coarsely chopped
1-1/2 cups sifted cake flour or all-purpose flour
3/4 teaspoon baking powder
1/2 teaspoon salt
4 eggs
2 cups sugar
1-1/4 teaspoons vanilla
1-1/4 cups coarsely chopped walnuts, toasted

Directions
1. Grease a 13x9x2-inch baking pan; set aside. In a heavy small saucepan, heat the butter and chocolate in a double boiler, stirring constantly, until chocolate is melted and smooth. Set aside to cool. In a small bowl, stir together flour, baking powder and salt. Set aside.

2. In a large mixing bowl, beat eggs and sugar with an electric mixer on high speed for 5 minutes or until lemon-colored and fluffy, scraping sides of bowl occasionally. Add cooled chocolate mixture and vanilla. Beat on low speed until combined. Add flour mixture. Beat on low speed until combined, scraping sides of bowl. Stir in walnuts. Spread the batter in the prepared pan. Bake in a 325 degree oven for 30 minutes or until brownies appear set.

3. Cool in pan on a wire rack. Makes 15 servings.


Friday, July 9, 2010

Olive Tapenade


Oh, my poor blog! How I have neglected you!
I seem to begin every other post with such exclamations... I should either:
a. Write a blog post more often.
b. Get over myself and realize that, like the diary I kept in grade school, apologies to the page are for my sake and not for the page's.

Just a quick recipe to share before I finish this glass of Dashwood sauvignon blanc (which is a steal, btw, at $9.99!)

OLIVE TAPENADE
(adapted from a recipe by Ina Garten)

1/2 pound good olives, rinsed and pitted. (I used a mix of fancy black olives)
2 Tbsp capers3 anchovy filets, rinsed
(I know, I know...you say you hate anchovies...but, trust me. So do I! But the addition of anchovies cuts the briny olive taste and makes it nice and mellow)
1 garlic clove
1/2 cup Extra Virgin Olive Oil
1 Tbsp lemon juice
2 tsp Dijon mustard
1 tsp fresh thyme leaves
1 Tbsp fresh parsley

Combine all ingredients in a food processor and process until mixture resembles a coarse paste. Transfer to a serving bowl. Enjoy!


Friday, June 25, 2010

This Fruit Crumble will make you feel Happiness


I'm constantly buying beautiful, seasonal, local fruit at our local market. I love to enjoy it that day on its own but what do you do when you have fruit that's not exactly at the height of freshness but still completely good? You put it in something else, of course. There's something about a super-ripe strawberry that isn't the most appetizing raw but it's bursting, juicy flavor is a welcome addition to a fruit crumble. Now, you can always use fresh fruit for this recipe-it will still be fabulous, but there is something about that ripe-ripe fruit that just sings when baked. And this is seriously the best fruit crisp/crumble I have ever had, let alone made. Ignore any previous crisp/crumble recipes you may have tried-(even the one I posted almost a year ago on this very blog!) because they can't hold a candle to this one. You can, of course, use any combination of fruits that pleases you. I did a strawberry-raspberry crumble but am looking forward to doing a strawberry-rhubarb next and then perhaps a peach-raspberry...My thanks go out to Nigella lawson for the recipe this is based on and to Deb from SmittenKitchen for publishing her version and thus bringing it to my attention. Seriously, ladies. Thank you.

DESPERATE HOUSEDIVA'S FAVORITE FRUIT CRUMBLE

Crumble Topping:
2/3 cup white whole wheat flour
2/3 cup all purpose flour
1 tsp baking powder (I think this is what makes the topping so perfect-it adds a bit of lift and fluff)
3 Tbsp sugar
3 Tbsp brown sugar
large pinch of salt ( you may prefer a small pinch, but I like my sweets to have a bit of salt)
1 stick of butter, melted

Fruit Filling:
1.5 cups of a favorite fruit, cut into small pieces (any berries or stone fruits or rhubarb)
1 cup of another fruit, cut into small pieces (any other berries or stone fruits or rhubarb)
juice of one lemon
1/2 cup sugar
3 to 4 Tbsp cornstarch
pinch of salt

Heat oven to 375. Prepare topping: In a large bowl, combine all ingredients until large clumps form. Refrigerate until ready.

Prepare fruit: Mix all filling ingredients together in pie plate or casserole of choice (a deep one.) Spread evenly.

Top Fruit with topping evenly. Bake for 40-50 minutes until topping is golden brown and topping is bubbling underneath.

Allow to cool slightly or to room temperature and enjoy!


Thursday, June 24, 2010

Salad Days: Part III Mexican Salad (AKA: The most delicious salad ever)


How I do love these long Summer days!
And how I do love the beautiful produce which is displayed in Midwestia's amazing famer's market... Not to mention the gorgeous herbs reaching towards the sun in my little backyard garden. Lovely. Each and every one.

In this, the final installation of the Salad Days posts, I present you with the recipe for my salad piece de résistance; the Desperate Housediva Mexican Salad.
In a word: Yum!

This is the ultimate salad for people who don't find salads satisfying. It's quickly become Professor Hubs' (and Professor Hubs' whole family's) favorite Summer Salad.
It's customizeable, easily made completely vegan, and is naturally gluten free.


DESPERATE HOUSEDIVA'S MEXICAN SALAD
adapted from a recipe from my friend Claire and a recipe from SELF magazine...
(serves 4, generously)
2 heads romaine lettuce, chopped
1 can black beans, drained (preferable organic)
1 can sweet corn kernals (preferable organic and low salt) OR the kernels cut off of 2 leftover corn-0n-the-cobs.
12 cherry tomatoes, halved
1 jicama, peeled and chopped (or if you can't find it; 1 firm apple, peeled and chopped)
5 radishes, thinly sliced
1/4 cup of thinly sliced red onion or a handful of chives
handful of shredded cabbage
1 bell pepper (red or yellow) chopped
1 avocado, chopped
Handful of fresh cilantro, chopped
Handful or crumbled feta cheese (or not, for vegan cooks...)
Grilled protein of choice, cubed (Grilled chicken breast, grilled shrimp, grilled tofu, etc.)

Combine all ingredients and toss with dressing.


DRESSING
Juice of 4 limes + honey to taste (or 1/4 cup rose's sweetened lime juice)
1/4 cup apple cider vinegar
1 garlic clove, minced
1/3 cup olive oil or more, to taste.


Wisk to combine and use at least half to dress salad. Add more to taste and save the rest for another purpose (another salad, a marinade, etc.)

Enjoy!!!


Saturday, June 12, 2010

Salad Days: Part II Thai Basil Salad


What I've been up to (that's kept me from sharing recipes:)

-Driving
-Travelling
-Honeymooning
-Beach combing
-Relaxing
-Reveling
-New Car-getting
-Eating
-Bonding
-Cooking
-Singing
-Shooting
-Loving
-Grieving
-Resting
-Nurturing
-Reminiscing
-Returning
-Connecting

...and infinite other gerunds...

As I mentioned in the last post, Prof. hubs and I have been feasting on the most delicious and filling of Summer Salads... This one is inspired by a salad that I ate after an exhausting day trekking through San Francisco with a friend in 2004... I have been craving it ever since. It's the perfect combination of flavors and textures-so refreshing, so toothsome, a bit spicy... Perfection.

And now, the second installment of my soon-to-be famous Salad posts:

THAI BASIL SALAD
(makes 2 huge portions or 4 regular...)
1/2 package asian rice noodles (pad thai noodles, vermicelli, etc.) cooked per package directions (use one handful or the whole amount-it's up to you and it's all good.)
2 head romaine lettuce, chopped
2 large handful of shredded cabbage (I just use the bag of pre shredded cole slaw mix)
5 thinly sliced red radishes
1 small handful shredded carrot (I just use the kind that's already in the bag of shredded cole slaw mix...)
1 peeled and cubed cucumber
1 mango, diced
8 grape tomatoes, halved
small handful chopped peanuts
small handful of each of the following herbs, chopped:
scallions, basil, mint, cilantro
Protein of your choice (I like grilled steak but sauteed tofu is lovely for a vegan choice as is chicken or shrimp as a steak alternative...)

Combine all ingredients and toss with dressing. Enjoy!!!

SALAD DRESSING
Juice of 4 limes
2 tbsp brown sugar
2 Tbsp Thai fish sauce
2 Tbsp water
2 cloves garlic, minced
2 tsp Shriracha sauce
1 tsp sesame oil
4 Tbsp canola oil (or other light, flavorless vegetable oil)

Wisk to combine well.


Tuesday, May 18, 2010

Salad Days: Part I Salade Niçoise


I've been on the road again as is evident from my lack of posts. First it was a stressful work week in NYC filled with photography work and voice lessons. Upon my return I was hostess to my sister-in-law for a week. We had a wonderful visit peppered with a few wonderfully successful cooking experiments but all of our traipsing around Midwestia and its environs left little time for blogging.
During my NY visit one of my dearest friends informed me that I was looking a teensy bit more 'happy and plump' than usual, which, combined with the poll results asking for more healthy, fast, and vegetarian recipes has me excited to share these next few posts. In short, as it is nice to look happy I don't want to look plump and I know that these salads can help :)
Salads. As I've stated before I'm not naturally inclined to love salads. In fact, until this past week I only really enjoyed three of them. But the past eight days or so have proven me wrong. It wasn't that I didn't like salad, it was just that I didn't like BORING salad. I love when a salad has so much flavor, texture, and heartiness to it that you don't feel as though you've joined a cult of asceticism but rather you've taken the first steps to living a life of European luxury. I think this first Salad is a perfect example of a satisfying meal that happens to be a made up primarily of vegetables. I first learned to make it during my time living in Paris and I can't stress enough how simple, delicious, and filling it is.


Salade Niçoise au Thon
(Nicoise salad with tuna)
(makes 2 very large portions or 4 rather small)
1 bag of Spring Mix greens
4 cooked red potatoes, cubed (from a bag of steam-in-microwave red potatoes or a few red potatoes from last night's roast.)
2 handfuls French green beans (from a bag of steam-in-microwave French green beans/haricot Verts or steamed on stove)
2 cans Tuna packed in olive oil (This is a MUST! It MUST be the rich and delicious kind packed in olive oil or it is decidedly un-French, un-decadent, and un-satisfying.)
2 Tbsp capers
10 niçoise olives (or your favorite black olives)
a few anchovies (optional)
2 hard boiled eggs, peeled and sliced
2 tomatoes, diced
a few slices of red onion for each salad

French Vinaigrette
1/4 cup red wine vinegar
2 Tbsp minced shallot
1 Tbsp minced garlic (optional)
1 tsp dijon mustard
3/4 cup good Extra virgin olive oil
s&p to taste

Combine all ingredients except oil until well blended. Then wisk in oil, slowly, until emulsified.

SALAD ASSEMBLY
Distribute ingredients evenly among plates. Drizzle with vinaigrette. Bon Appetit!


Monday, April 26, 2010

Red Velvet Dreams


Honestly, I feel guilty posting this recipe. First of all, it's so trashy-it goes completely against my usual whole/real/foods approach and utilizes not one but two boxed convenience foods. Secondly, I actually got up at 5:40 in the morning today to attend a 6 am spinning class and instead of posting a virtuous salad recipe I'm paying forward a sugary confection...and yet here I am, sharing with the internet world my favorite recipe for Red Velvet Cake. The one saving grace of the recipe is that instead of the usual oil added to a cake I find that using plain applesauce improves the homemade flavor and texture (no dry cake here!) I suppose the other saving grace is that it comes together in no time at all. Who knew you could put together a moist and delicious multi-tiered cake so quickly!

If perhaps you are wondering why I am sharing a red velvet cake recipe of all things it's because last Thursday I had a dream about a red velvet cake (welcome to my life) and couldn't stop thinking about eating one. Having little time (I was in the midst of rehearsals/performances of FLUTE) I decided to try to make a box cake taste delicious... And I did. It's really good.

RED VELVET CAKE
1 box duncan hines red velvet cake mix (I can't believe I wrote those phrases!)
1 cup water
1/3 cup unsweetened plain applesauce
3 eggs
1 box instant chocolate pudding

Preheat oven to 350. In a large mixing bowl combine all ingredients. Stir for about 2 minutes. Some small lumps are ok. Pour into prepared (greased) pan(s) and bake for:
2-8'' pans (35 minutes)
2-9'' pans (30 minutes)
13''X9'' pan (35 minutes)
24 cupcakes (19 minutes)
Making sure to check that a knife or toothpick comes out clean.

When cake has cooled completely, frost! I like to use a homemade cream cheese icing (sometimes with coconut,) but many prefer a boiled white frosting or a vanilla buttercream.
And most importantly, if you are going to eat cake-really savour it! do it with joy and without guilt! Bon Appetit!


Saturday, April 24, 2010

Indian Food Week: Part 3, Finale

Last night's performance of THE MAGIC FLUTE was a success (though a rather long evening for the audience-Prof. Hubs is a truly dedicated fan to stay through the whole thing-the show finished around 11:20!) I am looking forward to the freedom I experience in a few days time when the score of the opera finally winds its way out of my brain-I literally have it running through my mind at ALL HOURS. It could be worse. Thankfully it's Mozart as opposed to Gilbert & Sullivan, but it would still be nice to have some peace in that mind of mine.
Today I round out this week of Indian Food posts with a wonderful recipe for Chai Spiced Rice Pudding (Kheer) very loosely based on a recipe by Alton Brown. It's a great way to rid yourself of extra cooked rice (especially fragrant basmati) and a delicious finish to an Indian (or any) feast. It's also easily customizable to suit your diet-dairy free? OK! Just use soy or all coconut milk and it's vegan and it is also naturally gluten free as written.

MASALA CHAI RICE PUDDING
1 cup cooked rice (I like basmati)
1 cup milk of your choice (I used 2%)
1/2 cup half-half (you could instead use cream, milk, soy...whatever!)
3/4 cup light coconut milk (or regular...as you like)
up to 1/4 cup of sugar (I used about half that...I don't like it too sweet)
1/2 tsp ground cardamom (this is expensive, I know...but it is SO. SO. GOOD.)
1/4 tsp ground cinnamon
pinch of ground clove
1/4 tsp ginger
pinch of black pepper

In a large saucepan, combine milk and rice. Heat until just boiling, then lower heat and add simmer until the mixture begins to thicken slightly (about 7 minutes on my stove.)
Add the cream, coconut milk, sugar and spices and cook until the mixture starts to thicken again, about 10 minutes stirring occasionally with a wisk. When mixture begins to thicken remove from heat and allow to cool to room temperature. Serve at room temp. or cooled.
Feel free to add garnishes like raisins, pistachios, cinnamon, etc.
Enjoy!
(Note: Indian rice pudding is a bit soupier than the American variety.)

Thursday, April 22, 2010

Indian Food Week: Part 2


This week I have been deep in rehearsals for THE MAGIC FLUTE here in Midwestia. I have to admit I'm pleasantly surprised at the level of talent they have gathered to be in this production; there are some accomplished and wonderful singers here.
In this second installment of INDIAN FOOD WEEK I present to you an authentic recipe for the delicious vegetarian dish, Saag Paneer (cheese with spinach.) You can purchase paneer in the cheese section of some groceries but if you live in Midwestia or are just feeling crafty you can make your own paneer very quickly and easily by clicking here. It's crazy how easy it is.
This recipe for Saag Paneer was part of a wedding shower gift from a dear friend of mine (who's family happens to be Indian)-and it's sooooo good.


SAAG PANEER FROM PRITI'S MOM
1 onion
6 cloves garlic
1 oz. fresh ginger
1 lb. frozen spinach, thawed
1 cup plain yogurt
4 oz. buttermilk
2 tsp red chili powder (start with less if you don't like hot & spicy)
2 tsp garam masala (start with less if you don't like hot & spicy)
1 cup half and half
6 oz. paneer
salt to taste

Chop the onion, garlic and ginger and grind them into a paste. In a medium saucepan, combine the paste, spinach, yogurt, buttermilk, chili powder, and garam masala. Simmer at medium heat for 20 minutes. Mash the ingredients with a potato masher (or blend in a blender if you like it finer and smoother.) Add the half-half. Simmer until the mixture has a creamy consistency, 10 - 15 minutes. Add the cheese, simmer 5 minutes. Season with salt. Makes 4 to 6 servings.


Monday, April 19, 2010

Indian Food Week: Part 1


I have mentioned before that Midwestia has a severe lack of ethnic eateries. I have also mentioned that this has forced me to become more adventurous in the kitchen, putting together my favorite ethnic take-out and restaurant dishes at home. Until now this mostly consisted of my favorite Korean Recipes, Japanese dishes, Russian dishes, Mexican dishes, and Spanish dishes. Until now. Now I have finally, this weekend, conquered a fear of mine: Indian Food. Let me clarify-I was never afraid of eating Indian Food. I love Indian Food. I adore it. I would eat it several times a week were there a viable restaurant option in town. But cook it myself? Every time I even read a recipe for an Indian dish I got woozy somewhere between cardamon pods, ginger, garlic, and onion paste and heavy cream. There are so many ingredients in some of these recipes!
But that's changed now. Now I have triumphed over my fears and appear before you (figuratively) a home cook who makes a Chicken Tikka Masala that would rival your favorite take-out joint. A housewife who has made saag paneer (Indian Cheese and Spinach) from scratch (that paneer itself is so easy to make it's scary) and lived to tell the tale. So, internet friends, this week's recipes are dedicated to my adventures. First I give you everyone's favorite entry into Indian cuisine; Chicken Tikka Masala. Next, Saag Paneer, and finally a delicious way to use up all of your leftover basmati rice in a Masala Chai-spiced rice pudding! And it's so much HEALTHIER to cook it at home-I control the amount of cream in the dish, etc. I love that.

Note: This recipe takes a bit of time to put together the first time, so I recommend doing it on a day when you are home doing other things. I've tried shortcut recipes for this dish, but they just lacked real flavor and authenticity. I think you need about 90 minutes to make this, but most of those minutes are not active cooking time. The results are worth it!

CHICKEN TIKKA MASALA
(Thank you to my dear friend Erica's Brother-in-law, Rich, for this recipe. It is AMAZING)

Marinade
1/2 tsp cumin powder
1/2 tsp ground coriander
1/4 tsp cayenne pepper
1 tsp salt
Up to 2 lbs. chicken breast (I used 1.25 lbs, but it was so good I wish I used the whole 2!)
((if you want to make this vegetarian, you can use tofu or paneer instead)
1 cup plain yogurt (lowfat is ok)
1 TBSP fresh ginger, minced
2 medium cloves of garlic, minced

Sauce
3 Tbsp. canola oil
1 onion, sliced into half-moons
2 medium cloves of garlic, minced
2 tsp fresh ginger, minced
1 TBSP tomato paste
1 TBSP Garam Masala powder
1 28 oz. can crushed tomato
2 tsp sugar
2/3 cup light cream/half-half/heavy cream (I used half and half but then decided to add a drop of real, heavy cream, too.)
1/4 cup chopped fresh cilantro, plus more for garnish

DIRECTIONS
Blend first 4 ingredients of the marinade and use to coat chicken. Place in refrigerator for 20 minutes. After the 20 minutes, mix yogurt, garlic, and ginger into the bowl with the chicken and mix well. Place back in the fridge for another 3o minutes. While the chicken is marinating, make sauce: Sautée onion in oil until golden. Add the ginger and garlic and stir fry for 1 minute. Then add garam masala, tomato paste, crushed tomatoes, cilantro, sugar, and salt, and bring to a simmer for 15-20 minutes. While sauce is simmering and once the marinating time is up broil chicken on high for 9 minutes per side. Remove from oven and when cool enough cut into 1''x1'' bites. Stir cream into sauce and add chicken. Serve with chopped cilantro garnish over white basmati rice.


closeup of deliciousness from our friends at Arielle Doneson Photography- www.AriellePhoto.com

Thursday, April 15, 2010

Favorite Tchotchke Peddlers...

I am suffering from an acute upper-respiratory infection so sadly no recipes today. I made chicken tikka masala last night which I couldn't taste at all from a lack of sense of smell which made me realize I'm currently not fit to tell anyone about cooking. Today whether it's chocolate to curry it all smells like matzo ball soup to me. Quite frustrating and quite odd...
I've recently been amazed at how much Yiddish has made it into the modern English vernacular. Even here in Midwestia I'll overhear people use words like "schlep" without a second thought. I really do think this is a new(ish) phenomenon-perhaps thanks to tv shows like SEINFELD and CURB YOUR ENTHUSIASM. No matter how it happened I love it. No more strange looks from (non-Jewish) friends when I swing around words and phrases like "bubkes," "kibbitz," and "mensch." In the last year I almost squirted water out of my nose from pleased laughter when a (non-Jewish) Utah-raised friend said "Oy. this is not kosher" in response to a sticky situation she was describing.
Which brings me to tchotchkes. Tchotchkes (Typically pronounced as "Chach-Kee") are fun trinket-like knick-knacks. And I love them. I think it's in the same family as the love of stationary/school supplies and whatever impulse it is in me that causes me to swoon at the home accessories section of an Anthropologie store.
I would like to use this post to share a few of my favorite websites for procuring such goodies. I invite you to comment at the end of this post with your own favorite tchotchkes and/or where you like to go to look for them...I'm always on the prowl for new tchotchke peddlers...

THE DESPERATE HOUSEDIVA'S FAVORITE TCHOTCHKE STORES

Patina
It's amazing the kind of fun bits one can find here and for so little! I purchased a much beloved sparrow necklace, some snarky luggage tags, and monkey key covers from this gem. These brightly patterned mugs and decorative-packaging teas? I'm completely coveting them.

The Paper Source
I discovered this spot through purchasing some of my wedding accessories here. I am especially loving the matryushka (Ukranian nesting dolls) measuring cups, the japanese papers, and the cupcakes apron (and my birthday is next month...) If you need any stationary for anything they'll do a gorgeous job-they can also set you up with some phenomenal DIY projects...

Uncommon Goods
I am flipping out over the julia child birdhouse, the make-your-own mozzarella kit, and the leaf umbrella. Julia child birdhouse!!?? Amazing.

Target
Target is the motherload of cute, affordable tchotchkes. I recently redid my living room using a few of those LIBERTY OF LONDON pillows and some inexpensive, gauzy curtains. And don't even get me started on the adorable vintage looking apothecary jar.... I can easily spend an hour in target. Or two hours...

World Market
I love the international foods section of world market. Gorgeous chocolates, preserved moroccan lemons, and every spice imaginable... I appreciate the inexpensive and extensive wine selection but I especially love the front part of the store which sells TCHOTCHKES.
Today I am particularly coveting the adorable vintage clocks and the handmade ceramic drawer wood chests. I am a sucker for brightly painted tiles.


Anthropologie
My dream home is a cross between a Tuscan villa and an Anthropologie store. Seriously. I worked at Anthropologie for about 3 months when I first moved to NYC. I don't think many pay checks actually made it out of the store-that 40% employee discount did me in considerably...though my apartment and I were styled to utter, faux Parisian perfection.
Today on my Anthro wish list are the deck the halls necklace, the white narcissus mirror, and the two gardens pitcher. I could go on for days...

Sunday, April 11, 2010

Parental Brunch

from our friends at www.AriellePhoto.com


I love all things cheese (you may have noticed.) I think I inherited this love from
my Dad who, like me, enjoys cheese in it's savory or sweet forms. When I learned
my parents were coming for a visit to Midwestia I immediately started planning meals
involving this dairy delicacy. Fast forward to Saturday brunch and this gorgeous and
simple cheese danish. It's like a bit of cheesecake packed into a puffy little parcel.
It's a wonderful recipe for a brunch-it's so simple-and yet pretty enough to be quite
impressive. Perfection! (and my parents loved it!)


Quick and easy cheese danish
(adapted from Ina Garten)

8 oz. 1/3 less fat cream cheese (Neufchatel cheese)
1/4 up to 1/3 cup sugar (I prefer 1/4...I don't like the cheese to be too sweet)
2 egg yolks, room temperature
2 Tbsp. part skim ricotta cheese
1 tsp pure vanilla extract
1/4 tsp salt
zest of 1 lemon
2 sheets (1 box) of puff pastry, defrosted and thawed
1 egg beaten with 1 Tbsp water, for egg wash

Preheat the oven to 400 degrees F. Line a sheet pan with parchment paper.

Place the cream cheese and sugar in the bowl of an electric mixer fitted with a paddle attachment and cream them together on low speed until smooth. With the mixer still on low, add the egg yolks, ricotta, vanilla, salt, and lemon zest and mix until just combined. Don't whip!

Unfold 1 sheet of puff pastry onto a lightly floured board and roll it slightly with a floured rolling pin until it's a 10 by 10-inch square. Cut the sheet into quarters with a sharp knife. Place a heaping tablespoon of cheese filling into the middle of each of the 4 squares. Brush the border of each pastry with egg wash and fold 2 opposite corners to the center, brushing and overlapping the corners of each pastry so they firmly stick together. Brush the top of the pastries with egg wash. Place the pastries on the prepared sheet pan. Repeat with the second sheet of puff pastry and refrigerate the filled Danish for 15 minutes.

Bake the pastries for about 20 minutes, rotating the pan once during baking, until puffed and brown. Serve warm.


Tuesday, April 6, 2010

Ice Cream Dream


from our friends over at www.AriellePhoto.com


Lately, I've been attempting to be very good about using up leftover ingredients. My new rule is if I am going to buy a specialty ingredient (rosewater, gelatin sheets, heavy cream, etc.) I must also think of at least one other way to use it. This lead to yesterday's culinary activity-Strawberry Ice cream...from scratch. I had over a pint of leftover cream from a cake recipe I made last week (the Gotham Bar and Grill warm chocolate cake) and I needed to use it this week before it became a science experiment in my fridge. I also had purchased an abundance of strawberries as they have been practically giving them away at my local market. So naturally, it was ice cream time. I recognize that most people probably don't have an ice cream maker. I don't either, but I do have an ice cream mixer attachment for my stand mixer-which is awesome. I apologize if you have none of these toys-if that's the case then I recommend picking up a pint of Haagen-dasz, sitting down in front of the computer and eating it as you read this post...

Ice cream is really simple to make. So is frozen yogurt. It's fun and an incredibly delicious thing to do on a hot day (yesterday it was 80 degrees here in Midwestia!) But I warn you, this is the real deal-real cream, real eggs, real vanilla, a bit of real sugar, etc... It is R.I.C.H. so a little goes a long way-but that's how I like my ice cream. Also, if feeding this ice cream to children please use those special salmonella-free eggs as the egg in this recipe is not cooked, it is frozen.


REAL STRAWBERRY ICE CREAM
1 pint fresh strawberries, hulled and chopped into small bits
1 Tbsp fresh lemon juice
2 eggs (the salmonella-free, pasteurized kind, please!)
3/4 cup of sugar divided into 1/4 cup and 1/2 cup
2 cups Heavy cream...yup...the real deal...
1 cup of Milk (I used 2%)
1 tsp vanilla extract

In a large mixing bowl combine strawberries, lemon juice, and 1/4 cup of sugar. Allow to rest in the fridge for about 1 hour-until pretty pink juice is released.
In a separate mixing bowl beat the eggs until foamy (about 3 minutes if doing by hand)
add the 1/2 cup of sugar, milk and vanilla. Add the strawberries and their juice. Mix well. Slowly add cream until just combined. Pour into mixer and follow manufacturers instructions. Enjoy!!!

(Ice cream made with eggs will keep for about 3-4 days.)


Monday, April 5, 2010

Zucchini Pie


Last night Prof. Hubs and I prepared a Spring feast dinner: Pasta with Asparagus & Lemon, eggplant rollantini, and this zucchini pie.
One of my favorite family recipes, and perhaps one of yours as a few friends have told me they grew up with it as well, (it must have been in some publication back in my grandmother's day) is the Zucchini Pie. My grandmother and mother have made it for as long as I can remember. It's a delicious vegetarian entrée, a lovely appetizer or just a great addition to any spring meal. And it's a great way to use up any zucchini or squash you have in the house. Those of you who don't like cheese needn't worry-the parmesan included doesn't over-power the flavor, it more adds depth and richnes. The pie has a nice bit of puff and lightness and I personally prefer it thinner than thicker (cooked in a larger pan=more crisp outer layer. mmmm....) Actually, my favorite way to enjoy this pie is in little cupcake servings!


ZUCCHINI PIE
3 cups shredded zucchini (or a mix of zucchini and summer squash)
1 small onion chopped finely
4 eggs
1 cup bisquick mix (or 1 cup flour, 2 tsp baking powder, 1/4 tsp salt)
1/2 cup vegetable oil
1/2 cup shredded parmesan cheese
1/2 tsp dried marjoram (opt.)
1 tsp chopped parsley (opt.)

Preheat oven to 350. Combine all ingredients. Pour into lightly greased 10X6 pan (or 12 inch pie plate or cupcake tins.) bake for 30-40 minutes until lightly browned.


closeup of deliciousness


Wednesday, March 31, 2010

Vegetarian Tofu Tacos


I am constantly looking for delicious, fresh and nourishing vegetarian meals to supplement the meat we eat on other days. Living with a serious carnivore like Prof. Hubs (the man would eat three meals of meat a day) makes the search even more of a challenge because serious meat eaters are very picky about their vegetarian protein sources. These tofu tacos are a favorite meal at our house (that's true for me AND Prof. carnivore/hubs...) We eat them at least once a week. This is a wonderful meal for a family because everyone can customize the tacos completely and it's fun for a group because it's eaten with the hands and is a bit messy. AND it's fresh, nourishing, vegetarian, and delicious.
Feel free to customize as you like; I'm sure the spice rub would be great on ground beef/turkey/chicken instead of tofu but that defeats the point for me.

TOFU TACOS
1 package small corn tortillas
1 package WATER-PACKED extra firm tofu (the cardboard-packed kind is too slippery and just isn't crumbly enough)
2 to 3 TBSP spice rub (recipe below)
salt
1 onion, sliced into rounds
1 can black beans, drained and rinsed
1 can corn, drained and rinsed

GARNISHES
reduced fat shredded mexican cheese
1 avocado or fresh guacamole (mix avocado with half a lime and some salt to make fresh guac)
chopped cilantro
sour cream
fresh salsa

SPICE MIX (This recipe makes extra-I keep it in a plastic bag so I always have some around)
combine:
3 TBSP ground paprika
1 TBSP ground cumin
2 TBSP oregano
1 tsp (I probably add more like 1 TBSP because I like some heat) ground cayenne
1 tsp garlic powder or dried garlic

Instructions:
If you have the time freeze the package of tofu for an hour. The process of freezing and then defrosting increases the crumbling/meaty texture. If not, skip this step.
In a large sauté pan heat a bit of olive oil over high and add onion. Cook until translucent then add beans and corn, lower heat to medium-high.
In a different pan, heat olive oil over medium high to high. Crumble in tofu, add spice mixture and salt to taste. I find it needs a bit of salt... Stir to combine. I like to stir and then rest the tofu over heat for a bit so that the tofu develops a crust. I find it's more meaty. The stir/rest thing lasts for about five minutes. Meanwhile:
Prepare garnishes in an assembly line (I like to have Cheese, guac, sour cream, salsa, cilantro)
Heat tortillas (I do it on the stove in a small pan over medium heat or in the microwave...follow package directions.)

Assemble tortillas and enjoy (with lots of napkins!)

Extreme close-up of delicious taco filling goodness....