Showing posts with label Desserts. Show all posts

Tuesday, May 17, 2011

Chips Kahlua Ice Cream


When I was a little girl growing up in Michigan my favorite ice cream was available only at the Melting Moments ice cream shop in downtown East Lansing on the MSU campus. They were the one place in town where I could get my teeny little hands on a yellow cone filled with the best ice cream flavor of all time (this may be somewhat subjective,) Chips Kahlua.

Chips Kahlua had it all-it was creamy, rich, coffee-with-kahlua flavored ice cream filled with bits of luscious dark chocolate. Heaven. I realize you may be thinking, "Liquor flavored ice cream for a CHILD!? What!?" And yes, I do realize now that it was a slightly unusual choice for a kid of five years old to love, but what can I say, I was precocious. I've loved the taste of coffee for as long as I can remember. Apparently, even without trying it on its own until college, I also loved its sweetened, alcoholic cousin, Kahlua. Good stuff.

Every single taste of ice cream since those Melting Moments days is an attempt to recreate the taste of Chips Kahlua. To me it is the Platonic Form of ice cream of which all other coffee ice creams are mere shadows and reflections. Melting Moments no longer has Chips Kahlua in their regular offerings...in fact, I'm not even sure if they have a physical store anymore, but that will not stop my quest to find it. Or if I cannot find it, recreate it.

Professor Hubs and I received a Kitchenaid mixer as a wedding gift. I think I use it nearly every day-it's one of my 2 favorite kitchen appliances (the other being my cuisinart food processor.) One of the fancy schmancy attachments for my Kitchenaid mixer is the Ice Cream Attachment...
You see where I'm going here?

I decided to try my hand at making my own Chips Kahlua ice cream. Here's what I discovered:
a. One can easily make ice cream without eggs that is delicious. It takes like five minutes.
b. One cannot easily make ice cream without fat that is still delicious-it's ok, but not delicious.
c. Fat makes ice cream delicious.
d. Kahlua is the most delicious stuff on earth.
e. I love ice cream.

So if you find yourself having a hankering for a delicious, coffee-flavored ice cream treat, and you happen to have some kind of an ice cream maker, try out my Chips Kahlua ice cream. The stuff is good. ESPECIALLY if you make the full-fatty mcfatstein stuff. I will have to settle for the skim milk version for now, which is good, but not really the same as the Melting Moments flavor of my youth...

The Desperate Housediva's Chips Kahlua Ice Cream
(heavily improvised upon a recipe by Mark Bittman)

Ingredients:
2 cups of Milk or Cream (any fat percentage, any combination will do...the more fatty the tastier)
1/4 cup sugar (very low in sugar, oddly enough!)
pinch of salt
1/2 tsp vanilla
1/2 cup brewed coffee (I personally use decaf)
1/2 cup Kahlua (mmmm....)
3 large Tbsps Cornstarch
1/4 cup dark chocolate chips, chopped (regular sized chips are too large, trust me.)

In a saucepan over medium heat, combine 1.5 cups of the Milk/Cream, the sugar, the coffee, salt, and Kahlua. Stir occasionally until the sugar has dissolved and the mixture begins to steam.
In a separate bowl, combine the other 1/2 cup milk/cream with the cornstarch until well blended.
Add to the mixture on the stove and stir until the mixture has thickened slightly and one or two bubbles threaten to boil. Remove from heat and chill the mixture until cool.

Once cooled, add to ice cream machine according to manufacturers directions. Halfway through the mixing process, add the chips.

Enjoy the flavors of my childhood!


Tuesday, May 10, 2011

When the world hands you...rhubarb?


Yeah...so...(avoids gaze, sheepishly,) it's been a while...(kicks at dirt, feigning a casual air...) like, nearly 6 weeks... Oh, my poor desperatehousediva blog! How I have neglected you!
But you see, internet? There is just so much to report: so many recipes, so many anecdotes, home decor experiments (many of them successful! How much do we love a before & after!?) and lovely photos to share :)

It's officially Summer now here in Midwestia (Wooster, OH, for those of you who may have forgotten,) as The College is now on break. This means several things to me:
a. I now have my beloved husband, Prof. Hubs, around much more-yay!
b. The students are starting to disperse leaving behind a quiet, lazy Summer town.
c. Farmer's Markets are looking less and less like bake sales and more and more like Produce fantasy-lands.

All good things!

A few weeks ago we had dinner at the home of some friends who live on a self-titled "hobby farm." This is basically a stunning refurbished farmhouse in the woods complete with working farm (lite.) Do they have a greenhouse? Yes. A field full of gorgeous vegetables? Yes. Fruit trees? Yes. A barn? Yes. Animals? most recently chickens. It is basically my dream-home. Especially If you put the whole set up in Italy, close to the Adriatic coast!
After dinner we took a nice passeggiata (to continue with the, apparently, Italian theme I'm going with...) and managed to meander out into the garden. Scythe in hand, our friend cut a bunch of jewel-red rhubarb out of the ground and handed them to us. How much do we love a dinner with party favors!? Especially edible ones!? LOVE.

Personally I adore that classic American combination of strawberries and rhubarb. I decided to turn this lovely gift into a nice large batch of strawberry rhubarb preserves. The results were fantastic. They turned out much like THIS product I used to buy en masse from the brilliant people at American Spoon in Michigan.

But then I had almost too much S-R fruit preserves. So when life hands you Strawberry Rhubarb Fruit preserves? You make JAM BARS!!! These come together in like five minutes and provide hours of Spring delight :)


The Desperatehousediva's succulent Strawberry Rhubarb Jam-Crumble Bars
adapted from a recipe by Deb Perleman

1 cup granulated white sugar
1 tsp baking powder
3 cups flour (you can use all purpose, white whole wheat, or a 1/2-1/2 combo like I do)
1 cup of butter, melted
1 egg (sort of optional...the first time I made these I forgot the egg and they were still fabulous, though slightly crumblier. The 2nd time I remembered the egg and they were denser, cakier and yes, still fabulous.)
1/2 tsp salt
1.5-2 cups fruit preserves of your choice.

Preheat oven to 375.
Grease a 9X13 pan.
-In a large bowl, combine all ingredients BUT the fruit preserves into a nice dough. Do not overmix.
-Split the dough into 2 balls.
-With your hands, press the first dough ball into the prepared pan, spreading the dough into a nice, even crust.
-Then spread the fruit preserves over the crust layer, evenly.
-Finally, crumble the 2nd dough ball over the jam layer, evenly (it is slightly too wet to really crumble, so you may just want to break of little bits of dough and sprinkle them.)
-Bake for 45 minutes, or lightly browned. Allow to cool and enjoy!


Monday, February 28, 2011

Nigella's Epic Chocolate Guinness Cake


I have been doing so much back to back travelling of late. As much as I loved it, I am so thrilled to be back in my Ohio nest, decorating, cooking, reading, photo-editing, etc. I have become such a homebody over the last few years. I think it comes from having a nice little nest to take care of and a nice Prof. Hubs with whom to do so.
Last week I had the pleasure of reuniting in Chicago with several good friends whom I hadn't seen in YEARS-it was a much needed friendfest and I am now so excited for my upcoming trips to Chicago (in better, warmer weather, hopefully!) to photograph their wedding.
I have several photography projects coming up that I am really excited about. Check out my photosite in the coming weeks (www.AriellePhoto.com) to keep up :)
Then there is the matter of the Chocolate Guinness cake. My friend Ana has been raving about this cake for months. Her recommendation was so glowing that I knew I had to find an occasion to make it. Yesterday that occasion presented itself in the form of an informal dinner. I was asked to bring a dessert. And I did. I brought this cake. AND IT WAS SO DELICIOUS I CANNOT EVEN KEEP FROM SHOUTING (text-shouting.)


I am very pleased to present a cake that has become an instant classic in our house. Not only will I be making it for upcoming birthdays, but I will also use this cream cheese frosting recipe for the rest of my cream cheese frosting making days. SO GOOD! I usually have problems with lumps in my cc frosting, even if I let the cc sit out over night, but this method was perfect and I hadn't even let the cc soften for more than an hour! Wonderful! You don't really taste the guinness in the cake-it just adds a nice depth of flavor, a "ferrousness" as Nigella says. It is the most lovely, moist, dense cake... You'll love it!


Chocolate Guinness Cake

by Nigella Lawson

Total time: about 1 hour

For the cake:
Butter for pan
1 cup Guinness stout
10 tablespoons (1 stick plus 2 tablespoons) unsalted butter
3/8 cup unsweetened cocoa
2 cups superfine sugar
3/4 cup sour cream (I was out so I used 0% greek yogurt instead and it was great!)
2 large eggs
1 tablespoon vanilla extract
2 cups all-purpose flour
2 1/2 teaspoons baking soda

For the topping:
1 1/4 cups confectioners' sugar (I only used 1 cup-it was perfect)
8 ounces cream cheese at room temperature (I used Neufchâtel instead...better texture)
1/2 cup heavy cream.

1. For the cake: heat oven to 350 degrees. Butter a 9-inch springform pan and line with parchment paper. In a large saucepan, combine Guinness and butter. Place over medium-low heat until butter melts, then remove from heat. Add cocoa and superfine sugar, and whisk to blend.

2. In a small bowl, combine sour cream, eggs and vanilla; mix well. Add to Guinness mixture. Add flour and baking soda, and whisk again until smooth. Pour into buttered pan, and bake until risen and firm, 45 minutes to one hour. Place pan on a wire rack and cool completely in pan.

3. For the topping: Using a food processor, mix confectioners' sugar to break up lumps. Add cream cheese and blend until smooth. Add heavy cream, and mix until smooth and spreadable.

4. Remove cake from pan and place on a platter or cake stand. Ice top of cake only, so that it resembles a frothy pint of Guinness.

Yield: One 9-inch cake (12 servings).

Wednesday, December 15, 2010

Cookie exchange and superb Blondie recipe


It's been a big week for my kitchen. I had Prof. Hubs' Russian Feast to prepare for all of his students and a cookie exchange to attend within 24 hours of each other.
They both went off without a hitch. Well, sort of. I had originally planned to bring three dozen parisian macarons (pumpkin flavored, of course) to the cookie exchange. I worked so hard on them for hours-I even PIPED the meringue into the perfect little discs hoping to achieve that gorgeous, smooth, footed shell for my macarons... Alas, it was not to be. My macarons were hideous. This was partly due to a food dye incident which caused them to be BRIGHTPINK instead of light orange, but mostly due to the fact that they were bumpy, footless, and not at all shiny and gorgeous. I had to toss them. But what to bring to the cookie exchange?
Enter the blondie.

I took a Zingerman's recipe and messed with it some (I did not feel like/have the ingredients for making a separate praline) to make a perfectly gorgeous blondie. It comes together lightning fast and tastes really homey and delicious... Especially if, like me, you take them out a smidgen early so that the center bars are still really goey and chewy :)

Desperate Housediva's Gorgeous Blondies
inspired by a recipe from the Zingerman's bakehouse

Makes 16 large blondies

1 cup butter, melted

1 cup brown sugar

2 large eggs

2 tsp vanilla

2 Tbsp dark Rum or Cognac

1.5 cups cake or all purpose flour

1/2 tsp sea salt

1 tsp baking powder

1 to 1.5 cups bittersweet chocolate chips

Preheat oven to 325

Melt the butter. In a large bowl (or standing mixer) combine melted butter and brown sugar. Mix well until emulsified. Add vanilla, rum and eggs. Gently add dry ingredients and mix until just combined. Add chocolate chips.

Pour into greased 8X8 pan and bake for 35-40 minutes, until set and toothpick inserted into center comes out clean. Cool on rack.


Sunday, December 12, 2010

Breathing...and the world's greatest brownies...


When I started this blog it was a way to keep myself occupied as I made the transition from a New York City single girl to an Ohio housewife. It was also to be something of a record of our first year here in Midwestia and a place to share recipes old and new. I kept it up pretty regularly for a year but then something happened:
I didn't need a blog to keep me busy anymore. I was busy already. Somehow life and its engagements caught up with me-I was so busy I didn't quite know what to do with myself. Suddenly, instead of a respite from my nebulous days it became yet another thing I needed to do in my ever-increasingly scheduled life. So I took some time off the blogging. I checked my priorities. I re-checked them. I decided to focus on family, on health, on re-invigorated my photography business, and several other things, but you know what? I missed my food blog :) And so did you, internet, so did you! I have had so many people, acquaintances, relatives, and friends (both flesh and internet) ask me to start posting again that it's been really awesome. So here I am. Breathing and blogging. And cooking...

I hereby re-instate the Desperate Housediva food blog with the world's best brownies!
My favorite brownies in the entire world would be the Zingerman's Magic Brownies, no contest. Though the La Brea bakery in LA comes in at a distant second (they're quite delish.)
When I worked at Zingerman's in college I must have eaten two of these gorgeous chocolate bricks a week (at least.) They are more of a cakey, dense chocolatey and nutty brownie than a goey, fudgie one, but to me that's part of what makes them so good.
This recipe is obviously altered from the real recipe in that it's made for home cooks to produce one pan of perfect Zing brownies and not a commercial amount. But I must say the flavors don't suffer one bit. I really feel like they are as good as the real thing, especially if you use the highest quality ingredients you can get your hands on (and in Midwestia that's not nearly as high as most anywhere else!)


The Zingerman's Magic Brownies.
(no, they don't have anything "magic" in them, you junkies, you! They just contain delicious chocolate, lots of butter and wholesome goodness throughout!)

Ingredients
13 tablespoons butter (no substitutes)
6-1/2 ounces unsweetened chocolate, coarsely chopped
1-1/2 cups sifted cake flour or all-purpose flour
3/4 teaspoon baking powder
1/2 teaspoon salt
4 eggs
2 cups sugar
1-1/4 teaspoons vanilla
1-1/4 cups coarsely chopped walnuts, toasted

Directions
1. Grease a 13x9x2-inch baking pan; set aside. In a heavy small saucepan, heat the butter and chocolate in a double boiler, stirring constantly, until chocolate is melted and smooth. Set aside to cool. In a small bowl, stir together flour, baking powder and salt. Set aside.

2. In a large mixing bowl, beat eggs and sugar with an electric mixer on high speed for 5 minutes or until lemon-colored and fluffy, scraping sides of bowl occasionally. Add cooled chocolate mixture and vanilla. Beat on low speed until combined. Add flour mixture. Beat on low speed until combined, scraping sides of bowl. Stir in walnuts. Spread the batter in the prepared pan. Bake in a 325 degree oven for 30 minutes or until brownies appear set.

3. Cool in pan on a wire rack. Makes 15 servings.


Friday, June 25, 2010

This Fruit Crumble will make you feel Happiness


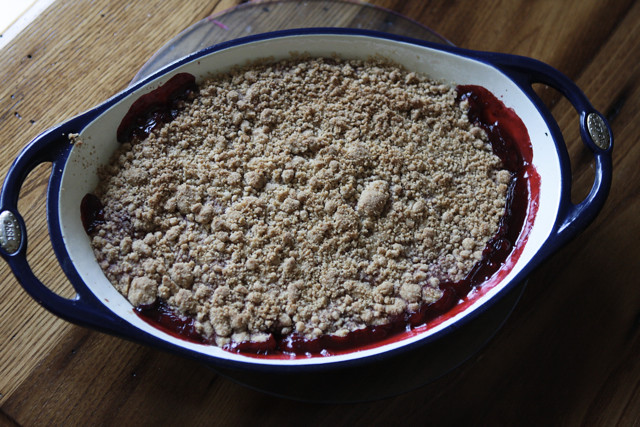
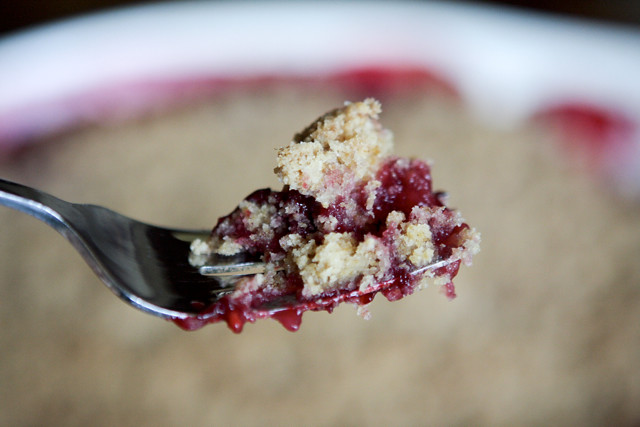
I'm constantly buying beautiful, seasonal, local fruit at our local market. I love to enjoy it that day on its own but what do you do when you have fruit that's not exactly at the height of freshness but still completely good? You put it in something else, of course. There's something about a super-ripe strawberry that isn't the most appetizing raw but it's bursting, juicy flavor is a welcome addition to a fruit crumble. Now, you can always use fresh fruit for this recipe-it will still be fabulous, but there is something about that ripe-ripe fruit that just sings when baked. And this is seriously the best fruit crisp/crumble I have ever had, let alone made. Ignore any previous crisp/crumble recipes you may have tried-(even the one I posted almost a year ago on this very blog!) because they can't hold a candle to this one. You can, of course, use any combination of fruits that pleases you. I did a strawberry-raspberry crumble but am looking forward to doing a strawberry-rhubarb next and then perhaps a peach-raspberry...My thanks go out to Nigella lawson for the recipe this is based on and to Deb from SmittenKitchen for publishing her version and thus bringing it to my attention. Seriously, ladies. Thank you.

DESPERATE HOUSEDIVA'S FAVORITE FRUIT CRUMBLE

Crumble Topping:
2/3 cup white whole wheat flour
2/3 cup all purpose flour
1 tsp baking powder (I think this is what makes the topping so perfect-it adds a bit of lift and fluff)
3 Tbsp sugar
3 Tbsp brown sugar
large pinch of salt ( you may prefer a small pinch, but I like my sweets to have a bit of salt)
1 stick of butter, melted

Fruit Filling:
1.5 cups of a favorite fruit, cut into small pieces (any berries or stone fruits or rhubarb)
1 cup of another fruit, cut into small pieces (any other berries or stone fruits or rhubarb)
juice of one lemon
1/2 cup sugar
3 to 4 Tbsp cornstarch
pinch of salt

Heat oven to 375. Prepare topping: In a large bowl, combine all ingredients until large clumps form. Refrigerate until ready.

Prepare fruit: Mix all filling ingredients together in pie plate or casserole of choice (a deep one.) Spread evenly.

Top Fruit with topping evenly. Bake for 40-50 minutes until topping is golden brown and topping is bubbling underneath.

Allow to cool slightly or to room temperature and enjoy!


Saturday, April 24, 2010

Indian Food Week: Part 3, Finale

Last night's performance of THE MAGIC FLUTE was a success (though a rather long evening for the audience-Prof. Hubs is a truly dedicated fan to stay through the whole thing-the show finished around 11:20!) I am looking forward to the freedom I experience in a few days time when the score of the opera finally winds its way out of my brain-I literally have it running through my mind at ALL HOURS. It could be worse. Thankfully it's Mozart as opposed to Gilbert & Sullivan, but it would still be nice to have some peace in that mind of mine.
Today I round out this week of Indian Food posts with a wonderful recipe for Chai Spiced Rice Pudding (Kheer) very loosely based on a recipe by Alton Brown. It's a great way to rid yourself of extra cooked rice (especially fragrant basmati) and a delicious finish to an Indian (or any) feast. It's also easily customizable to suit your diet-dairy free? OK! Just use soy or all coconut milk and it's vegan and it is also naturally gluten free as written.

MASALA CHAI RICE PUDDING
1 cup cooked rice (I like basmati)
1 cup milk of your choice (I used 2%)
1/2 cup half-half (you could instead use cream, milk, soy...whatever!)
3/4 cup light coconut milk (or regular...as you like)
up to 1/4 cup of sugar (I used about half that...I don't like it too sweet)
1/2 tsp ground cardamom (this is expensive, I know...but it is SO. SO. GOOD.)
1/4 tsp ground cinnamon
pinch of ground clove
1/4 tsp ginger
pinch of black pepper

In a large saucepan, combine milk and rice. Heat until just boiling, then lower heat and add simmer until the mixture begins to thicken slightly (about 7 minutes on my stove.)
Add the cream, coconut milk, sugar and spices and cook until the mixture starts to thicken again, about 10 minutes stirring occasionally with a wisk. When mixture begins to thicken remove from heat and allow to cool to room temperature. Serve at room temp. or cooled.
Feel free to add garnishes like raisins, pistachios, cinnamon, etc.
Enjoy!
(Note: Indian rice pudding is a bit soupier than the American variety.)

Sunday, April 11, 2010

Parental Brunch

from our friends at www.AriellePhoto.com


I love all things cheese (you may have noticed.) I think I inherited this love from
my Dad who, like me, enjoys cheese in it's savory or sweet forms. When I learned
my parents were coming for a visit to Midwestia I immediately started planning meals
involving this dairy delicacy. Fast forward to Saturday brunch and this gorgeous and
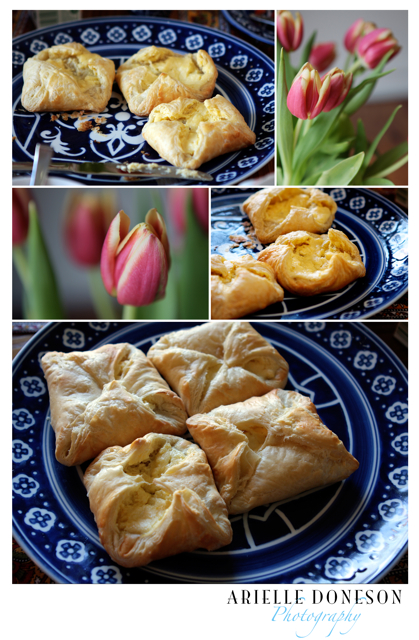
simple cheese danish. It's like a bit of cheesecake packed into a puffy little parcel.
It's a wonderful recipe for a brunch-it's so simple-and yet pretty enough to be quite
impressive. Perfection! (and my parents loved it!)


Quick and easy cheese danish
(adapted from Ina Garten)

8 oz. 1/3 less fat cream cheese (Neufchatel cheese)
1/4 up to 1/3 cup sugar (I prefer 1/4...I don't like the cheese to be too sweet)
2 egg yolks, room temperature
2 Tbsp. part skim ricotta cheese
1 tsp pure vanilla extract
1/4 tsp salt
zest of 1 lemon
2 sheets (1 box) of puff pastry, defrosted and thawed
1 egg beaten with 1 Tbsp water, for egg wash

Preheat the oven to 400 degrees F. Line a sheet pan with parchment paper.

Place the cream cheese and sugar in the bowl of an electric mixer fitted with a paddle attachment and cream them together on low speed until smooth. With the mixer still on low, add the egg yolks, ricotta, vanilla, salt, and lemon zest and mix until just combined. Don't whip!

Unfold 1 sheet of puff pastry onto a lightly floured board and roll it slightly with a floured rolling pin until it's a 10 by 10-inch square. Cut the sheet into quarters with a sharp knife. Place a heaping tablespoon of cheese filling into the middle of each of the 4 squares. Brush the border of each pastry with egg wash and fold 2 opposite corners to the center, brushing and overlapping the corners of each pastry so they firmly stick together. Brush the top of the pastries with egg wash. Place the pastries on the prepared sheet pan. Repeat with the second sheet of puff pastry and refrigerate the filled Danish for 15 minutes.

Bake the pastries for about 20 minutes, rotating the pan once during baking, until puffed and brown. Serve warm.


Tuesday, April 6, 2010

Ice Cream Dream


from our friends over at www.AriellePhoto.com


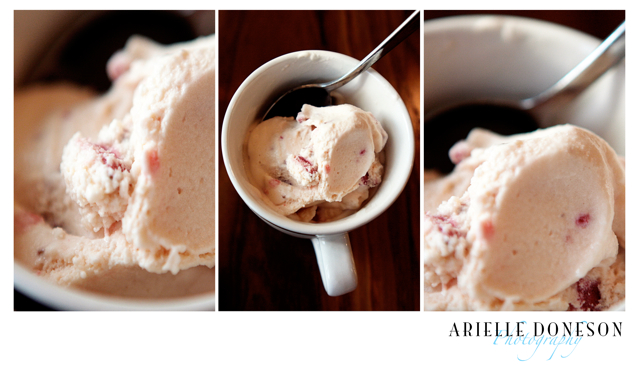
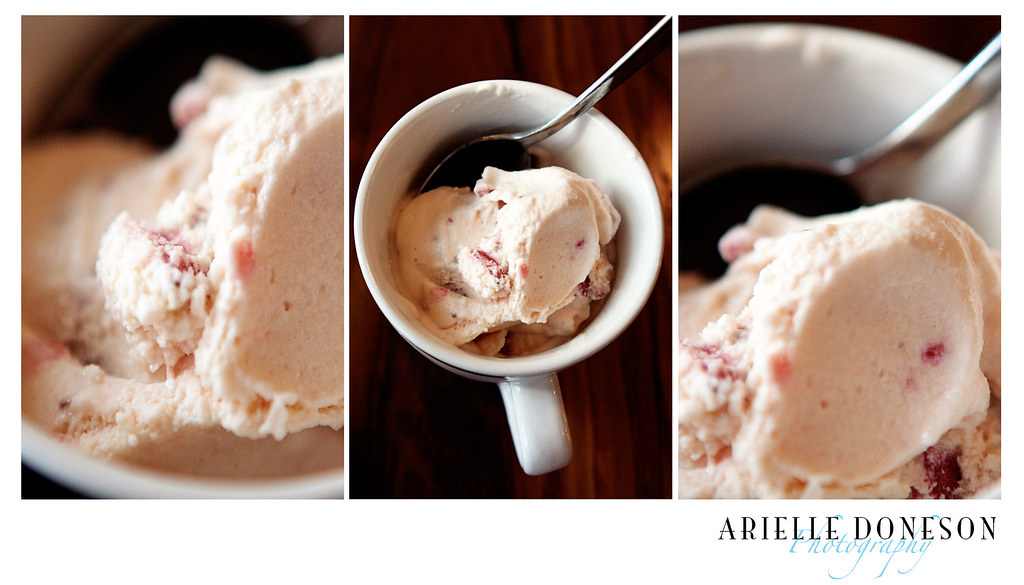
Lately, I've been attempting to be very good about using up leftover ingredients. My new rule is if I am going to buy a specialty ingredient (rosewater, gelatin sheets, heavy cream, etc.) I must also think of at least one other way to use it. This lead to yesterday's culinary activity-Strawberry Ice cream...from scratch. I had over a pint of leftover cream from a cake recipe I made last week (the Gotham Bar and Grill warm chocolate cake) and I needed to use it this week before it became a science experiment in my fridge. I also had purchased an abundance of strawberries as they have been practically giving them away at my local market. So naturally, it was ice cream time. I recognize that most people probably don't have an ice cream maker. I don't either, but I do have an ice cream mixer attachment for my stand mixer-which is awesome. I apologize if you have none of these toys-if that's the case then I recommend picking up a pint of Haagen-dasz, sitting down in front of the computer and eating it as you read this post...

Ice cream is really simple to make. So is frozen yogurt. It's fun and an incredibly delicious thing to do on a hot day (yesterday it was 80 degrees here in Midwestia!) But I warn you, this is the real deal-real cream, real eggs, real vanilla, a bit of real sugar, etc... It is R.I.C.H. so a little goes a long way-but that's how I like my ice cream. Also, if feeding this ice cream to children please use those special salmonella-free eggs as the egg in this recipe is not cooked, it is frozen.


REAL STRAWBERRY ICE CREAM
1 pint fresh strawberries, hulled and chopped into small bits
1 Tbsp fresh lemon juice
2 eggs (the salmonella-free, pasteurized kind, please!)
3/4 cup of sugar divided into 1/4 cup and 1/2 cup
2 cups Heavy cream...yup...the real deal...
1 cup of Milk (I used 2%)
1 tsp vanilla extract

In a large mixing bowl combine strawberries, lemon juice, and 1/4 cup of sugar. Allow to rest in the fridge for about 1 hour-until pretty pink juice is released.
In a separate mixing bowl beat the eggs until foamy (about 3 minutes if doing by hand)
add the 1/2 cup of sugar, milk and vanilla. Add the strawberries and their juice. Mix well. Slowly add cream until just combined. Pour into mixer and follow manufacturers instructions. Enjoy!!!

(Ice cream made with eggs will keep for about 3-4 days.)


Monday, March 22, 2010

Strawberry Rhubarb love


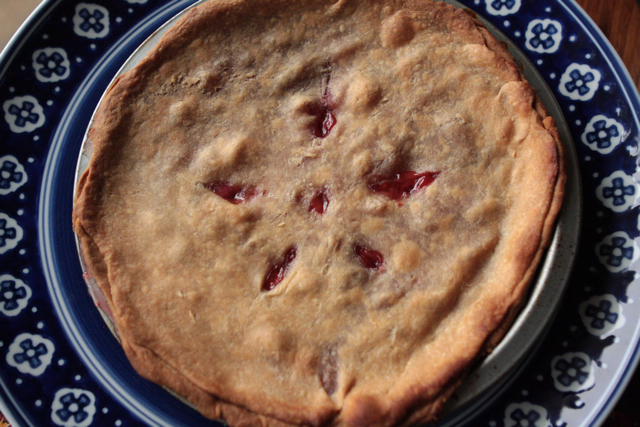
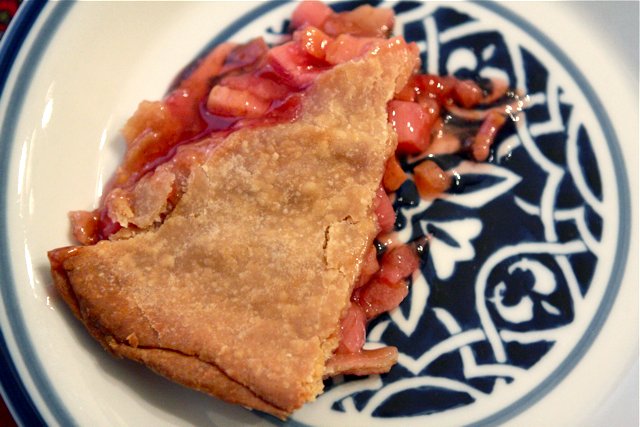
I can remember very clearly the first time I ever tasted a strawberry rhubarb pie. It was during a visit to Windsor, Canada to visit my mother's cousin and her family. I was about five years old and before that visit the only pies I had tasted were apple (my mom's enormous-great-wall-of-china apple pie, to be specific.) I remember the moment like it was yesterday-the sun shining into the open kitchen where my mother's cousin presented me with a slice of this gorgeous golden-brown pie, the glossy red and pink fruits housed inside just bursting to be freed from their crust-bonds (and into my tummy.) And since that first bite of sweet/tart/strawberry-rhubarbedy goodness I've been hooked on everything strawberry rhubarb. However, oddly enough until this afternoon I had not made a strawberry rhubarb anything in my own kitchen.
I had some leftover empanada dough and decided to use it to make a pie. I think real pie crust is probably better (it's fluffier and flakier) but this dough was a huge hit and a pie was a great way to use the leftovers (as would be a tart or a quiche, I'm sure...) I hadn't decided what kind of pie I was going to make with the dough but during my midday trip to the grocery store the sale on strawberries decided for me. Professor hubs said it was the best pie he'd ever had (biased much?) but I can attest that it is really delicious. If you've never had strawberry rhubarb pie it's a sort of bright, tart and sweet flavor.


STRAWBERRY RHUBARB PIE

3 cups rhubarb stalks cut into 1/2 inch pieces. (pull of outside stringy layer of stalks, like celery strings. It's kinda fun....also discard any leaves which are poisonous!)

1 to 1.5 cup strawberries, stemmed and sliced

1 cup of sugar (you could probably use even less if your strawberries are really sweet.)

3 Tablespoons cornstarch

1/4 tsp salt

zest of one lemon

sprinkle of dried ginger

sprinkle of cinnamon

unbaked pastry crust for two-crust pie

Preheat oven to 4oo. In a large bowl combine all ingredients except pastry crust. Mix well. Allow to sit at room temperature for 10 minutes. Put buttom layer of crust into prepared pie pan. Pour in fruit mixture. Top with other layer of pastry crust and pinch/crimp together edges. Cut a few slits in the top crust for ventilation. Bake at 400 for 20 minutes. then lower heat to 350 for 30 minutes. You may need to cover the edges with foil if they are browning too quickly. Remove from heat and allow to cool before serving. If you like warm fruit pies the juices will be runnier than if you allow them to cool to room temperature. In a word: YUM!

Tuesday, February 23, 2010

2 cakes, both alike in dignity


yeah...so, that Shakespeare reference is quite lame, I know. But it got your attention, didn't it. And I didn't use pun-I just replaced the 'houses' with 'cakes' which is still completely lame...but not AS lame as a pun, right?
eh... anyway...

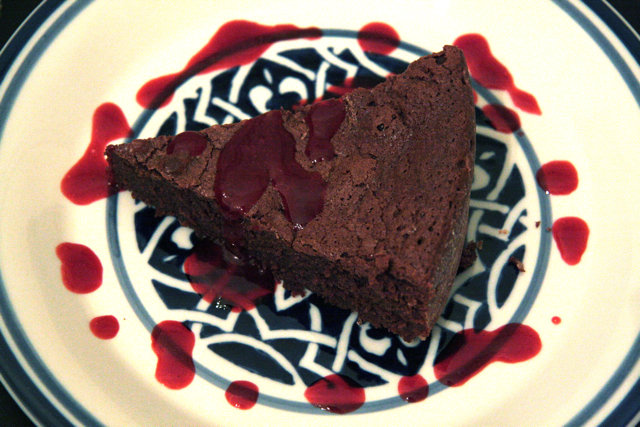
Yesterday I promised to post my special French chocolate cake recipe (with homemade raspberry coulis) but I realized that it has a smidgen of flour in it, so I will also post my favorite FLOURLESS chocolate cake recipe for those for whom flour is an absolute NO.


FRENCH CHOCOLATE CAKE
(I have been making this cake for years and years and it never lets me down)
3/4 cup powdered sugar, plus extra for dusting pan
10 oz. semisweet chocolate chips (I like ghiradelli)
3/4 cup unsalted butter, chopped
2 tsp vanilla
5 eggs, separated
1/4 cup flour (I have used white, white whole wheat, rice, you name it...it should work and be delicious)
pinch of salt (I use about 3/4 tsp)

Preheat oven to 325.
Butter a 9.5'' springform pan and then sprinkle with powdered sugar, swirl around and tap out the excess.

Set aside 3Tbsp of the sugar. Place the chocolate, butter and remaining sugar in a double boiler until melted. mix well. Remove from heat, stir in vanilla and let cool slightly.

Beat the egg yolks into the cooled chocolate mixture, then stir in flour.

Using an electric mixer beat the egg whites until frothy. Increase the speed, add the salt and continue beating until soft peaks form. Sprinkle in the reserved 3 Tbsp sugar and beat until the whites really are stiff and glossy (this is what keeps the cake light tasting.) Beat in 1/3 of the whites into the chocolate mixture, then gently fold in the remaining whites. Combine well but do not overmix.

Carefully pour the mixture into the pan and tap the pan gently to release any air bubbles.

Bake for about 35-45 minutes until well risen and the top springs back when touched lightly with fingertip. (If cake is rising unevenly, rotate after 20 minutes.)
Once baked, transfer to wire rack, remove sides of pan and let cool completely.

Enjoy with raspberry sauce or vanilla ice cream or with a dusting of powdered sugar!


RASPBERRY COULIS
half a bag frozen raspberries
2 tbsp lemon juice
1-4 Tbsp sugar, to taste

In a small saucepan, melt fruit and sugar over med-high heat. Keep stirring. When boiling gently, add lemon juice. Keep stirring for a minute or two. Remove from heat and pour through a strainer into a large bowl. If you would like, hold onto fruit solids as raspberry jam. Keep refrigerated. The liquid in the bowl is your rapberry coulis. allow to cool to room temperature and enjoy drizzled on chocolate cake, etc.


FLOURLESS CHOCOLATE CAKE
(from Nigella lawson)
8 oz. semisweet chocolate, chopped
1 stick unsalted softened butter
1tsp vanilla
6 eggs-2 whole; 4 separated
1/3 cup plus 1/2 cup powdered sugar

Preheat oven to 350. Line bottom of an 8'' springform pan with parchment but do not grease sides of pan. Melt chocolate and butter in a double boiler and set aside to cool slightly.

Whisk the 4 egg whites until firm, gradually add the 1/2 cup sugar and whisk until shites are holding their shape and peak gleamingly, but not stiff.

Remove this boil and set aside while you whisk in another bowl the 2 whole eggs and 4 egg yolks with the 1/3 cup sugar and vanilla. Then gently fold in the chocolate mixture.

Lighten this mixture with some of the egg whites-then fold in the rest of the whites gently in about 3 goes.

Pour into prepared pan and bake for 35-40 minutes or until cake is risen and cracked and the center is no longer wobbly on the surface. Cool in it's pan on a wire rack. The cake's middle will sink in as it cools and the sides may splinter. It is a vision of imperfection but that's one of the reasons this cake is so good.


Monday, December 14, 2009

The Ginger Cookies of life


Let me begin this post by stating that, thanks to my dear friend Jessica's post on winter cravings,
I am no longer craving sweets with the same voracity. Thus, I can now make Holiday cookies
without being a slave to them. With this new freedom in mind I share with you one of my favorite
cookie recipes.
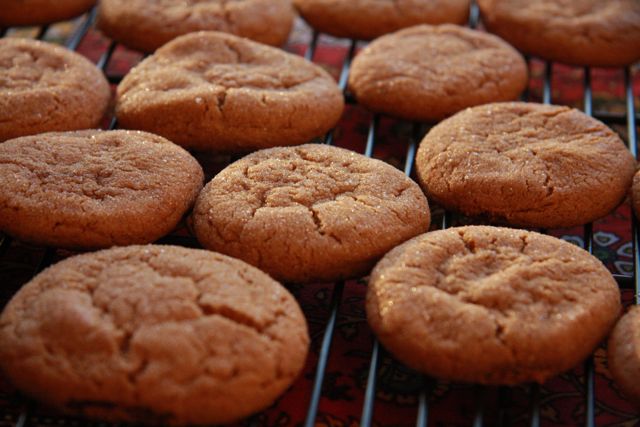
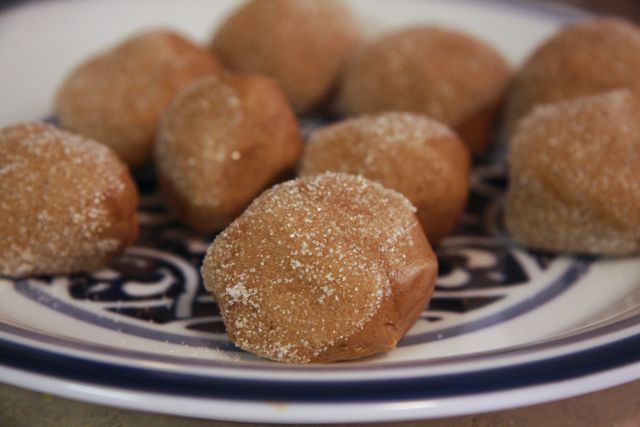
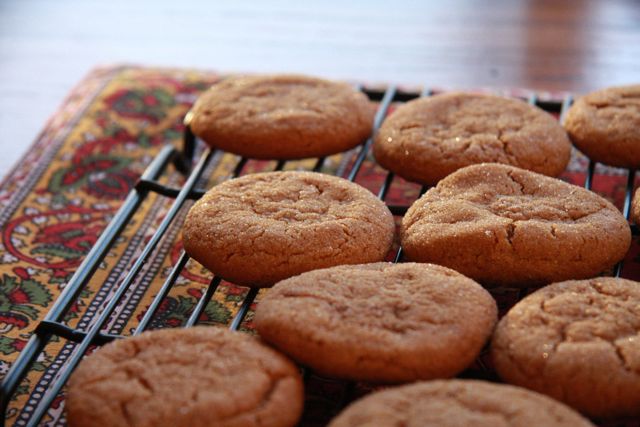
Last Winter during one of my visits to Prof. Hubs in Boston, my friend Evelyn and I found ourselves in her kitchen craving Chrismas cookies. In the end, we couldn't agree on what kind of cookies to make so we decided there was no harm in making two recipes. The Russian Tea cakes were good enough, but it was this Ginger cookie recipe that was the great success of the afternoon. I must have made them 50 times since that fateful afternoon with Evelyn. They are the most perfect, chewy, ginger-y snaps... This week I have been invited to my first cookie swap (girlie night of gossip and cookie noshing? SIGN ME UP!) and I think I may bring these-it will be the second time in 3 days that I've made them...they're that good. I have passed the recipe on to many of my nearest and dearest and here I share it with you:

Ginger Cookies
thank you, thank you, Paula Deen...
xo, Desperate Housediva

Ingredients

  • 3/4 cup vegetable shortening
  • 1 cup sugar, plus more for rolling
  • 1 large egg
  • 1/4 cup molasses
  • 2 cups sifted all-purpose flour
  • 2 teaspoons baking soda
  • 1 teaspoon ground cinnamon
  • 2 teaspoon ground ginger
  • 1/2 teaspoon ground cloves
  • 1/2 teaspoon salt

Directions

Preheat the oven to 350 degrees F.

Line cookie sheets with parchment paper or nonstick baking mats. Using an electric mixer at low speed, cream the shortening and sugar until thoroughly combined. Add the egg and molasses and beat until completely incorporated. Sift together the flour, baking soda, cinnamon, ginger, cloves and salt and add to the mixture. Stir until combined. Roll the dough into balls about 1-inch in diameter. Roll the balls in sugar.


Place 1/2-inch apart on the prepared cookie sheets. Flatten the balls slightly with your fingertips. Bake for 12 minutes. Cool on wire racks.


Best Chocolate Chip Cookies (so far...)


The following is a recipe that came together after scouring other blogs that claim to have found a replica recipe for the famous
Levain Bakery Chocolate Chip Walnut Cookie. The truth is, after attempting each of the recipes I could find,
I can say with certainty that none of the replica recipes comes close to the taste of a real Levain cookie.
And yet each of them makes a pretty fantastic chocolate chip cookie in their own right.
After putting together this recipe, I had my dear friend and recipe tester, Ana, give them a try.
She gave them rave reviews and said they reminded of Mrs. Fields cookies.
So it's back to the drawing board in terms of Levain replicas... In the meantime,
Mrs. Fields still makes a mean cookie so the recipe's worth trying.
So far, this is the best Chocolate Chip cookie recipe I've come up with.

Don't forget these cookie baking tips:
-when you're ready to store any cookies: Put them in a sealed container atop a slice of soft bread.
It really keeps them moist and chewy (if, like me, you love a chewy cookie.)
-chilling the dough and the cookie sheet will make for less cookie spread (if you are looking for a thicker cookie)
-Chilling the dough overnight makes for the best chocolate chip cookies, no matter what recipe you're using
(that tip is from Maury of THE CITY BAKERY himself!)


The Best Chocolate Chip Cookies (so Far)
1 stick butter, cold and cubed
1 c. brown sugar
1 egg
In an electric mixer, or by hand cream all above ingredients
add:
3/4 c. all purpose flour (using only BLEACHED flour will result in less cookie spread)
3/4 c. white whole wheat flour
1/2 Tbsp. baking powder
1/2 tsp. baking soda
1/2 tsp. salt
1 tsp. vanilla
1/2 Tbsp. Cornstarch
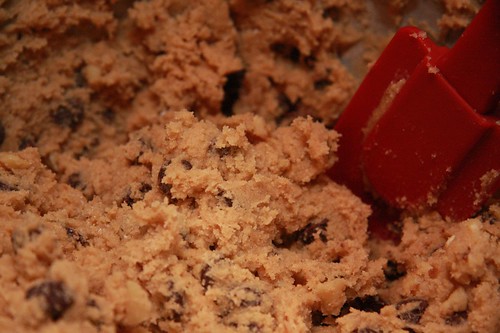
Mix all ingredients with an electric beater until incorporated and a thick, creamy dough is created. Then mix in:
1/2 cups of crushed walnuts
1 cup of {good quality, small} semi-sweet chocolate chips
Beat again with electric mixer.

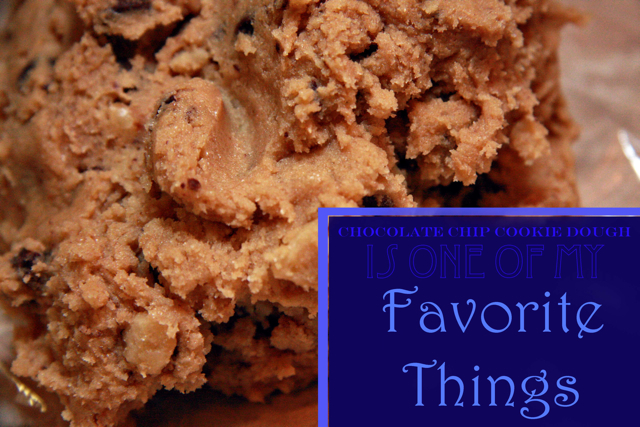
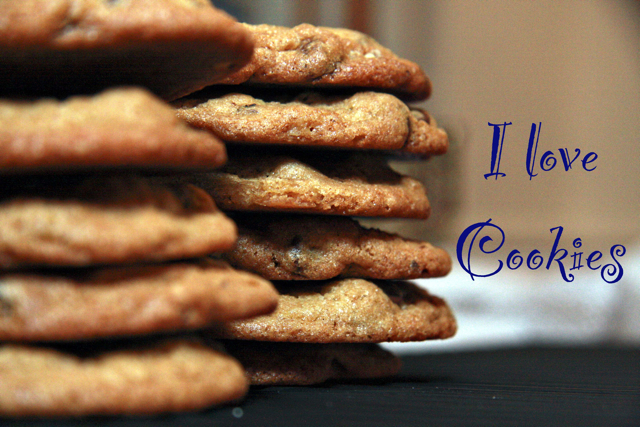
please excuse my graphic design additions...I've been going a bit photoshop crazy these days...

If you have the time, do take the time to work these a bit by hand (knead) like a bread dough. It's not necessary, but they are a bit more Levain-y that way :)

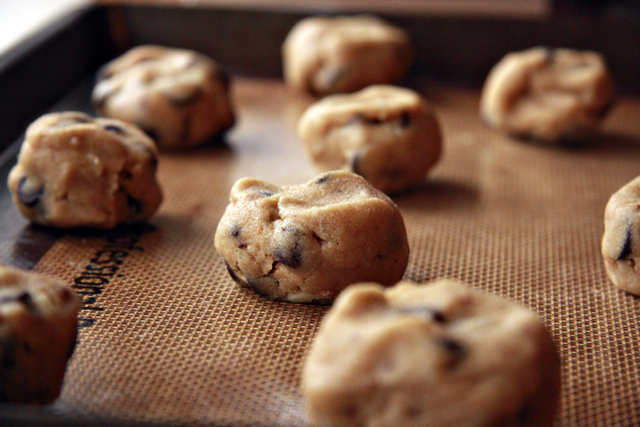
Drop large balls of dough on cookie sheet covered in parchment or, my fave: silpat mat.

Bake 350 degrees for 10-15 minutes (depending on desired gooey-ness), or until the tips of the cookies have turned light brown. Remove from cookie sheet. Cool and ENJOY!!!!


Monday, October 26, 2009

Traditions


It's been a week since my last trip to NYC and I'm just now starting to feel normal again. These trips to NY are sooooooo exhausting! I manage to pack in an entire month of work/lessons/socializing into one week which makes the subsequent week back in Midwestia a time of recouperation, i.e. I watch a LOT of daytime tv...
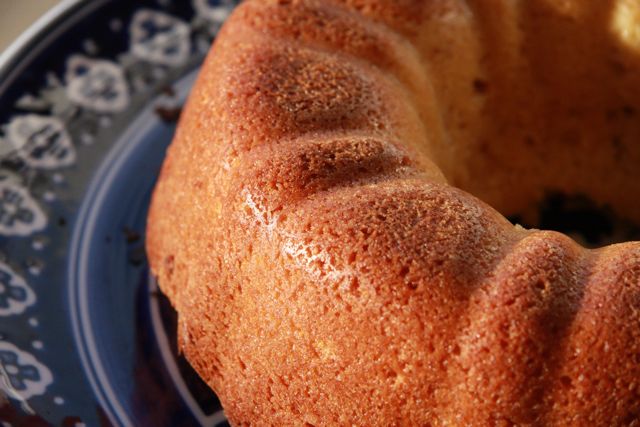
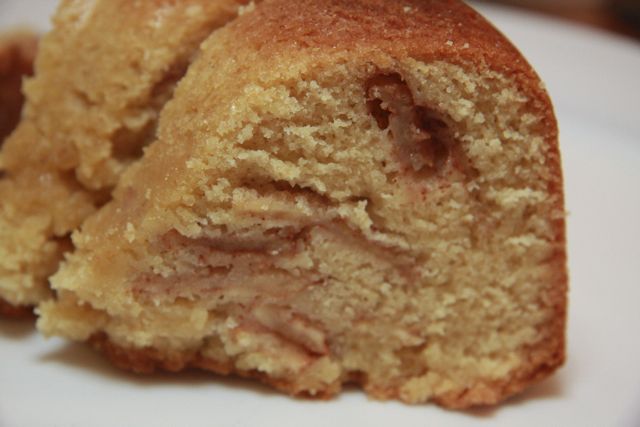
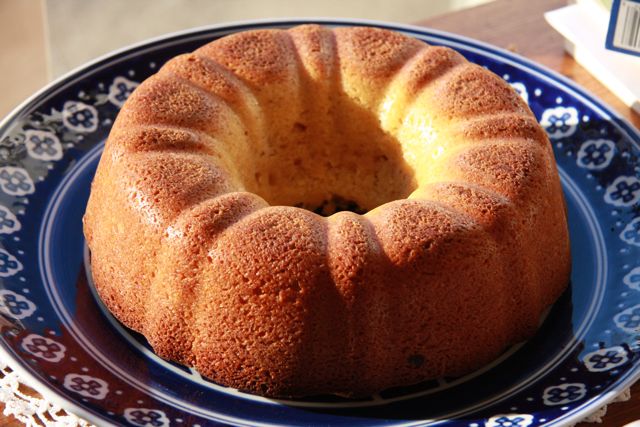
One of the few things that gets me out of my decompression state is baking. It somehow seems more relaxing than regular cooking. All of the scooping, measuring, and stirring are quite therapeutic in their quiet and repetitive ways. Most of my cooking is very instinctual, even the measuring, so to actually acurately measure out a teaspoon of something is a regimented change to the cooking status quo. This past weekend I baked TWO of my Nana's apple cakes-one for some friends and then, because that one turned out nicely, one for us!
There's something about an old family recipe that makes it better than any other-there's the knowledge that it WILL turn out delicious and then that first bite, completely full of memories. This cake is like that for me and I hope it will become a family tradition to those of you who choose to bake it...

Nana's Apple Cake recipe (a traditional Jewish Apple cake)
4 C. peeled and sliced apple
4 Tb + 2 C sugar
3 C reg flour (sometimes I actually use half or all white whole wheat flour)
1 tsp salt (I usually add a teensy bit extra)
4 eggs
1 Tbsp vanilla
4 tsp cinnamon
1 Tbsp baking powder
1 C canola oil
1/4 C orange juice


Preheat oven to 375
combine apples, cinnamon, the 4Tb sugar and set aside. Sift flour, baking powder, salt and the 2 C sugar in large mixing bowl. Make a well in the center and pour oil, eggs, orange juice and vanilla. Beat until well blended.
Grease 10'' tube (fluted) pan ( I like to use that PAM baking spray with flour in it.)
Spoon 1/3 of batter into pan. Make a ring of 1/2 apple mixture (DRAINED OF EXCESS MOISTURE) taking care not to have apples touching sides of pan.
Spoon another 1/3 of batter on top.
Make another ring of remaining apples & top with remaining batter. Bake for 1 1/4 hours or until done. Cover top with aluminum foil if it begins to overbrown.
Allow to cool to lukewarm before turning out onto serving plate.
Freezes well.