Showing posts with label Gluten Free. Show all posts

Thursday, June 24, 2010

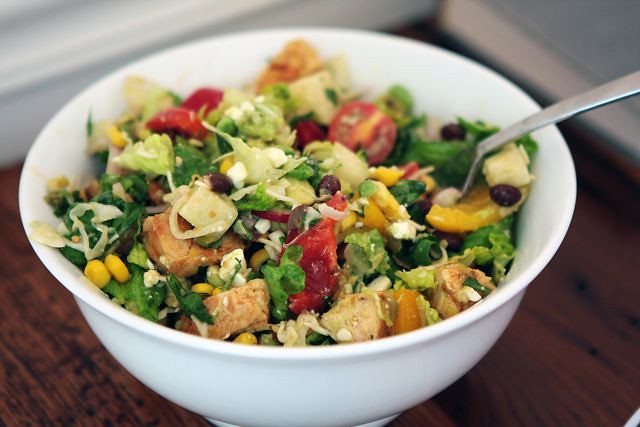
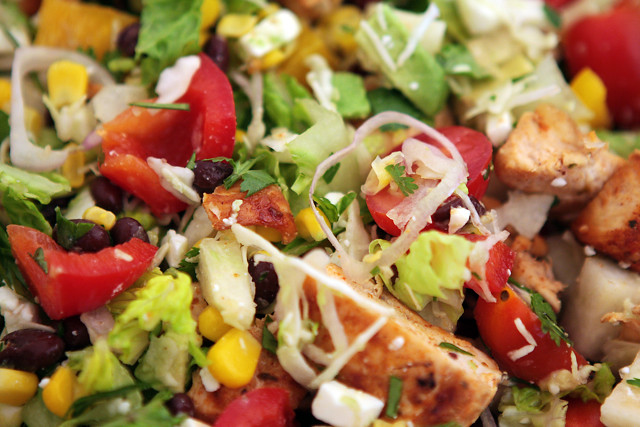
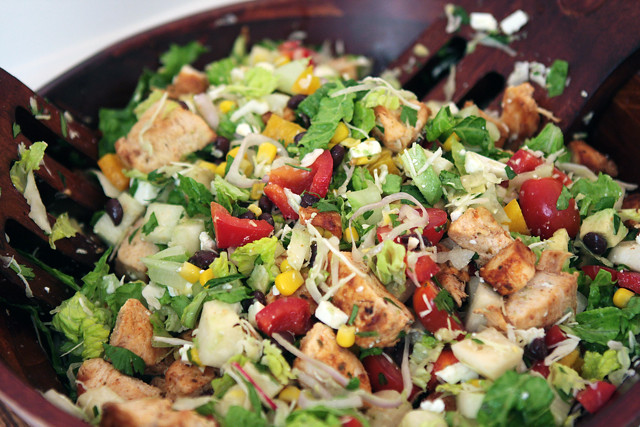
Salad Days: Part III Mexican Salad (AKA: The most delicious salad ever)


How I do love these long Summer days!
And how I do love the beautiful produce which is displayed in Midwestia's amazing famer's market... Not to mention the gorgeous herbs reaching towards the sun in my little backyard garden. Lovely. Each and every one.

In this, the final installation of the Salad Days posts, I present you with the recipe for my salad piece de résistance; the Desperate Housediva Mexican Salad.
In a word: Yum!

This is the ultimate salad for people who don't find salads satisfying. It's quickly become Professor Hubs' (and Professor Hubs' whole family's) favorite Summer Salad.
It's customizeable, easily made completely vegan, and is naturally gluten free.


DESPERATE HOUSEDIVA'S MEXICAN SALAD
adapted from a recipe from my friend Claire and a recipe from SELF magazine...
(serves 4, generously)
2 heads romaine lettuce, chopped
1 can black beans, drained (preferable organic)
1 can sweet corn kernals (preferable organic and low salt) OR the kernels cut off of 2 leftover corn-0n-the-cobs.
12 cherry tomatoes, halved
1 jicama, peeled and chopped (or if you can't find it; 1 firm apple, peeled and chopped)
5 radishes, thinly sliced
1/4 cup of thinly sliced red onion or a handful of chives
handful of shredded cabbage
1 bell pepper (red or yellow) chopped
1 avocado, chopped
Handful of fresh cilantro, chopped
Handful or crumbled feta cheese (or not, for vegan cooks...)
Grilled protein of choice, cubed (Grilled chicken breast, grilled shrimp, grilled tofu, etc.)

Combine all ingredients and toss with dressing.


DRESSING
Juice of 4 limes + honey to taste (or 1/4 cup rose's sweetened lime juice)
1/4 cup apple cider vinegar
1 garlic clove, minced
1/3 cup olive oil or more, to taste.


Wisk to combine and use at least half to dress salad. Add more to taste and save the rest for another purpose (another salad, a marinade, etc.)

Enjoy!!!


Saturday, June 12, 2010

Salad Days: Part II Thai Basil Salad


What I've been up to (that's kept me from sharing recipes:)

-Driving
-Travelling
-Honeymooning
-Beach combing
-Relaxing
-Reveling
-New Car-getting
-Eating
-Bonding
-Cooking
-Singing
-Shooting
-Loving
-Grieving
-Resting
-Nurturing
-Reminiscing
-Returning
-Connecting

...and infinite other gerunds...

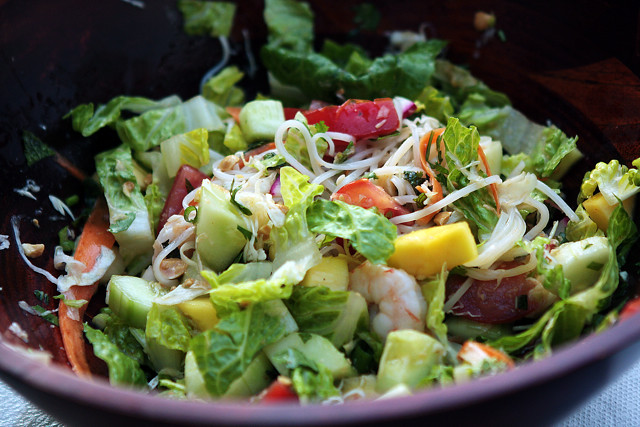
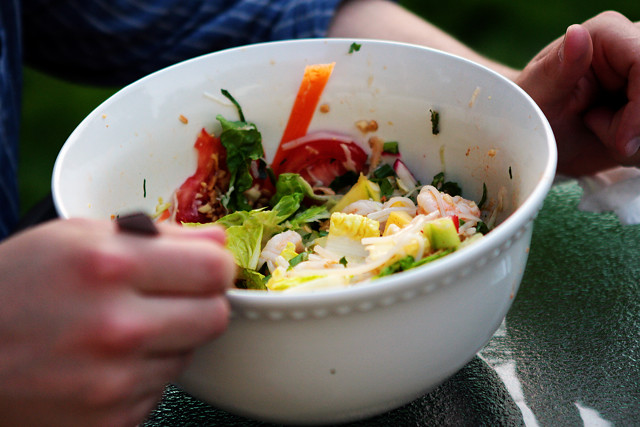
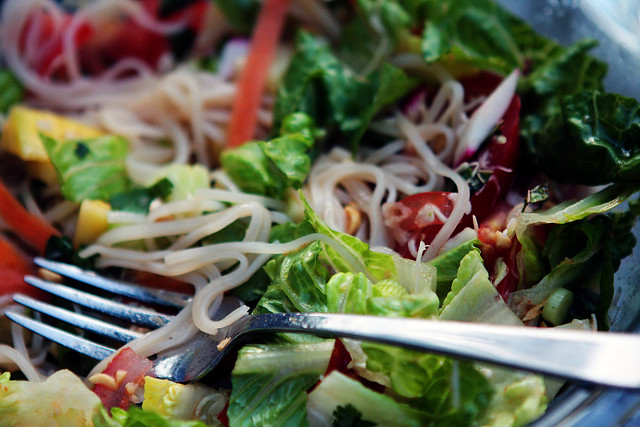
As I mentioned in the last post, Prof. hubs and I have been feasting on the most delicious and filling of Summer Salads... This one is inspired by a salad that I ate after an exhausting day trekking through San Francisco with a friend in 2004... I have been craving it ever since. It's the perfect combination of flavors and textures-so refreshing, so toothsome, a bit spicy... Perfection.

And now, the second installment of my soon-to-be famous Salad posts:

THAI BASIL SALAD
(makes 2 huge portions or 4 regular...)
1/2 package asian rice noodles (pad thai noodles, vermicelli, etc.) cooked per package directions (use one handful or the whole amount-it's up to you and it's all good.)
2 head romaine lettuce, chopped
2 large handful of shredded cabbage (I just use the bag of pre shredded cole slaw mix)
5 thinly sliced red radishes
1 small handful shredded carrot (I just use the kind that's already in the bag of shredded cole slaw mix...)
1 peeled and cubed cucumber
1 mango, diced
8 grape tomatoes, halved
small handful chopped peanuts
small handful of each of the following herbs, chopped:
scallions, basil, mint, cilantro
Protein of your choice (I like grilled steak but sauteed tofu is lovely for a vegan choice as is chicken or shrimp as a steak alternative...)

Combine all ingredients and toss with dressing. Enjoy!!!

SALAD DRESSING
Juice of 4 limes
2 tbsp brown sugar
2 Tbsp Thai fish sauce
2 Tbsp water
2 cloves garlic, minced
2 tsp Shriracha sauce
1 tsp sesame oil
4 Tbsp canola oil (or other light, flavorless vegetable oil)

Wisk to combine well.


Saturday, April 24, 2010

Indian Food Week: Part 3, Finale

Last night's performance of THE MAGIC FLUTE was a success (though a rather long evening for the audience-Prof. Hubs is a truly dedicated fan to stay through the whole thing-the show finished around 11:20!) I am looking forward to the freedom I experience in a few days time when the score of the opera finally winds its way out of my brain-I literally have it running through my mind at ALL HOURS. It could be worse. Thankfully it's Mozart as opposed to Gilbert & Sullivan, but it would still be nice to have some peace in that mind of mine.
Today I round out this week of Indian Food posts with a wonderful recipe for Chai Spiced Rice Pudding (Kheer) very loosely based on a recipe by Alton Brown. It's a great way to rid yourself of extra cooked rice (especially fragrant basmati) and a delicious finish to an Indian (or any) feast. It's also easily customizable to suit your diet-dairy free? OK! Just use soy or all coconut milk and it's vegan and it is also naturally gluten free as written.

MASALA CHAI RICE PUDDING
1 cup cooked rice (I like basmati)
1 cup milk of your choice (I used 2%)
1/2 cup half-half (you could instead use cream, milk, soy...whatever!)
3/4 cup light coconut milk (or regular...as you like)
up to 1/4 cup of sugar (I used about half that...I don't like it too sweet)
1/2 tsp ground cardamom (this is expensive, I know...but it is SO. SO. GOOD.)
1/4 tsp ground cinnamon
pinch of ground clove
1/4 tsp ginger
pinch of black pepper

In a large saucepan, combine milk and rice. Heat until just boiling, then lower heat and add simmer until the mixture begins to thicken slightly (about 7 minutes on my stove.)
Add the cream, coconut milk, sugar and spices and cook until the mixture starts to thicken again, about 10 minutes stirring occasionally with a wisk. When mixture begins to thicken remove from heat and allow to cool to room temperature. Serve at room temp. or cooled.
Feel free to add garnishes like raisins, pistachios, cinnamon, etc.
Enjoy!
(Note: Indian rice pudding is a bit soupier than the American variety.)

Thursday, April 22, 2010

Indian Food Week: Part 2


This week I have been deep in rehearsals for THE MAGIC FLUTE here in Midwestia. I have to admit I'm pleasantly surprised at the level of talent they have gathered to be in this production; there are some accomplished and wonderful singers here.
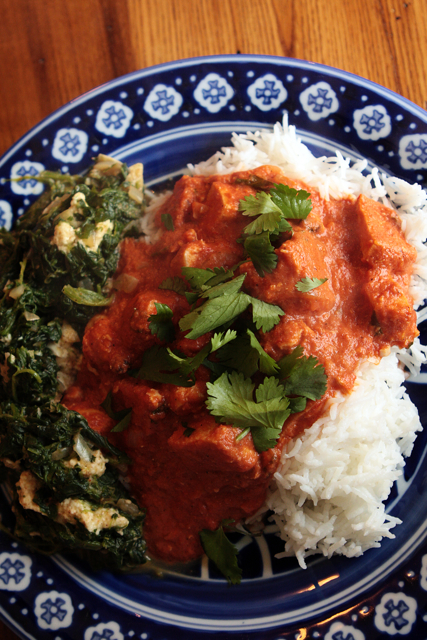
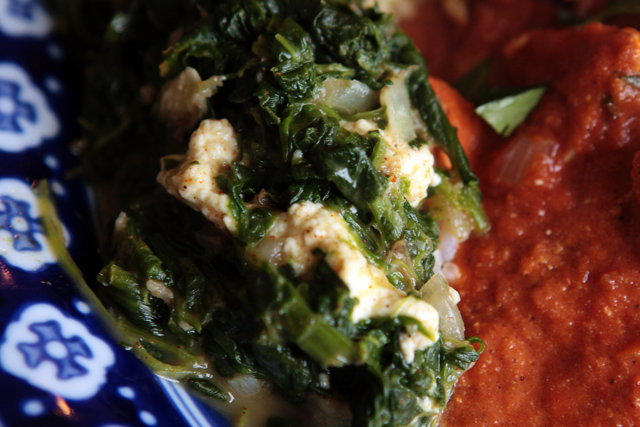
In this second installment of INDIAN FOOD WEEK I present to you an authentic recipe for the delicious vegetarian dish, Saag Paneer (cheese with spinach.) You can purchase paneer in the cheese section of some groceries but if you live in Midwestia or are just feeling crafty you can make your own paneer very quickly and easily by clicking here. It's crazy how easy it is.
This recipe for Saag Paneer was part of a wedding shower gift from a dear friend of mine (who's family happens to be Indian)-and it's sooooo good.


SAAG PANEER FROM PRITI'S MOM
1 onion
6 cloves garlic
1 oz. fresh ginger
1 lb. frozen spinach, thawed
1 cup plain yogurt
4 oz. buttermilk
2 tsp red chili powder (start with less if you don't like hot & spicy)
2 tsp garam masala (start with less if you don't like hot & spicy)
1 cup half and half
6 oz. paneer
salt to taste

Chop the onion, garlic and ginger and grind them into a paste. In a medium saucepan, combine the paste, spinach, yogurt, buttermilk, chili powder, and garam masala. Simmer at medium heat for 20 minutes. Mash the ingredients with a potato masher (or blend in a blender if you like it finer and smoother.) Add the half-half. Simmer until the mixture has a creamy consistency, 10 - 15 minutes. Add the cheese, simmer 5 minutes. Season with salt. Makes 4 to 6 servings.


Wednesday, March 31, 2010

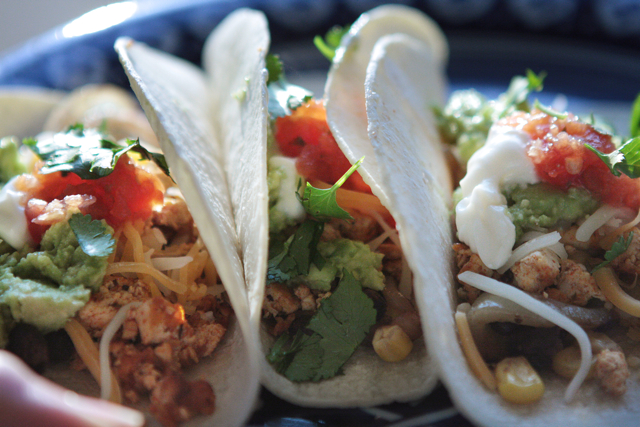
Vegetarian Tofu Tacos


I am constantly looking for delicious, fresh and nourishing vegetarian meals to supplement the meat we eat on other days. Living with a serious carnivore like Prof. Hubs (the man would eat three meals of meat a day) makes the search even more of a challenge because serious meat eaters are very picky about their vegetarian protein sources. These tofu tacos are a favorite meal at our house (that's true for me AND Prof. carnivore/hubs...) We eat them at least once a week. This is a wonderful meal for a family because everyone can customize the tacos completely and it's fun for a group because it's eaten with the hands and is a bit messy. AND it's fresh, nourishing, vegetarian, and delicious.
Feel free to customize as you like; I'm sure the spice rub would be great on ground beef/turkey/chicken instead of tofu but that defeats the point for me.

TOFU TACOS
1 package small corn tortillas
1 package WATER-PACKED extra firm tofu (the cardboard-packed kind is too slippery and just isn't crumbly enough)
2 to 3 TBSP spice rub (recipe below)
salt
1 onion, sliced into rounds
1 can black beans, drained and rinsed
1 can corn, drained and rinsed

GARNISHES
reduced fat shredded mexican cheese
1 avocado or fresh guacamole (mix avocado with half a lime and some salt to make fresh guac)
chopped cilantro
sour cream
fresh salsa

SPICE MIX (This recipe makes extra-I keep it in a plastic bag so I always have some around)
combine:
3 TBSP ground paprika
1 TBSP ground cumin
2 TBSP oregano
1 tsp (I probably add more like 1 TBSP because I like some heat) ground cayenne
1 tsp garlic powder or dried garlic

Instructions:
If you have the time freeze the package of tofu for an hour. The process of freezing and then defrosting increases the crumbling/meaty texture. If not, skip this step.
In a large sauté pan heat a bit of olive oil over high and add onion. Cook until translucent then add beans and corn, lower heat to medium-high.
In a different pan, heat olive oil over medium high to high. Crumble in tofu, add spice mixture and salt to taste. I find it needs a bit of salt... Stir to combine. I like to stir and then rest the tofu over heat for a bit so that the tofu develops a crust. I find it's more meaty. The stir/rest thing lasts for about five minutes. Meanwhile:
Prepare garnishes in an assembly line (I like to have Cheese, guac, sour cream, salsa, cilantro)
Heat tortillas (I do it on the stove in a small pan over medium heat or in the microwave...follow package directions.)

Assemble tortillas and enjoy (with lots of napkins!)

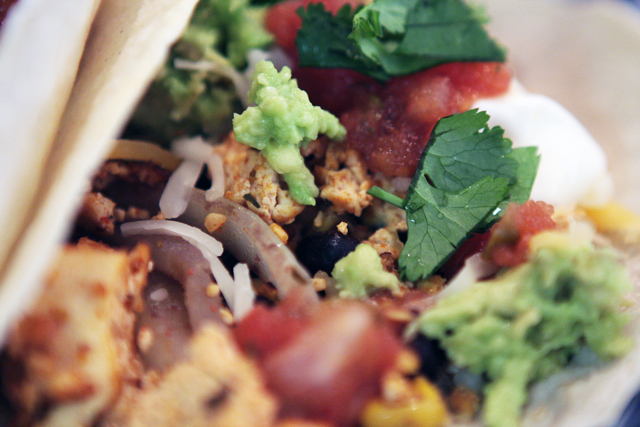
Extreme close-up of delicious taco filling goodness....


Thursday, March 25, 2010

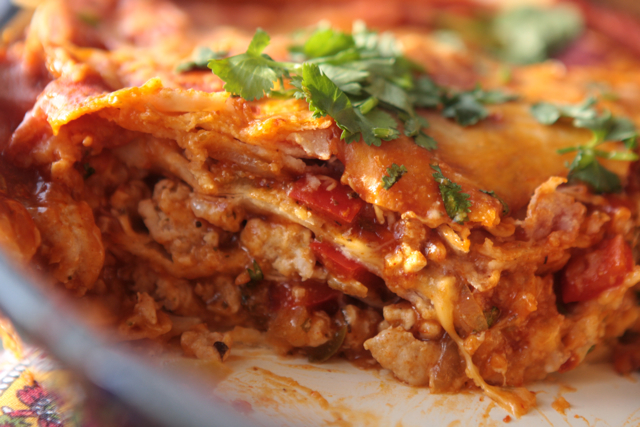
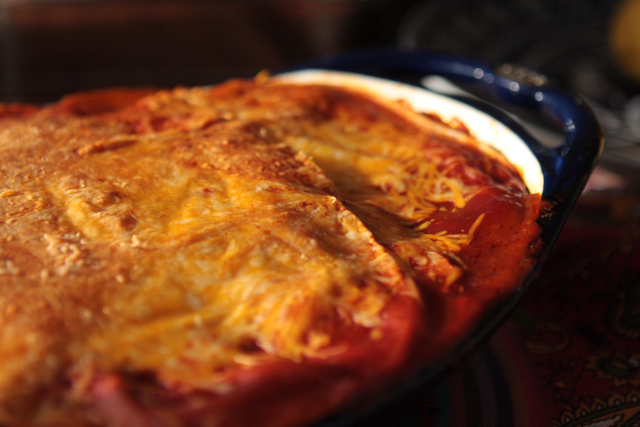
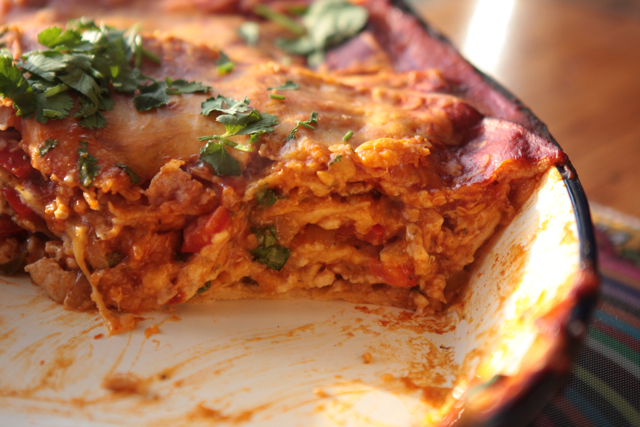
1950's housewife recipe-Enchilada Casserole


There are a few recipes I have come across that make me think of a 1950's housewife. These are casseroles or the kind of dish that involve a can or two of cream of mushroom soup, etc. Don't worry-this recipe is not really that kind of recipe... but somehow when I make it I still sort of feel like I should be wearing a ruffled apron and heels. It must be the 'casserole' part of the title.
I have made this recipe many, many times. It's always a hit and very easy to customize (i.e. it can easily be made vegetarian by substituting the turkey with tofu, crumbled and mixed with a bit of salt, cumin, garlic, oregano, cayenne, and paprika powders.) It's also Gluten Free which is wonderful for those who are wheat/gluten sensitive/intolerant (like some of my favorite people-you know who you are!)

TURKEY ENCHILADA CASSEROLE
adapted from a Cooking Light recipe

  • 1 1/2 pounds ground turkey breast
  • 1/2 cup chopped onion
  • 1/2 cup chopped red pepper
  • 1/2 cup chopped green pepper
  • 1 tablespoon minced garlic
  • 2 tablespoons minced fresh oregano leaves or 1 tablespoon dried
  • 1/2 teaspoon ground cumin
  • 1 teaspoon salad oil
  • 1 can diced green chiles
  • 30 oz. (pref. organic) red enchilada sauce
  • Salt
  • 12 corn tortillas (6 in. wide)
  • 1 bag (8oz) reduced fat Mexican blend shredded cheese (NOT taco blend...)
  • Chopped fresh cilantro

Preheat oven to 425. In a large sautée pan over high heat, stir turkey, onion, peppers, garlic, oregano, and cumin in oil until turkey is crumbly and no longer pink, about 4 minutes. Stir in chiles and 1 cup enchilada sauce. Add salt to taste.

Cut tortillas in half. Arrange a fourth of the halves evenly over the bottom of a shallow 3-quart casserole, overlapping to fit. Sprinkle a fourth of the cheese evenly over the tortillas, then top with a third of the turkey mixture and a fourth of the remaining enchilada sauce, spreading each level. Repeat to make two more layers of tortillas, cheese, turkey mixture, and sauce; top with another layer of tortillas and sauce, then cheese. (Reread this a few times, it seems a bit confusing at first...)

Bake in a 425° regular or convection oven until cheese is melted and casserole is hot in the center, 18 to 20 minutes. Sprinkle with chopped cilantro.


Wednesday, March 24, 2010

Chicken with 40 cloves of garlic


Dear Ina Garten,

Thank you for creating recipes that are always successful. Much love,

DesperateHousediva

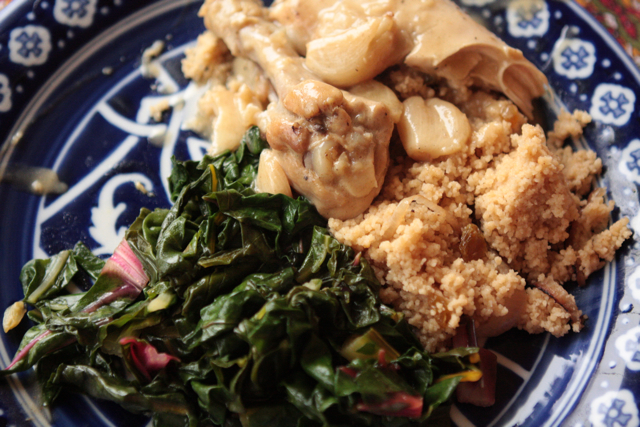
I have seen many recipes for Chicken with 40 cloves of garlic over years in various places and have been intrigued. I love both chicken and garlic. Forty cloves of garlic should be the minimum for all recipes... Well, maybe not ALL...
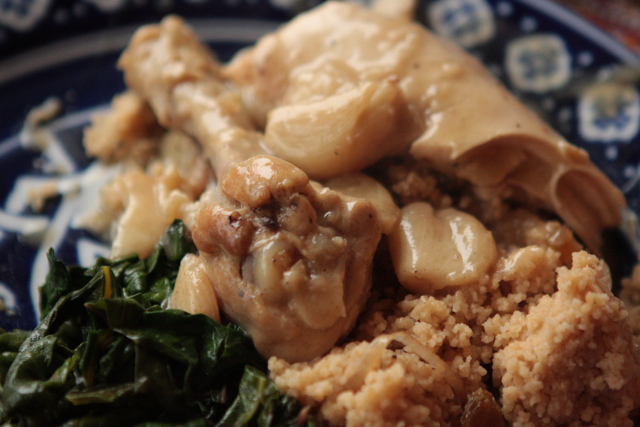
When I came across Ina's recipe I knew it was going to work out, there was no question in my mind. I have had success with every Ina recipe I've ever made and this recipe is no exception. It's fantastic, it's simple, and it makes you feel FANCY. I love recipes that make me feel both accomplished and successful. I served the chicken with sautéed greens (swiss chard) and moroccan couscous (whole wheat couscous cooked in chicken broth, tossed with sultana raisins & sautéed shallots...)


CHICKEN WITH 40 CLOVES OF GARLIC
from Ina Garten

3 whole heads of garlic (this is about 40 cloves
2 small chickens, cut into eighths (I just used one chicken cut into parts...)
S&P
1 Tbsp butter
2 Tbsps olive oil
3 Tbsps Cognac (or plain brandy,) divided
1.5 cups dry white wine
1 Tbsp fresh thyme leaves (or 1 tsp dried)
2 Tbsps flour
2 Tbsp heavy cream (optional... but delicious...)

Separate the cloves of garlic and drop them into a pot of boiling water for 60 seconds. Drain the garlic and peel. Set aside.

Dry the chicken with paper towels. Season liberally with salt and pepper on both sides. Heat the butter and oil in a large pot or Dutch oven over medium-high heat. In batches, saute the chicken in the fat, skin side down first, until nicely browned, about 3 to 5 minutes on each side. Turn with tongs or a spatula; you don't want to pierce the skin with a fork. If the fat is burning, turn the heat down to medium. When a batch is done, transfer it to a plate and continue to saute all the chicken in batches. Remove the last chicken to the plate and add all of the garlic to the pot.

Lower the heat and saute for 5 to 10 minutes, turning often, until evenly browned. Add 2 tablespoons of the Cognac and the wine, return to a boil, and scrape the brown bits from the bottom of the pan. Return the chicken to the pot with the juices and sprinkle with the thyme leaves. Cover and simmer over the lowest heat for about 30 minutes, until all the chicken is done.

Remove the chicken to a platter and cover with aluminum foil to keep warm. In a small bowl, whisk together 1/2 cup of the sauce and the flour and then whisk it back into the sauce in the pot. Raise the heat, add the remaining tablespoon of Cognac and the cream, and boil for 3 minutes. Add salt and pepper, to taste; it should be very flavorful because chicken tends to be bland. Pour the sauce and the garlic over the chicken and serve hot.


Wednesday, March 17, 2010

Green, for St. Patrick's Day


Yeah...so...(sheepishly digs into ground with toe) it's been a while...
I have been completely missing in action from the blogosphere for the last 3 weeks. I blame the city of New York-it is completely consuming to be there for a week. Upon my return we were blessed with a few really beautiful days in Midwestia...then a trip to visit my parents...and then just general lack of motivation, which is the real culprit.
However, in all of those excuses something wonderful happened:
Cilantro pesto.
Though obviously not a traditional Irish dish it's so green and fresh I think the Irish would really approve...at least, the Half-Irish Prof. Hubs approves, and that's the Irish vote to which I'm pandering.
I have been putting this stuff on everything. It's delicious on steak for a sort of Argentine preparation. It's gorgeous on seared sea scallops. It would work on chicken, fish, tofu, pasta...In fact, it's really quite wonderful on everthing. I invite you to prepare it and let me know how it works best in your opinion.
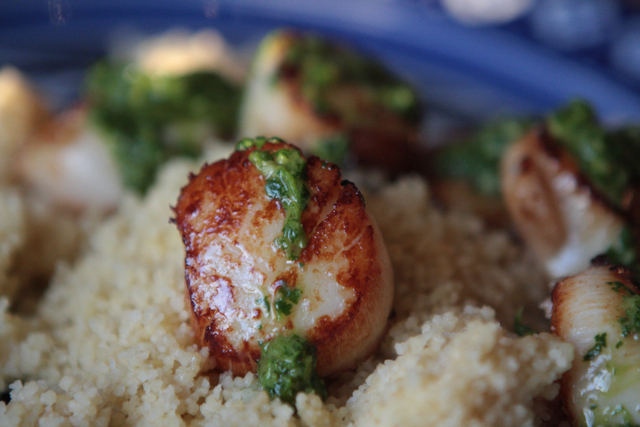
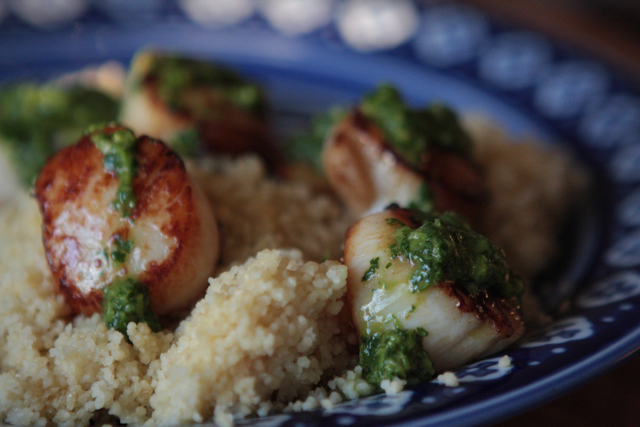
Last night I made it for professor hubs on perfectly seared sea scallops, whole wheat couscous, roasted asparagus, and a green salad. It was amazing. In fact, I can't get over how well the whole thing turned out.

CILANTRO PESTO
adapted from Gourmet

1 medium garlic clove
1/2 teaspoon salt
1 cup fresh cilantro
1/4 cup good extra virgin olive oil
Juice from 1/2 a lime
1/8 tsp. cayenne pepper

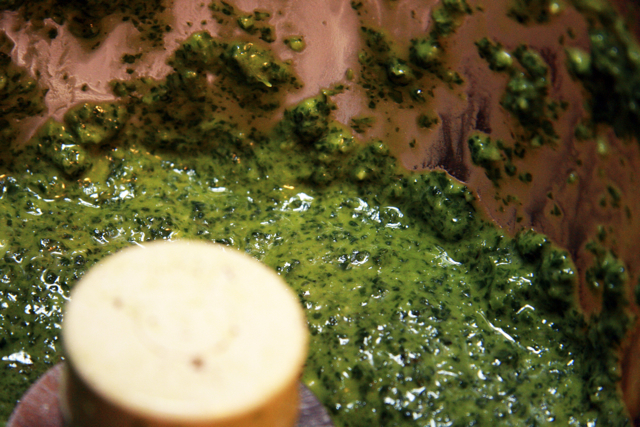
Put all of these things into a food processor and go to town until desired consistency-I like a saucy pesto, you may prefer slightly thicker.
Yum.
Put on everything savory. How GORGEOUS and GREEN is this stuff!!?!


SEARED SEA SCALLOPS
Sea scallops
Soy sauce
Sauvignon blanc (or other dry white wine)

If your scallops are 'wet' wash them dry well. If they are 'dry' skip the washing and drying step.
Put scallops in a large bowl, combine 1 part soy sauce:3 parts wine until scallops are covered. (With my 14 scallops this amounted to 1/4 cup soy, 3/4 cup wine.)
Allow to marinate for 20 minute-1 hour. When ready to sear, remove from marinade and make sure they are not dripping with excess liquid.

Heat a bit of butter and a bit of vegetable oil in a large sautée pan over high heat until it starts to sizzle.
Add a few scallops to the pan, making sure not to crowd them, which would steam them and not sear them (I cooked six scallops at a time, spaced well apart in a huge pan.)
DO NOT MOVE THEM FOR 2 MINUTES! After that point, turn them. You should sea a gorgeous brown crust. Cook for 1 minute on this side. Then remove from heat and place on serving dish as you do the next batch(es) until done. I add a smidge of butter for each new batch. To serve drizzle some cilantro pesto on top. They are PERFECTION.

How gorgeous are these!! (my new fancy schmancy lens doesn't hurt the photo, either...)


Just in case you are not a seafood person here's a look at the sauce in action on some slices of flatiron steak:


(this photo was taken with an old lens...look how much better the scallops look.)

Tuesday, February 23, 2010

2 cakes, both alike in dignity


yeah...so, that Shakespeare reference is quite lame, I know. But it got your attention, didn't it. And I didn't use pun-I just replaced the 'houses' with 'cakes' which is still completely lame...but not AS lame as a pun, right?
eh... anyway...

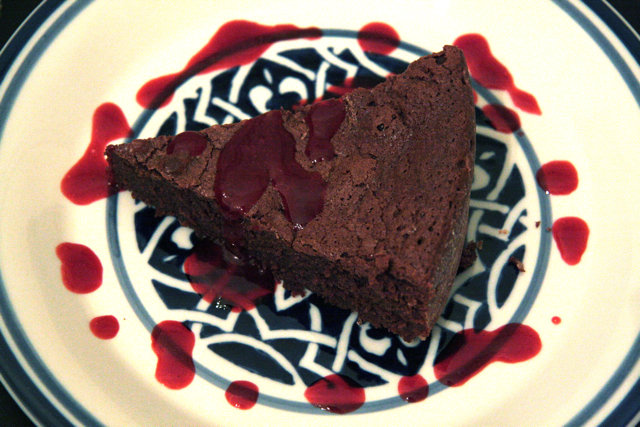
Yesterday I promised to post my special French chocolate cake recipe (with homemade raspberry coulis) but I realized that it has a smidgen of flour in it, so I will also post my favorite FLOURLESS chocolate cake recipe for those for whom flour is an absolute NO.


FRENCH CHOCOLATE CAKE
(I have been making this cake for years and years and it never lets me down)
3/4 cup powdered sugar, plus extra for dusting pan
10 oz. semisweet chocolate chips (I like ghiradelli)
3/4 cup unsalted butter, chopped
2 tsp vanilla
5 eggs, separated
1/4 cup flour (I have used white, white whole wheat, rice, you name it...it should work and be delicious)
pinch of salt (I use about 3/4 tsp)

Preheat oven to 325.
Butter a 9.5'' springform pan and then sprinkle with powdered sugar, swirl around and tap out the excess.

Set aside 3Tbsp of the sugar. Place the chocolate, butter and remaining sugar in a double boiler until melted. mix well. Remove from heat, stir in vanilla and let cool slightly.

Beat the egg yolks into the cooled chocolate mixture, then stir in flour.

Using an electric mixer beat the egg whites until frothy. Increase the speed, add the salt and continue beating until soft peaks form. Sprinkle in the reserved 3 Tbsp sugar and beat until the whites really are stiff and glossy (this is what keeps the cake light tasting.) Beat in 1/3 of the whites into the chocolate mixture, then gently fold in the remaining whites. Combine well but do not overmix.

Carefully pour the mixture into the pan and tap the pan gently to release any air bubbles.

Bake for about 35-45 minutes until well risen and the top springs back when touched lightly with fingertip. (If cake is rising unevenly, rotate after 20 minutes.)
Once baked, transfer to wire rack, remove sides of pan and let cool completely.

Enjoy with raspberry sauce or vanilla ice cream or with a dusting of powdered sugar!


RASPBERRY COULIS
half a bag frozen raspberries
2 tbsp lemon juice
1-4 Tbsp sugar, to taste

In a small saucepan, melt fruit and sugar over med-high heat. Keep stirring. When boiling gently, add lemon juice. Keep stirring for a minute or two. Remove from heat and pour through a strainer into a large bowl. If you would like, hold onto fruit solids as raspberry jam. Keep refrigerated. The liquid in the bowl is your rapberry coulis. allow to cool to room temperature and enjoy drizzled on chocolate cake, etc.


FLOURLESS CHOCOLATE CAKE
(from Nigella lawson)
8 oz. semisweet chocolate, chopped
1 stick unsalted softened butter
1tsp vanilla
6 eggs-2 whole; 4 separated
1/3 cup plus 1/2 cup powdered sugar

Preheat oven to 350. Line bottom of an 8'' springform pan with parchment but do not grease sides of pan. Melt chocolate and butter in a double boiler and set aside to cool slightly.

Whisk the 4 egg whites until firm, gradually add the 1/2 cup sugar and whisk until shites are holding their shape and peak gleamingly, but not stiff.

Remove this boil and set aside while you whisk in another bowl the 2 whole eggs and 4 egg yolks with the 1/3 cup sugar and vanilla. Then gently fold in the chocolate mixture.

Lighten this mixture with some of the egg whites-then fold in the rest of the whites gently in about 3 goes.

Pour into prepared pan and bake for 35-40 minutes or until cake is risen and cracked and the center is no longer wobbly on the surface. Cool in it's pan on a wire rack. The cake's middle will sink in as it cools and the sides may splinter. It is a vision of imperfection but that's one of the reasons this cake is so good.

Monday, February 22, 2010

Valentine's Feast


This post is ridiculously, embarassingly late. It is clearly well past Valentine's Day as I publish this post. However I have been a traveller of late. The last two weeks have seen me in New York, Houston (shooting for the Houston Grand Opera!,) Atlanta, back in Midwestia, and now preparing for an upcoming return trip to NY. The trips were wonderful but I'm pretty tired and in need of some serious nesting (at least for the next few days until I leave for NYC.)

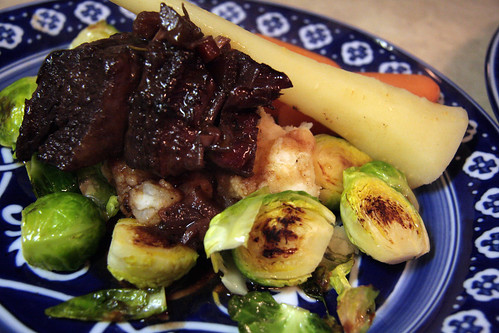
Due to being on the road so much in February I didn't have a chance to share my Valentine's feast recipes. So, perhaps you will be inspired by the following recipes to cook up a very special dinner for some other occasion. Here's the menu: Braised beef shortribs with truffle mashed potatoes, baby root vegetables, brussels sprouts, French chocolate cake with raspberry coulis.
I will give you the recipe for the short ribs, and the baby root veg in this entry and the cake with sauce in the following. I must give credit for the ultimate short ribs recipe to my dear friend Claire. I have followed it almost to the letter, save for the very end where I omitted some extra butter and added a dash of something special...

ULTIMATE BEEF SHORT RIBS
2 Tbsp Vegetable oil
6 short ribs
s&p
1 med onion coarsely chopped
1 med carrot coarsely chopped
1 med celery rib coarsely chopped
3 large garlic cloves, minced
1 Tbsp tomato paste
1 bottle dry red wine
4 Cups chicken stock
1 tsp black peppercorns, ground
2 sprigs thyme
2 sprigs rosemary
1 dried bay leaf
1 Tbsp barbeque sauce (I used the one from Trader Joe's) note: this is optional. I added it because I thought the recipe needed a soupçon of sweet and smoky and this did the trick.

Preheat oven to 300.
In a large, heavy bottomed casserole or oven-proof sauté pan with lid, heat oil over med-high heat. Season the ribs with salt and pepper. Cook in batches until nicely browned on all sides, about 8 minutes. Transfer to plate.


Pour off all but 3 Tbsp of fat. Return casserole to med-high heat and add onion, carrot and celery. Cook, stirring, until nicely browned, 8 to 10 minutes. Add garlic and tomato paste and cook for 1 minute. Add the red wine and cook until reduced by half, about 10 minutes. Add stock, peppercorns, thyme, rosemary and bay leaf and bring to boil. Return short ribs to casserole and cover tightly.

Move casserole to oven. Braise until short ribs are tender, about 2 hours (I think it often takes longer-2.5 hours worked for me). About 15 minutes into cooking time, check to make sure the liquid is barely simmering, and reduce oven temp if necessary. When tender, transfer ribs to platter. Cover with alum foil to keep warm.

Let braising liquid stand off heat for 3 minutes. Skim off fat that rises to surface. Return casserole to stove and bring to boil over high heat. Cook until sauce is richly flavored and reduced to about 1.5 cups, 10 to 15 minutes (probably longer). Off heat, whisk in barbeque sauce. Season with salt and pepper.

TRUFFLE MASHED POTATOES

1.5 lbs. potatoes

1/4 cup to 1/2 cup sour cream

s&p to taste

Peel potatoes. Cut into large chunks. Add to boiling water and cook until tender. Remove potatoes from water (you may keep the water boiling for the baby vegetables) and move to a large bowl. Add sourcream, s&p and mash using favorite method (mine's to use a potato ricer.) When well mashed add truffle oil.


BABY ROOT VEGETABLES
Baby root vegetables: 12 oz parsnips, peeled
12 oz baby carrots, peeled
salt and pepper

Bring large pot of water to boil. Add parsnips and cook until tender, about 10 minutes. Using slotted spoon, transfer to bowl. Cover to keep warm.

Add carrots to boiling water and cook until tender, about 6 minutes. Drain and keep warm with parsnips. Season with salt and pepper.

To serve: place a mound of mashed potatoes in center of warmed dinner plate. Lean a short rib up against potatoes. Spoon sauce around potatoes and garnish with turnips and carrots.

Bon Appetit!!!

Friday, January 22, 2010

Green Soup


Last week I returned to NYC which was wonderful, though I over-scheduled my time far too much. I was busy with photoshoots, voice lessons, and friend time, all the while fighting a cold. Ick!
This week seems to have run away with me already-seriously, it's FRIDAY??? January 22nd??? How did that HAPPEN!?! And now I need a week to recover before my next jaunt to the big apple.
It's the beginning of second semester at the College of Midwestia. Professor Hubs is educating America's youth and I'm taking another philosophy class and continuing with Russian. I've also begun painting in the past few weeks, a favorite diversion of my youth. I'm not very good but I really enjoy it and even if my paintings aren't amazing it's an inexpensive and creative way to decorate our otherwise bare walls, no?
And, of course, I've also been doing some cooking...

In an attempt to save money I've been trying to repurpose leftovers in new, creative ways. I actually came up with some of the best meals we've had in a while: Turkey enchiladas, steak with cilantro chimichurri sauce, Portuguese Caldo Verde, etc...
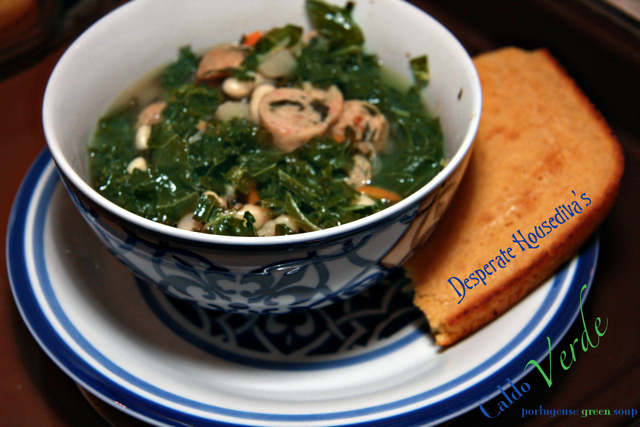
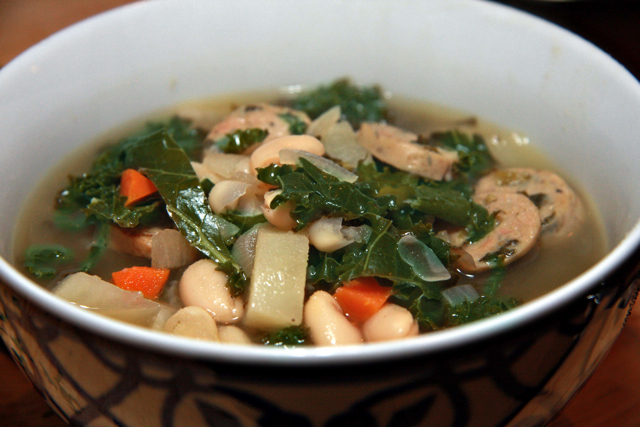
The recipe below for Caldo Verde (Portuguese green soup) is not a traditional caldo verde (a potato broth with kale and sausage,) it's a combination of a traditional recipe and an attempt to rid my fridge of pesky leftovers in a creative, delicious, and healthy way. It comes together very quickly, is delicious, and really sings with some of my quick whole wheat corn bread (recipe to follow in a day or two) in place of the traditional yeast corn bread of the Portuguese, Broa. And it's so good for you: Kale! Beans! Apple Cider vinegar! It's a powerhouse of nutritional masters :)

Desperate Housediva's Caldo Verde (Portuguese Green Soup)

Ingredients
Olive oil
1 Spanish onion, diced
3 cloves of garlic, minced
6-8 ounces cooked chicken sausage (or chorizo, or linguiça, or tempeh) sliced into thin rounds
2 quarts low-sodium chicken broth (or vegetable, if making vegan/vegetarian)
1 lb potatos, peeled and cut into small 1'' bites
3 large carrots, peeled and chopped
1 bay leaf
splash of dry white wine
1 large can (or 2 regular cans) of cannellini beans, rinsed.
1 lb kale, rinsed, de-ribbed, chopped into thin strips.
1 Tbsp-1/4 cup apple cider vinegar, to taste (optional...but awesome!)
s&p

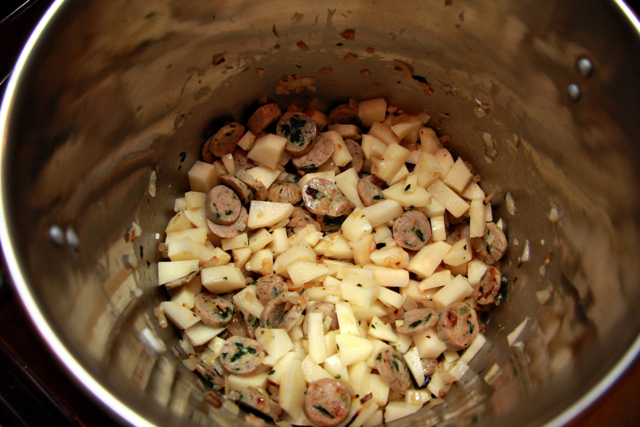
Heat olive oil in a large stockpot or casserole (medium.) Add onions, garlic, sausage, bay leaf. When onions are translucent, add potatoes and carrots.

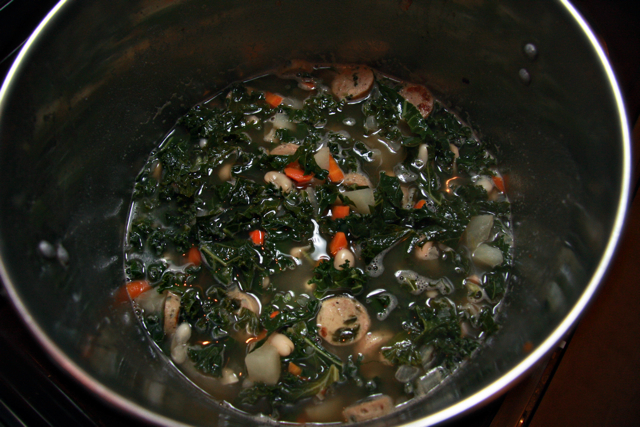
Stir well to combine. Add wine splash and broth. When mixture begins to boil, lower heat and cover. Cook for 15 minutes, until potatoes and carrots are tender. Uncover, add beans and kale, stir well.

After kale has wilted, add vinegar, salt and pepper to taste.

Bom Apetite!
(Portuguese. Like the soup. In case you didn't get it...)


Wednesday, December 9, 2009

Festival of Lights

It's that time of year again: Chanukah!
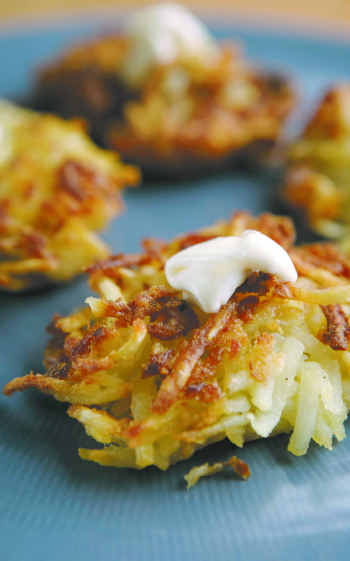
In my family Chanukah is synonymous with Latkes. Usually my Dad (though on occasion, my Mom) prepares them annually to celebrate
this. As a child I used to invite a friend or two over (usually non-Jewish friends as there weren't a large number of other Jewish families in our town) to light the candles, eat latkes, exchange gifts, and play dreidel. One of these childhood friends wrote to me a couple of days ago requesting that I write a post divulging the secrets of my family's famous Latkes. It warmed my heart in the most wonderful way that she remembered: how amazing to think that the little Chanukkah dinner we shared as children stuck with her after all this time. In her honor I dedicate this:

The Famous Family Latkes
(From the complete American-Jewish cookbook, edited by Anne London and Bertha Kahn Bishov, 1971)

6 medium potatoes
1 small onion
2 eggs slightly beaten
3 Tbsp flour
1/4 tsp pepper
1 tsp salt
1/2 tsp baking powder

Peel and grate potatoes and onion.

Let stand 10 minutes so liquid will rise to top. Remove liquid.

Stir in eggs.

Add other ingredients.

Drop by spoonfuls into hot, well-greased skillet. (my Dad uses canola oil)

Brown on both sides.

Drain on absorbent paper.

Serve hot with applesauce, or sour cream. (I like both)


Wednesday, December 2, 2009

The House Special

Early on in our relationship I took Prof. Hubs through the labyrinthine side streets of NYC's china town to one of my favorite Vietnamese restaurants. It's called, iconically, PHO. (That was a joke-they're almost all called PHO, named after the hearty oxtail soup served for breakfast throughout Vietnam.) I think it's on Mulberry near Bayard, but I'm not even sure... I can only find it intuitively using my uncanny New York sense of inner North.
Before even opening the menu Prof. Hubs told me he was ordering 'the House Special.' I was not aware the restaurant even had a house special-nor was I aware that Prof. Hubs was a pro at ordering in Vietnamese restaurants. Surprisingly, Prof. Hubs was correct-they DID have a house special. According to him, every Vietnamese restaurant worldwide (or at least the ones he's patronized) offer it and it's always basically the same thing. Even more suprising was that it was, ironically, NOT Pho. It was, I have since learned, Bún, one of Prof. Hubs favorite dishes in the universe.
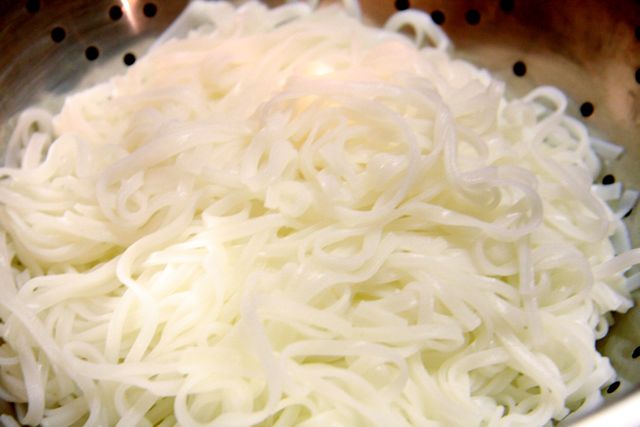
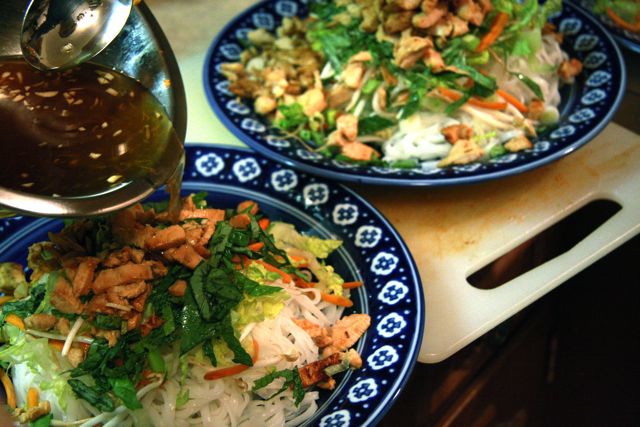
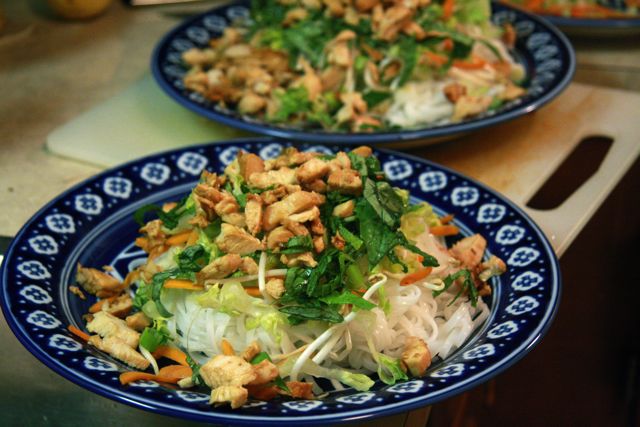
Though not actually a bread product at all, Bún is a deliciously refreshing rice vermicelli noodle dish. It's noodles, served room temperature, covered with a green mixture of shredded lettuce, carrot, basil, mint, cilantro, peanuts, lemongrass-marinated grilled meat, and a sweet dressing called Nuoc Cham, which is poured over all... It's sooooo good. It's a wonderful light dinner. Probably more suited for warm weather we balked at convention and made it tonight...and it was amazing. I was a bit intimidated by the long ingredient list and the amount of fish sauce involved (icky smell, no?) but it turned out to be a really simple meal to put together, with very little cooking involved, all coming together in under an hour. With a bit of practice one could probably make it in 30 minutes, which is always a bonus any time of year.
THE HOUSE SPECIAL (Vietnamese Bún)

NUOC CHAM DRESSING
1 large clove garlic, finely chopped
1 tsp sriracha or other chili sauce
2/3 cup hot water
1/4 cup sugar
1/4 cup fish sauce
juice of 1 lime
1 TBSP shredded carrot

Combine all ingredients, allow to cool.

VIETNAMESE LEMONGRASS-STYLE MARINATED CHICKEN
3 chicken breasts cut into strips
zest of 1 lemon
juice of 1 lemon
4 garlic cloves chopped
2 scallions, chopped
3 tsp brown sugar
2 Tbsp fish sauce
juice of 1 lime
squirt o sriracha sauce

Combine all ingredients and allow chicken to marinate as the rest of the Bún recipe is assembled.

ASSEMBLING BÚN
1 package rice vermicelli (or if you live in Midwestia like i do-Pad Thai noodles)
1/2 cup julienned carrots
1 romaine lettuce heart, shredded
4 Tbsp bean sprouts
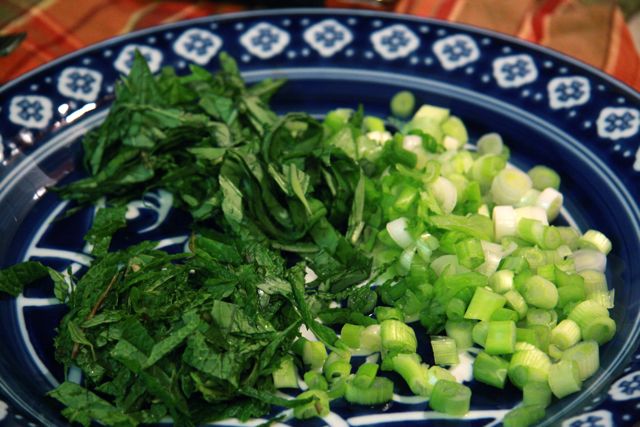
4 Tbsp fresh mint, chopped
4 Tbsp fresh basil, chopped
1/4 cup chopped peanut
Nuoc Cham dressing
Lemongrass marinated Chicken

Cook noodles according to package directions, allow to cool as the rest of the recipe is assembled.


Shred/chop all veggie ingredients.


Cook chicken in grill pan or wok until cooked through. Allow to cool a bit, then chop into bite sized pieces.


Assembling salad: Noodles on plate topped with lettuce, carrots, beansprouts herbs, then chicken pieces, then peanuts, then dressing. mmmmm.....


Tuesday, December 1, 2009

Kasha time

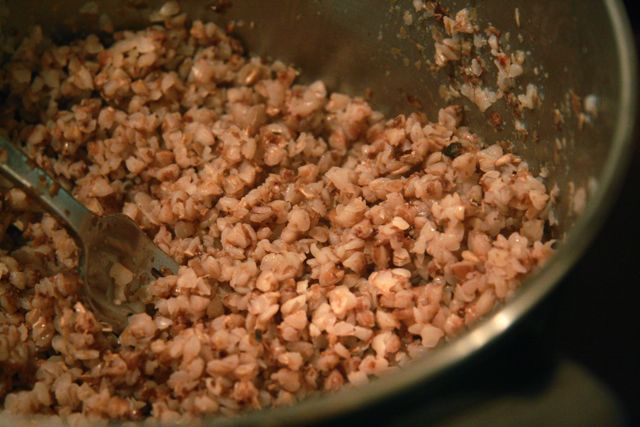
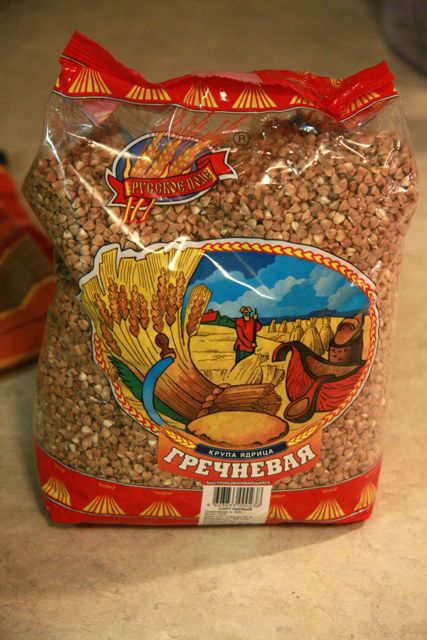
Growing up in a Jewish American household, Kasha was something we ate on Jewish holidays as a hearty side dish to brisket. What is Kasha, you ask? Kasha is whole grain buckwheat groats, toasted, then cooked like rice until it becomes a delicious and fluffy side-dish. It's technically not a grain-it's a fruit in the rhubarb family-seriously! So it's wonderful for people trying to avoid wheat. And it's a great source of amino acids (protein's building blocks,) second only to Quinoa in the pseudo-grain family. It's found in every Russian pantry and most Ashkenazi Jewish homes as well. Here's the thing though-it has a very 'idiosyncratic' flavor. Sort of a bitter, earthy taste that some uninitiated palates don't like. I love it, but that may be because I've eaten for as long as I can remember! Prof. Hubs would eat it for every meal and he claims that most people who try it don't have any idea how to eat it, what kind to buy, and how to prepare it which is why they think they don't like it. I think his hypothesis is true because it seems the only kinds we've been able to find at health food stores (the most accessible option) is the quick cooking kind, and if you try
that kind you will NOT like it. It's really worth trekking to a Russian food store (or to any number of Russian food stores online, our fave:
http://www.moscowonhudson.com ) to buy a bag and go through the whole process. One cooks it as one would cook rice: rinse the grains (like with rice) and cook it 1 part kasha to 2 parts water (also like rice,) starting out at a boil, then lowering heat to a simmer and covering for about 15 minutes. Kasha needs a savory, creamy addition: butter, sourcream, egg yolks, etc.. It's AMAZING with eggs sunny-side up, their yolks mixed into the brown grains. It sings with the gravy from a roast beef or chicken. And it is most delicious when mixed with any of the above AND with sour cream.
It was with Kasha in mind that I created this Chicken Paprikash recipe. I thought it would be a great showcase for this ultra-healthy and hearty side dish...and it really was...

Desperate Housediva's Chicken Paprikash
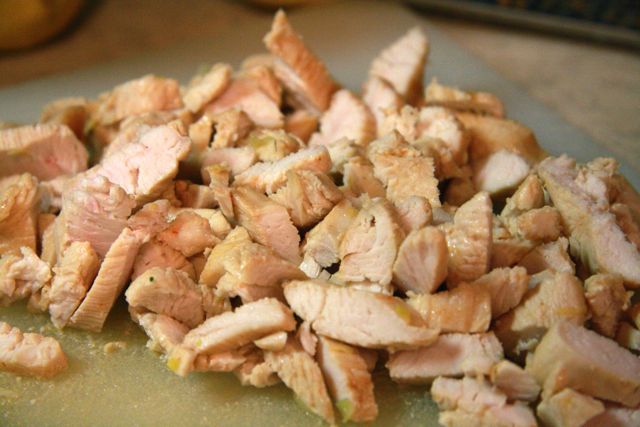
4 skinless boneless chicken breasts, cut into bite-sized pieces
1 Tbsp butter + spl
ash of Olive oil
S&P
1 onion, diced
1 green pepper, cut into thin stips or bite sized pieces
3 cloves of garlic
2 Tbsp (Hungarian) paprika
1 cup chicken broth
1 bay leaf
1 cup sour cream
3 Tbsp flour

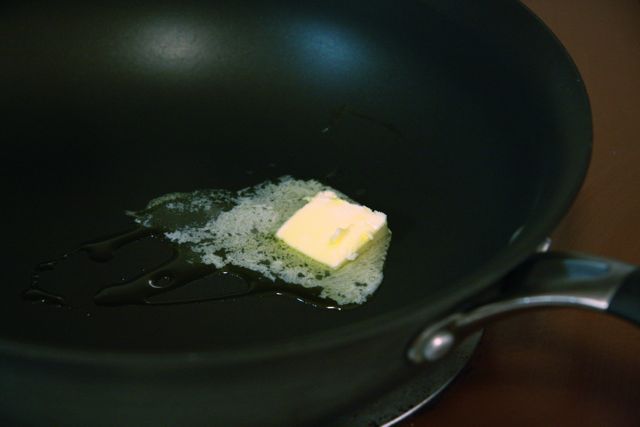
In a large dutch oven melt butter and olive oil over Med-High heat.

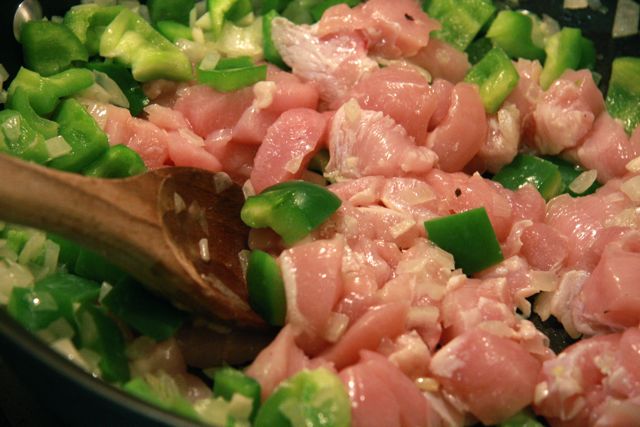
When melted, add onions, peppers and garlic. Stir and cook until onion is translucent. Push veggies to the outside of pan and add chicken pieces.
Salt and pepper the chicken pieces, stir and cook.

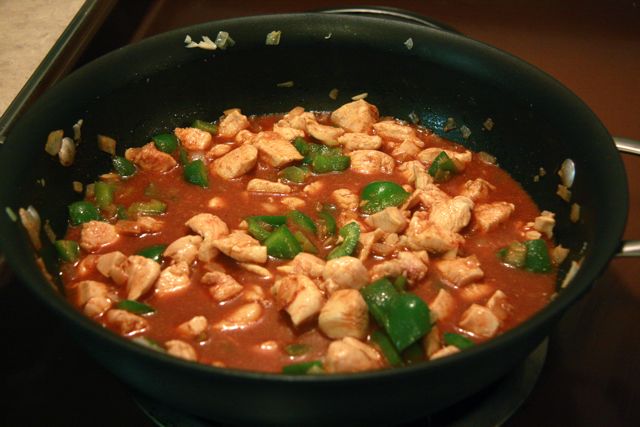
At this point you can reincorporate the veggies. When chicken is cooked through, add paprika. Stir to coat. Add bay leaf. Add chicken broth.

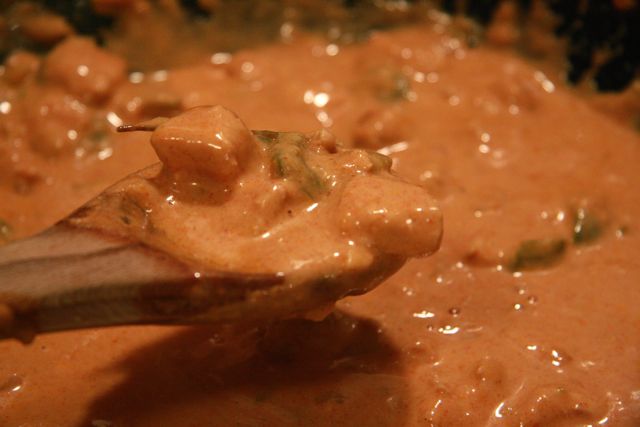
Lower heat to Med-low, cover and cook for 45-50 minutes. At this point, remove lid, stir in flour and sour cream until thickened.
Serve over noodles, rice, potato or buckwheat Kasha like we do :)
Enjoy!!!


Sunday, November 29, 2009

It takes a village: Bibimbap

Prof. Hubs and I love Korean food. We especially love Kimchee (pickled cabbage,) Kalbi (beef shortribs,) and Bibimbap (rice and vegetables.) Since our move to Midwestia I have chronicled the lack of feasible ethnic food eateries in our area. And though this fact in itself is really, really inconvenient it actually has forced us to become more adventurous in our own kitchen so that we needn't go without our favorite dishes from around the world-we just have to cook them ourselves. Which is how I came to prepare bibimbap... Let me state that this recipe is the product of a collaborative effort-I must thank several of my Korean friends for their guidance in the production of this dish... Thanks to their tips plus some desperate housediva ingenuity the final product tasted just like my favorite bibimbap from K-town in NYC!!!
DESPERATE HOUSEDIVA BIBIMBAP (for 2)
1 cup short grain brown rice (note: traditional bibimbap uses white rice)
half a bag of washed baby spinach
10 mushrooms (preferably shitake, but white will do in a pinch) cut into slices
10 baby carrots cut into matchsticks or 3/4 cup shredded carrot
1 small zucchini cut into matchsticks or 3/4 cup shredded zucchini
handful of korean bean sprouts (I can't find these in midwestia so don't stress if you can't either)
2 eggs
Sriraicha sauce (or, if you can find it, Gochujang, Korean chili paste)

BULGOGI BEEF (optional..,and soooo delicious)
1 ribeye steak trimmed of fat and cut into little thin bites
3/4 cup soy sauce
3 Tbsp sugar
1 Tbsp honey
1 onion, diced
5 garlic cloves, diced
splash of sesame oil
splash of rice wine vinegar


About 40 minutes before serving begin to cook the brown rice...it takes about that long.
When rice is close to being done, or IS done it's time to cook the individual components of the dish. Blanche the spinach in boiling water for a minute or two, until wilted. Remove from boiling water, rinse in cold water and squeeze out excess. In a wok or sautée pan heat a bit of sesame oil and cook the carrots until just softened.
Remove carrots from pan, add a dash of sesame oil to pan and cook mushrooms (with a dash of salt) until soft and thin.
Remove mushrooms from pan and add a dash of oil and cook zucchini with a dash of salt until translucent.
Keep the cooked vegetables separate from one another on a plate.
If cooking bulgogi beef, now is the time to heat up a wok on high and add the beef, I just throw the whole thing in there (with marinade) and stir it around for a two minutes until the beef is cooked. In the pan you used to cook the veggies, heat a bit of oil (canola, peanut, etc.) and cook 2 eggs, over easy.
Assemble the plate: One cup of rice, covered with beef, veggies (separate, but next to each other) and fried egg. I like to top with a dollop of sriraicha sauce (because we can't get the special Korean bibimbap sauce here in Midwestia...) and then mix it ALL together and enjoy!!!