Showing posts with label Breads. Show all posts

Monday, February 7, 2011

Perfectly perfect whole wheat pancakes (and part II of the Desperate Housediva's DIY home decor diaries)


As chronicled in my last entry, I have begun some DIY home decor projects over the past few weeks. I love the process of scouring the Internet for ideas/inspiration but at the same time I find it utterly overwhelming. So many color combinations! So many possibilities! But I feel a strange pressure; once I commit to an aesthetic then it is locked in (until I decide to do a decor overhaul...)
So that kind of stresses me out (I'm easily overwhelmed, apparently...) Not to mention the fact that my blue fabric wall was a total bust. It made the room look really small...and kind of college dorm-y. So that was a 'no.' But, not to be discouraged I am now on to new projects. I will soon be able to share my dresser decoupage before and after photos-love it! I'm just waiting on the pretty vintage glass drawer pulls...
After all of the stress of redecorating (I say this with a huge amount of sarcasm, as I realize most people wouldn't be stressed out...just me...because I'm a wimp...) I decided we needed some comforting food. Really comforting. Like pancakes. But still healthful and nutritious. And these pancakes were perfect. They are so delicious, so tender! And they come together practically instantaneously :) I love that!


Whole Wheat Pancakes
based on a recipe by Heidi Swanson of 101cookbooks.com

2 cups white whole wheat flour (or unbleaced all-purpose flour)
1 teaspoon baking powder
1/2 teaspoon baking soda
1/3 cup brown sugar
1/2 teaspoon sea salt
2 1/4 cups buttermilk (or 2 1/4 cups skim milk with 2 1/4 Tbsp white vinegar, left to sit for 10 minutes)
2 large eggs
butter for pan (and/or for serving)

Fresh Fruits, Organic Maple Syrup, Greek Yogurt, or whatever else floats your boat on delicious pancakes.

Combine the flour, baking powder, baking soda, sugar, and salt in a large bowl. Add the buttermilk, eggs, and melted butter. Stir all the ingredients until they are just combined. Don't worry if the batter is a bit lumpy, you don't want to over mix.

Heat your skillet, pan, or griddle to medium-hot and brush it with a bit of butter. Test for the right temperature. If a drop of water dropped onto the pan starts to dance, you are in the ballpark. Pour about 1/3 of a cup of batter into the skillet. Wait until the pancake bottom is deep golden in color, then flip with a spatula and cook the other side until golden and cooked through. Repeat with the remaining batter.

Serve with a golden pat of butter and plenty of berries and syrup.

Makes about 12 large pancakes, or dozens of silver-dollars - enough to feed a small crowd.


Dreaming of Pancakes

Sunday, January 23, 2011

Healthy + Delicious = (Blue)berry Bran Muffins!


I've been on the hunt for a delicious, healthy bran muffin recipe for ages. In NYC I'm obsessed with the raspberry bran muffins from The BirdBath green bakery-they're phenomenal-though I'm pretty sure they're nutritionally closer to cake than anything else :)
The other day Prof. Hubs brought home a huge number of blueberries. I love them, they are lovely just as they are, but few can eat berries in such exorbitant numbers. They need to be used in delicious ways before they're considered waste. Hence, the birth of the Desperate Housediva's (Blue)berry Bran Muffins. These come together easily in minutes, in one bowl, and are soooo delicious, so healthy (Greek yogurt, bran, whole wheat flour, teensiest bit of butterfat, fresh berries-nutritional powerhouse!) that I needed to share them immediately. I am looking forward to trying this recipe out with fresh raspberries when the season arrives... And for those of you watching your calories this season-I think they come in under 100 calories/per muffin with lots of fiber and protein!


The Desperate Housediva's superhealthydelicious Berry Bran Muffins
(based on a few different recipes, including one by Jean Hewitt, one by some Canadian Agropur people, and one by some recipe contributor called 3lioncubs...)

2 cups white whole wheat flour
1.5 cups wheat bran
3/4 tsp salt (pref. sea salt)
1.25 tsp baking soda
2 Tbsp brown sugar
2 cups fat free plain Greek yogurt
1 egg
1/4 cup honey
1 Tbsp blackstrap molasses
3 Tbsp melted butter
1/4 cup plain applesauce
1/4 skim milk (or buttermilk)
1 cup berries (I used blue but rasp would also be divine...)

Preheat oven to 425.
Either butter and flour a muffin tin or use little muffin liners.

In a ginormous mixing bowl, sift first five ingredients (flour through brown sugar.) Then make a well in the middle and add all remaining ingredients except berries. Mix with a wooden spoon until just combined. Then add berries and give a few mixes (barely) until berries are somewhat evenly distributed throughout batter. Do not overmix.

Spoon batter (it should be pretty thick but not doughy) 3/4 way up cups. Bake for 15 minutes (10 minutes if using mini muffin tins) until muffins are golden brown on top.
Allow to cool for a minute or two before enjoying with or without some lovely butter.


Sunday, April 11, 2010

Parental Brunch

from our friends at www.AriellePhoto.com


I love all things cheese (you may have noticed.) I think I inherited this love from
my Dad who, like me, enjoys cheese in it's savory or sweet forms. When I learned
my parents were coming for a visit to Midwestia I immediately started planning meals
involving this dairy delicacy. Fast forward to Saturday brunch and this gorgeous and
simple cheese danish. It's like a bit of cheesecake packed into a puffy little parcel.
It's a wonderful recipe for a brunch-it's so simple-and yet pretty enough to be quite
impressive. Perfection! (and my parents loved it!)


Quick and easy cheese danish
(adapted from Ina Garten)

8 oz. 1/3 less fat cream cheese (Neufchatel cheese)
1/4 up to 1/3 cup sugar (I prefer 1/4...I don't like the cheese to be too sweet)
2 egg yolks, room temperature
2 Tbsp. part skim ricotta cheese
1 tsp pure vanilla extract
1/4 tsp salt
zest of 1 lemon
2 sheets (1 box) of puff pastry, defrosted and thawed
1 egg beaten with 1 Tbsp water, for egg wash

Preheat the oven to 400 degrees F. Line a sheet pan with parchment paper.

Place the cream cheese and sugar in the bowl of an electric mixer fitted with a paddle attachment and cream them together on low speed until smooth. With the mixer still on low, add the egg yolks, ricotta, vanilla, salt, and lemon zest and mix until just combined. Don't whip!

Unfold 1 sheet of puff pastry onto a lightly floured board and roll it slightly with a floured rolling pin until it's a 10 by 10-inch square. Cut the sheet into quarters with a sharp knife. Place a heaping tablespoon of cheese filling into the middle of each of the 4 squares. Brush the border of each pastry with egg wash and fold 2 opposite corners to the center, brushing and overlapping the corners of each pastry so they firmly stick together. Brush the top of the pastries with egg wash. Place the pastries on the prepared sheet pan. Repeat with the second sheet of puff pastry and refrigerate the filled Danish for 15 minutes.

Bake the pastries for about 20 minutes, rotating the pan once during baking, until puffed and brown. Serve warm.


Tuesday, January 26, 2010

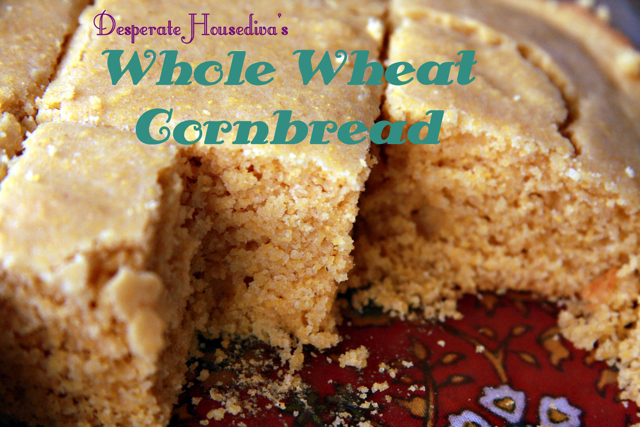
Cornbread with an asterisk *


In current health food culture corn has a bad reputation. I believe this is due partly to the low-carb fanaticism of the late 1990's and mostly to its connection to the ubiquitous American junk food sweetener, High Fructose Corn Syrup, and the genetically modified corn products fed to cattle. But does everyone's favorite bbq side dish (corn-on-the-cob) have any redeeming qualities? Obviously, the answer depends on where you look. I happen to think that if one cooks with clean, local organic corn or cornmeal one can enjoy the health benefits of this Ancient American staple. Did you know that corn is an excellent source of Folate, B vitamins like Thiamin, fiber, phosphorous and manganese in addition to a number of powerful phyto-nutrients (powerful antioxidants that fight disease?) Not so bad, maybe... I invite you to do your own research on corn and come to your own conclusions. I myself will be enjoying it, in moderation, in recipes such as this whole wheat cornbread (did I mention it's also naturally low-fat?)

WHOLE WHEAT CORNBREAD
(adapted from Kathleen Daelmans)
1 cup organic cornmeal (I used yellow)
1 cup white whole wheat flour
2 TBSP honey
1.5 tsp baking powder
1/2 tsp salt
1 cup milk (You can use skim, I used 2%)
1/4 cup canola oil (organic!)
1 egg, beaten

Preheat oven to 400. Lightly grease a 9 inch baking dish. In a large bowl, combine dry ingredients. In another medium sized bowl combine wet incredients. Add wet ingredients to dry ingredients. Stir to combine, but be careful not to overmix. Pour batter into baking dish and bake for 20-25 minutes (until edges are lightly browned and a toothpick comes out clean.)

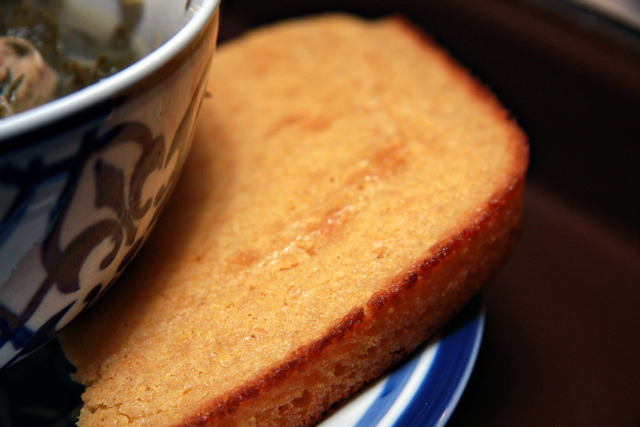
Enjoy!!! (perhaps with a bowl of Green Soup?)

Thursday, December 17, 2009

Popovers


In my childhood home my Mom must have baked fresh popovers every Winter weekend. I fondly remember tearing into the warm, puffy crust and feeling enthralled as I watched the steam rush skyward before I took my first bite. Each of my two brothers must have eaten their weight in popovers during the 1980's... This is why whenever I see/smell/taste/even think of popovers I feel intense happy family nostalgia.
My friend Claire (of Claire's Limey Salad fame) recently prepared popovers at a dinner she hosted and I was instantly taken back to those childhood weekend breakfasts. With this in mind I decided to prepare a Desperate Housediva version of this family favorite. I added some magical White Whole Wheat flour in order to make it a bit healthier and included the melted butter in the batter itself to add a flaky/pastry component to the dish. They did not disappoint: not only do they live up to my popover nostalgia but they also feel healthier (and no less delicious) with the addition of the white whole wheat flour.
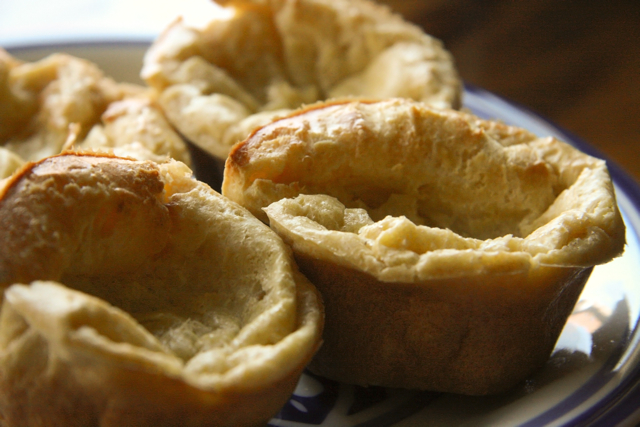
If you have never had the pleasure of enjoying a fresh popover (which was Prof. Hubs' situation before this morning) the only way I can describe them is to say they are something like a Yorkshire Pudding...if that doesn't help you, just taste them. Prof. Hubs said that they are like the best parts of bread combined with the bests part of eggs. This is a somewhat literal description for those who really have no previous popover/yorkshire pudding experience.
No matter what, you should make them...like NOW.


POPOVERS
(adapted from the Moosewood cookbook)
2 to 4 Tbsp melted butter
2 eggs
1 cup Milk
1/2 cup white whole wheat flour
1/2 cup all purpose flour
1/2 tsp salt
(NOTE: In the original recipe one can use up to 4 eggs depending on your egginess preferences. If using more than 2 eggs, add a 1/4 each of milk and all purpose flour.)

Preheat oven to 375. Grease muffin tin/popover tin.


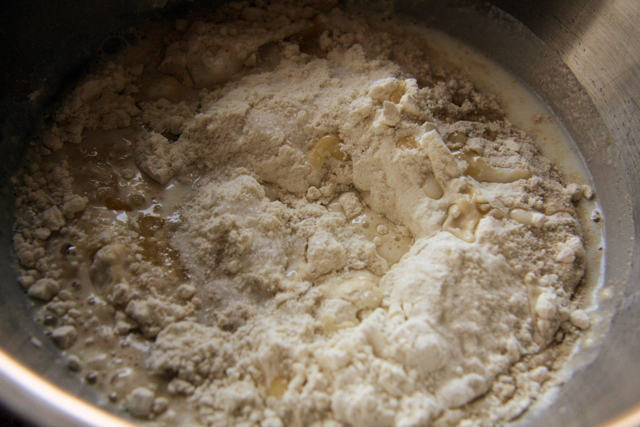
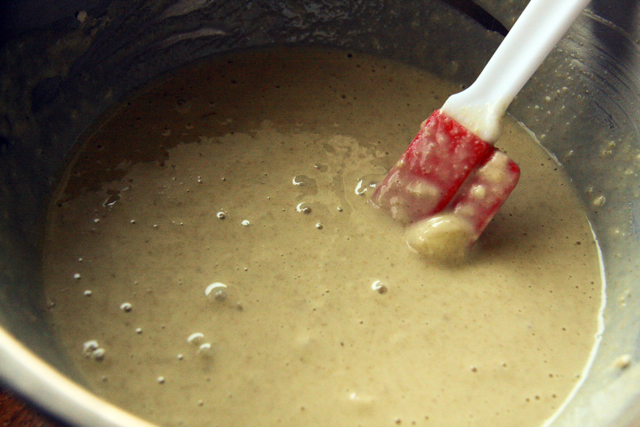
In a large bowl combine all ingredients well. A few lumps are okay.

(NOTE: some people use the melted butter to grease the tin. Others add the melted butter to the batter. I do the latter and it creates a wonderfully flaky popover, but if you're looking for a silkier, less flaky popover omit the butter from the batter.)
Pour batter into muffin tins filling them 1/2 to 2/3 full. Bake for 25 minutes (Add 5 minutes
per egg if you added more than 2 to your batter.) DO NOT open oven while popovers are baking!!!!!
After the alotted cooking time has passed remove popovers immediately and prick the puffy part with a knife to allow steam to escape and to help them hold their unique shape.
Serve immediately. I like mine plain or with this...


Saturday, December 5, 2009

Russian Feast, also known as how I spent my Thursday

In honor of semester's end at the College of Midwestia Prof. Hubs and I decided to throw a little party for the Russian students to celebrate all that they accomplished during the past few months...and mostly to bribe them into continuing their studies with the Russian program...
In my eagerness to prepare traditional Russian recipes I decided to (ambitiously) prepare not only a traditional borscht (beet soup,) but also pirozhki (little pies filled with a cabbage mixture,) Khatchapuri (the most delicious cheese bread known to humankind) and an apple cake... I was cooking for more than 10 hours, people (which is why I poached a borscht photo from some other website-I was too busy kneading fresh pirozhki dough to snap pics...) It was actually a lot of fun-though somewhat stressful (I needed Prof. Hubs to stage a Borscht intervention somewhere around 9pm on Thursday and he came to my rescue with more beets, etc.) and I haven't had such sore feet since my days working in the restaurant business. No wonder they require food service workers to wear those dansko clogs!
After all that cooking we finally got to enjoy the goodies-and they were wonderful. Even the actual Russians at the feast found them to be authentically delish (though, admittedly the whole wheat dough that I used for the cabbage pirozhki was not nearly as supple and light as the white dough I made for the cheese Khatchapuri...nor nearly as authentic.) I have included the Borscht recipe and the Khatchapuri recipe, because they were the most beloved (and I already shared the amazing Jewish apple cake recipe in a previous post.) Though the borscht has multiple parts it's worth the effort on a cold winter's day. And you can always do something else (like make Khatchapuri) while the various parts are cooking...

FUN WITH BORSCHT
based on several recipes, including on on SIMPLY RECIPES, one on EPICURIOUS and several featured on prominent Russian cooking websites
(note: this makes enough borscht to fill a large stockpot...or a lot of people.)

INGREDIENTS
vegetable oil
2lbs beef shortribs (the British cut, thick squares, on the bone, as opposed to the thin, long cuts)
1 onion, quartered
16 cups (4 containers) beef broth (low sodium)
8 beets
8 carrots, peeled, chopped into 1/2 inch bites
5 med potatoes, peeled, chopped into 1/2 inch bites
6 cups white cabbage chopped into 1/2 inch square shreds
1 cup dill, chopped
sour cream
s&p

PART I
In a large stockpot heat a bit of vegetable oil to med-hi. Add shortribs. Brown on all sides (total of about 8 minutes) then add onion. Then add one container (4 cups) broth. Bring to a boil, lower to a simmer, cover. Cook for 2.5 hours. After that time remove from heat. Transfer shortribs to plate. Trim of bone and fat, shred meat. Set aside shredded beef in fridge. Allow broth to cool (this takes at least 4 hours) and then skim fat from the top.

PART II
Boil beets in water for 25 minutes. Transfer to a plate.
Allow to cool, then peel and chop into 1/2 inch bites.
Continue with all of the other vegetable chopping.
Bring skimmed back to stove. Add remaining stock and bring to a boil. Add all chopped vegetables (beets, carrots, potato.) Then lower heat to simmer soup, covered for at least an hour. Stir in meat.
Now you are FINALLY ready to enjoy the fruits of your labor-
Serve soup with a large dollop of sourcream, dill, and salt and pepper to taste.


KHATCHAPURI (Georgian cheese bread)

(note: I'm sure you could just use refrigerated pizza dough rolled very thin for this, but if you have the time, this dough is so silky and supple.)


DOUGH
(recipe by Gil Marks)
1 package active dry yeast
1/4 cup warm water plus 2/3 cup warm water or milk
3 tsp sugar or honey
2 large eggs
1/4 cup butter melted
1.5 tsp salt
about 3.5 cups unbleached all purpose flour

In a large bowl dissolve the yeast in 1/4 cup of the warm water. Stir in 1 tsp of the sugar and let stand until foamy. Stir in the remaining water, the remaining 2 tsp sugar, the eggs, butter, salt,and 2 cups of the flour. Gradually add enough of the remaining flour to make a workable dough.
Knead dough until smooth and elastic. Place in a greased large bowl, turning to coat. cover loosely with plastic wrap or a damp towel and let rise in a warm, draft-free place until nearly doubled in bulk, about 1.5 hours. Punch down and knead again before use or cover and refrigerate for up to 24 hours.


FILLING
1 cup ricotta cheese
1.5 blocks of feta cheese, crumbled
half a bag shredded part-skim mozzarella cheese
1 egg

Combine all cheeses and egg.

ASSEMBLY:
Preheat oven to 350. Roll out dough to 1/2'' to 3/4'' thick. Cut into rounds (my rounds were about 6'' in diameter.) Fill the rounds with a layer of cheese mixture, leaving room at the edges. Cover with another round and pinch edges closed. (for extra pretty brown-ness, brush little pies with a mix of 1 egg and 1 tbsp water before baking.) Place on a greased baking sheet and bake until lightly browned (in my oven, about 10 minutes.)
I warn you-this is the tastiest cheesy bread product you will EVER EAT:
ENJOY WITH CAUTION-HIGHLY ADDICTIVE


Tuesday, September 22, 2009

Here's to the ladies who lunch...

I have always been somewhat confounded by lunch-I'm never quite hungry enough for a big meal so soon after breakfast but if I have a light lunch I'm often starving by 4pm. I think the solution for me is probably to do 2 mini meals-a smoothie at 1 and half a sandwich at 4 or something... In other words, more effective 'meal planning' which is yet another concept that leaves me confounded.
And then a whole other slew of meal shenanigans ensue: As a rule I don't like sandwiches. Now, like many rules, there are a few exceptions. One of the most delicious of which being my husband's incredible toasted turkey avocado sandwich. It's just perfection. In addition to my rule about sandwiches I also have a rule about not liking mayonnaise and yet again this turkey sandwich breaks that one as well...
PROFESSOR HUBS' TOASTED TURKEY AVOCADO SANDWICH
2 slices crusty bread (I like a sourdough whole wheat)
2 tsp mayonnaise
1/4 avocado
2 slices sharp cheddar cheese
5 slices deli style turkey breast

Spread both slices of bread with a very, very thin layer of mayo. On one of the slices lay out the cheese slices. Put the decorated slices in the toaster oven or real oven (375) until the cheese gets melt-y. Remove slices from oven, spread the slice of toast without the cheese with the avocado. Arrange the turkey as you like on the cheese slice. Put them together and enjoy!!!
Note: this is even better when sliced on the diagonal

Variation 1: add sliced tomato and lettuce
Variation 2: add tomato, lettuce, bacon
Variation 3: add sliced green apple and an application of honey mustard on one slice bread in place of the mayonnaise

Saturday, August 29, 2009

Simple Life

I went to the Aldi yesterdy (in case you are not familiar with Aldi, it is the German store chain that OWNS Trader Joe's and is basically a really, really cheap and democratic version of T.J.'s) to pick up some frozen berries for the miraculous smoothies we've been making of late.  As I made my way down the first aisle I found myself behind a woman in full Amish garb.  I studied her a bit in between my assessment of granolas being offered at bargain basement prices.  Her build was solid yet feminine, she was wearing layer upon layer of carefully pinned pleated dark brown fabric, clunky solid black shoes, and a large black bonnet to cover her hair.  I could not see her face from where I was, behind her, but due to her build and the amount of food in her cart (she appeared to be shopping for a family of 40) I guessed her to be of middle age.  As she stopped to pick up abot 6 jars of smooth peanut butter I passed her without looking at her face and continued shopping.  When it came time to check out I ended up in line behind her where again I studied the simple arrangement of straight pins holding her bodice to her skirt.  She turned around and I got a glimpse of her face; it was the face of a girl, a child bride.  She couldn't have been more than 23.  In her strange little voice with its almost German accent she offered her place in line to me as I had 4 items and she had about 400.  She was very gracious and sweet.  As you can surmise from this paragraph I found her fascinating.  I wonder what her life is like on the Amish farms nearby-how many children she has, if she is happy with her husband, how she feels about her responsibilities in her own community and her thoughts on our "English" society.
That afternoon I made bread.  It's something I've been doing on Friday's the last few weeks as it feels like a nice connection to my own ancestors.  Most likely the young Amish woman does not make bread (as I noticed about 8 loaves of sliced white bread in her cart) but in my own imaginary scenario of her daily life she does.  She bakes a lot of bread.  In my fantasy life the Amish existence is much like life on LITTLE HOUSE ON THE PRAIRIE.  I am most certainly wrong.
Here is a great recipe for Whole Wheat Challah bread.  I warn you, this bread will go very, very quickly.  It's that delectable.

WHOLE WHEAT CHALLAH
from a recipe by Ms. Kern at notderbypie

makes one challah directions for a kitchenaid are in italics

1/2 cup warm water tsp. sugar (I use demerara) 1 packet (2-1/2 tsp.) yeast

2.5 cups white WHOLE WHEAT flour

.5 cup white all purpose flour

tsp. salt

1/4 cup plus a 4 tsp sugar 1/3 cup vegetable oil 1/4 cup water (if needed for dough consistency) 2 eggs

1. Put 1/2 cup warm water in a small bowl. Add the tsp. of sugar, sprinkle the yeast overtop, and leave it to proof for five minutes (just to make sure the yeast is alive).

2. Mix flours, salt, and 1/4 cup plus few Tbsp. sugar in a large bowl (or in a kitchenaid bowl fitted with the dough hook.) Stir to incorporate or blend on low speed.

4. Add yeast mixture to the flour; add wet ingredients to the bowl, and mix or blend on low-medium.

5. Knead the dough for about ten minutes, until everything is well incorporated. Add flour by the Tbsp, with a light hand, until dough is stretchy but not sticky. Blend on low-medium until dough comes together. Make sure flour at the very bottom of the bowl gets incorporated as well; this usually entails some incorporation by hand.)

6. Cover the dough, in its original bowl, with a moist towel. If you have to, use plastic wrap and cover loosely.

7. You have two choices for the rise: either leave the dough to rise for one hour, or (as I do) let it rise twice, for 45 minutes each, with a punch-down between rises.

8. Preheat oven to 375 degrees.

9. After the rise(s), the dough should be soft and more flexible than before. Separate dough into three. Roll each ball into a log almost 1-foot long. Braid the logs together to create your loaf. Trick: I start in the middle and do not pinch the top ends together before starting. After I've braided from halfway down to the bottom of the loaf, I turn the loaf over and upside down, and braid the other half. This way, both ends look identical. Tuck the ends beneath the loaf when braiding is finished.

10. Put loaf on its own baking sheet; brush with egg wash, if desired.

11. Bake at 375 degrees for 30-35 minutes, until challah is golden brown and baked through.

Serve warm or at room temperature.

Wednesday, August 12, 2009

Adventures in time management

I can't really think of anything to write about today. Here are a couple of ideas I have been toying with a bit but am too lazy to actually explore:

1. The fact that I now talk to MYSELF while driving. In a British accent. Or a Southern one like on TRUEBLOOD.
2. A review of FUNNY PEOPLE which attacks the recent NYTimes review, which was so completely wrong. This movie is PERFECT (in my opinion!)
3. The recovery of my zucchini plants from powder mould due to an ultra-pasteurized cow's milk remedy....um. yeah...you really wish I wrote that one, right?
4. How I have uncannily figured out how to stretch a five minute task into an hour-long task so that I feel like I am busier than I am.

But in the end, I realized that all of those are completely boring to anyone but me...ahhh, narcissism. So, instead of waxing poetic regarding plant health, here is a delightfully un-boring, particularly delicious strawberry shortcake recipe that I've been making lately. If you only need to make one or two biscuits you can freeze the dough for later use. It freezes admirably. Or do as Prof. Hubs and I do: refrigerate the leftover dough and on a weekend morning bake some biscuits and make turkey bacon and egg sandwiches with them...mmmm...


DESPERATE HOUSEDIVA'S STRAWBERRY SHORTCAKES
whole wheat biscuits
vanilla cream
strawberries, washed, hulled and cut into halves or quarters
strawberry jam

WHOLE WHEAT BISCUITS (adapted from THE NEW BASICS cookbook)
1 cup all-purpose flour
1 cup whole wheat flour
1 Tbsp baking powder
3 Tbsp sugar
1/2 tsp salt
5 Tbsp unsalted butter, cold (MUST be cold)
3/4 cup milk (or half and half...)

Preheat oven to 450.
Combine dry ingredients in a bowl. Cut the butter into small pieces and 'cut' it into the flour using a pastry blender or two knives until it resembles coarse crumbs. Add the Milk and stir gently until the dough resembles a ball.
Take said ball of dough and transfer to a floured surface-it will be STICKY! Knead it for about 30 seconds, then pat it into a 3/4 inch rectangle. I like to fold it over once or twice and then flatten it again (this makes for good 'pull-apart' biscuits.) Don't overknead-you want the butter to stay cold for flakiness factor...
Using a cookie cutter (or the top of a water glass, like I do) cut dough into rounds. Arrange the rounds 1-inch apart on a greased baking sheet (I just use a silpat mat.) Bake until golden and puffed-about 12-14 minutes.

VANILLA WHIPPED CREAM
1 cup heavy whipping cream
1/5 Tbsp sugar
1/4 tsp vanilla extract

For this recipe, first chill a metal bowl in the fridge for at least 10 minutes. Also, keep the cream cold during this time. After the bowl is chilled, pour the cream into the cold bowl and whisk or electrically mix the cream until soft-medium peaks form. Then add in the sugar and vanilla-combine. Yum! I don't like this to be too sweet but if you do, feel free to add more sugar... If your arm gets tired from whisking feel free to take a break by putting the bowl (with partially whipped cream) back in the fridge for a few minutes... Keeping it all cold will greatly help your purpose and prevent the cream from becoming butter :)


ASSEMBLING THE SHORTCAKES
Take the biscuits and cut them in half. Spread the jam on either side. Then, on the bottom half of each biscuit put a large spoonful of strawberries, topped with a heaping spoonful of cream, then top with the other biscuit half. Enjoy!!!