Tuesday, January 26, 2010

Cornbread with an asterisk *


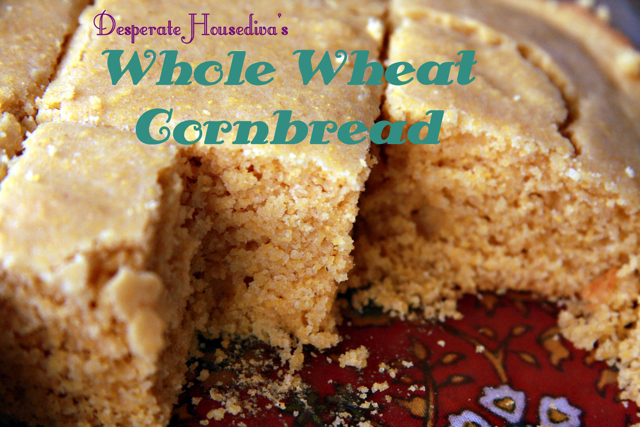
In current health food culture corn has a bad reputation. I believe this is due partly to the low-carb fanaticism of the late 1990's and mostly to its connection to the ubiquitous American junk food sweetener, High Fructose Corn Syrup, and the genetically modified corn products fed to cattle. But does everyone's favorite bbq side dish (corn-on-the-cob) have any redeeming qualities? Obviously, the answer depends on where you look. I happen to think that if one cooks with clean, local organic corn or cornmeal one can enjoy the health benefits of this Ancient American staple. Did you know that corn is an excellent source of Folate, B vitamins like Thiamin, fiber, phosphorous and manganese in addition to a number of powerful phyto-nutrients (powerful antioxidants that fight disease?) Not so bad, maybe... I invite you to do your own research on corn and come to your own conclusions. I myself will be enjoying it, in moderation, in recipes such as this whole wheat cornbread (did I mention it's also naturally low-fat?)

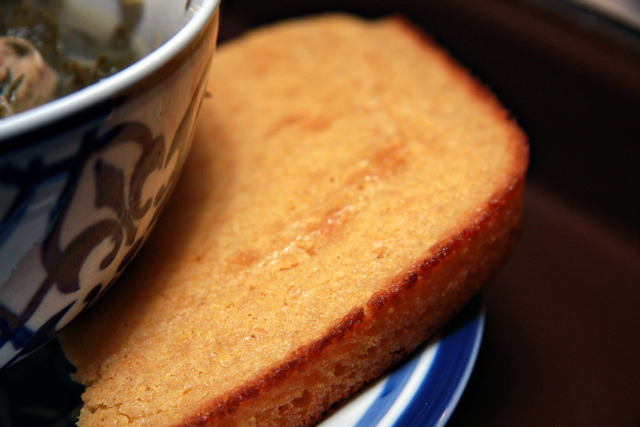
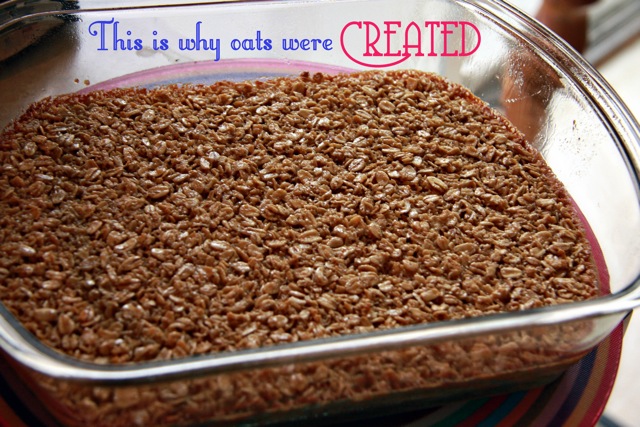
WHOLE WHEAT CORNBREAD
(adapted from Kathleen Daelmans)
1 cup organic cornmeal (I used yellow)
1 cup white whole wheat flour
2 TBSP honey
1.5 tsp baking powder
1/2 tsp salt
1 cup milk (You can use skim, I used 2%)
1/4 cup canola oil (organic!)
1 egg, beaten

Preheat oven to 400. Lightly grease a 9 inch baking dish. In a large bowl, combine dry ingredients. In another medium sized bowl combine wet incredients. Add wet ingredients to dry ingredients. Stir to combine, but be careful not to overmix. Pour batter into baking dish and bake for 20-25 minutes (until edges are lightly browned and a toothpick comes out clean.)

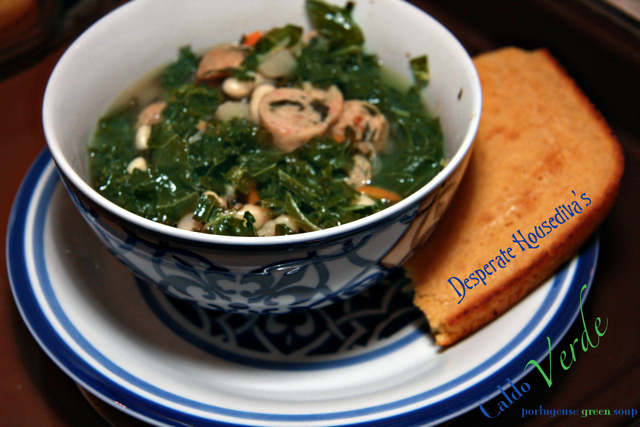
Enjoy!!! (perhaps with a bowl of Green Soup?)

Friday, January 22, 2010

Green Soup


Last week I returned to NYC which was wonderful, though I over-scheduled my time far too much. I was busy with photoshoots, voice lessons, and friend time, all the while fighting a cold. Ick!
This week seems to have run away with me already-seriously, it's FRIDAY??? January 22nd??? How did that HAPPEN!?! And now I need a week to recover before my next jaunt to the big apple.
It's the beginning of second semester at the College of Midwestia. Professor Hubs is educating America's youth and I'm taking another philosophy class and continuing with Russian. I've also begun painting in the past few weeks, a favorite diversion of my youth. I'm not very good but I really enjoy it and even if my paintings aren't amazing it's an inexpensive and creative way to decorate our otherwise bare walls, no?
And, of course, I've also been doing some cooking...

In an attempt to save money I've been trying to repurpose leftovers in new, creative ways. I actually came up with some of the best meals we've had in a while: Turkey enchiladas, steak with cilantro chimichurri sauce, Portuguese Caldo Verde, etc...
The recipe below for Caldo Verde (Portuguese green soup) is not a traditional caldo verde (a potato broth with kale and sausage,) it's a combination of a traditional recipe and an attempt to rid my fridge of pesky leftovers in a creative, delicious, and healthy way. It comes together very quickly, is delicious, and really sings with some of my quick whole wheat corn bread (recipe to follow in a day or two) in place of the traditional yeast corn bread of the Portuguese, Broa. And it's so good for you: Kale! Beans! Apple Cider vinegar! It's a powerhouse of nutritional masters :)

Desperate Housediva's Caldo Verde (Portuguese Green Soup)

Ingredients
Olive oil
1 Spanish onion, diced
3 cloves of garlic, minced
6-8 ounces cooked chicken sausage (or chorizo, or linguiça, or tempeh) sliced into thin rounds
2 quarts low-sodium chicken broth (or vegetable, if making vegan/vegetarian)
1 lb potatos, peeled and cut into small 1'' bites
3 large carrots, peeled and chopped
1 bay leaf
splash of dry white wine
1 large can (or 2 regular cans) of cannellini beans, rinsed.
1 lb kale, rinsed, de-ribbed, chopped into thin strips.
1 Tbsp-1/4 cup apple cider vinegar, to taste (optional...but awesome!)
s&p

Heat olive oil in a large stockpot or casserole (medium.) Add onions, garlic, sausage, bay leaf. When onions are translucent, add potatoes and carrots.

Stir well to combine. Add wine splash and broth. When mixture begins to boil, lower heat and cover. Cook for 15 minutes, until potatoes and carrots are tender. Uncover, add beans and kale, stir well.

After kale has wilted, add vinegar, salt and pepper to taste.

Bom Apetite!
(Portuguese. Like the soup. In case you didn't get it...)


Thursday, January 7, 2010

Vegetable Resolutions


I'm not one for New Year's resolutions-by the time December 31st rolls around I've rarely even considered my plans for the new year. However I do recognize the value of goal setting and creating healthy habits. After the richest of holiday feasts I like to amp up my vegetable intake. I figure that if I eat more vegetables I won't have any more room in my tummy for fatty foods and sweets... Following the richest of indulgences I have been known to eat a dinner or two a week of just beautifully prepared vegetables. Sometimes the body needs a bit of a digestive break from the heavy, complicated foods of the holidays. My favorite veggies include a whole roasted Sweet potato (wrap in foil, bake at 400 for 1-1.5 hours,) roasted brussels sprouts or asparagus (toss with olive oil, s&p, put on baking sheet, bake at 400 for 20 min,) and my new veggie fave: garlicky breadcrumbs cauliflower. To me this cauliflower preparation is a nice substitute for my breadcrumbs pasta. (Though low-carb people take note: it's not low carb. It's cooked in breadcrumbs. But it is lower carb than pasta cooked in bread crumbs...)
It's a lovely side dish to fish or chicken, or enjoy it as I do: part of an all vegetable feast.


GARLICKY BREADCRUMBS CAULIFLOWER

1 head of cauliflower, cut into bite-sized pieces
3 cloves of garlic, minced
olive oil
1/4, up to 3/4 Cups breadcrumbs
S&P

In a large saucepan add cauliflower, cover with water and a some shakes of salt. Bring to a boil. Cook until cauliflower is tender-about 8 minutes. Drain well.

In a large, nonstick sautée pan, heat olive oil. Add garlic and sauté until fragrant and golden. Add breadcrumbs. Well combine garlic oil and breadcrumbs. Add cauliflower and toss to coat.

I like to allow the mixture to stay for a minute or two in place-in order to create a nice crispy crust of crumbs on the cauliflower (this can only be done in a nonstick pan.) Add S&P to taste. Enjoy!

Wednesday, December 30, 2009

Guest Writer: Nutrition Counselor Part II

I asked my dear friend Jessica, the nutritional health counselor, for another post as we begin to navigate this New Year. I, for one, have really indulged this holiday season. I'm not one for diets but I do recognize the need for clean eating after a few days, weeks or a whole SEASON of indulgences... So, with that in mind, enjoy Jessica's wisdom and advice:


It may sound simple, but...

As your eating habits get cleaner, you start to really enjoy the simplest foods - things with only three or four ingredients.
When shopping in a store, this should be a guideline for us. If you feel the ABSOLUTE NEED to buy prepackaged/prepared foods, try to limit it to foods that have no more than 5 ingredients. Your stomach, face, hair, skin, brain, emotional stability, etc. will thank you!
Continuing along the vein of Winter foods, as we hunker down for the serious bit of it, we keep tackling the challenge of satisfying our instinctive desires for higher carbohydrate foods. The stage is beautifully set for whole grains.
No, I don't mean brown Wonderbread...lol
I mean little pearls of goodness that can be found at your local natural market in the bulk bins. Things like quinoa, millet, barley, buckwheat, wild rice blends, and the like. There are hundreds, depending where in the country you are.
Today, I had some fun with millet. This little round golden grain has been cultivated in East Asia for the last 10,000 years. It is safe for those with gluten intolerance, such as Coeliac's, and provides about 11% protein by weight. It is rich in B vitamins, especially niacin, B6, folic acid, calcium, iron, potassium, magnesium, and zinc. Millet does contain a mild thyroid peroxidase inhibitor, so should be eaten in moderation by people with thyroid problems.
Ok, got all that mumbo-jumbo out of the way, now this stuff tastes G-O-O-D!
As with most grains, millet should be soaked in an "acid bath" to remove the stomach irritating saponins (yes, naturally occuring soap). This is easy. Put your millet - a cup or so - in a small bowl and fill with water to about 1/2 inch above the grain. Then pour 2 tablespoons of either fresh lemon juice or raw apple cider vinegar and mix in. Cover, place somewhere warm (top of stove does fine) for at leat 4 hours, if not overnight. You can leave this longer to open the grain up and some people go so far as to let it ferment a bit. Not I.
In the morning, run water through it a few times and throw water out. Then put in saucepan with enough water to cover and bring to a boil. Simmer til tender - sometimes it absorbs all the water, sometimes you have to drain it off, but when it's done it'll have the consistency of slightly al-dente pasta.
Drain.
Then, the fun begins. First, you need to decide what kind of fat you want to add. Yes fat. Get over it. You need it for your skin, eyes, organs, and BRAIN! Also, the nutrients in whole grains are mostly fat-soluble, meaning they are ONLY bioavailable to your body when accompanied by wholesome fats.
I prefer to add some raw milk butter, but as that is hard to get in NY, olive oil does the trick.
Then, I like to add some aromatics - garlic and/or onion.
Then, some herbs and/or chopped tomato.
Eat warm. YUM!

Today, I did the following - to a 1/2 cup serving of warm millet, I added:
1 teaspoon butter
2 tablespoons of VERY FINELY chopped raw red onion
note: I let the onion rest for a few minutes after chopping to let go of it's bitter bite before adding to bowl
about one teaspoon of fresh thyme
1 tablespoon olive oil (first cold pressed)
a pinch of pink himalayan sea salt
1 tablespoon of crumbled raw milk sharp cheddar

Another awesome thing about these grains is that the other half cup I made can be stored for later. You can make a sweet treat out of it by adding some cinnamon, clove, cardamom, and either maple syrup or agave nectar and it turns out like a yummy sort of rice-pudding-y concoction.

Go out and see what grains your local market has! Most can be prepared as above, with a preliminary acid soak. If you find something you don't know what to do with, feel free to email me with questions!
Happy Winter Eats!

jessica@732eattrue.com
www.732eattrue.com

Saturday, December 26, 2009

Wisdom from my Mother-In-Law


Prof. Hubs and I just got back from a relaxing holiday visit with his family. We saw movies (Avatar in 3d is so wonderful!!! Young Victoria is a gem!) read, relaxed, went for walks, bonded, and feasted our way through the days...I think just about every meal we ate in the last seven days included pie of some kind... I'll really need to do some detoxing in the new year (and my posts will reflect this so keep checking in.)
In addition to being a brilliant professor, scholar and mother of four, my mother-in-law is a really good cook-the intuitive kind. No recipes used in her kitchen-she cooks based on her 'sense' of what will be delicious and beautiful. (And what can be combined in a a MAGIC BULLET...she loves her infomercial finds!) She really produced some delectable meals during our visit and the following recipe is one I asked her to make twice I liked it so much. And I also made it first thing upon arriving back in Midwestia. I learn so much from watching her cook and this quick and inexpensive meal is a new favorite.


Flank Steak (1-1.25 lbs.)
Worcestershire sauce (I used 1/3 of a bottle)
Soy sauce (again, I used 1/3 of a bottle)
Flour (for dredging)
White wine (Mother-in-law says the cheaper the better)
2 cloves Garlic, chopped

1 Onion
1/2 container of mushrooms, sliced
1 large Potato(optional)
White wine
sour cream (optional)

Rice (best with long grain white basmati, but we enjoy it with short grain brown rice.)

Start to cook rice.
Slice flank steak into very thin pieces. Put sliced beef in a bowl and add enough soy sauce and worcestershire sauce to cover (ratio of soy to worcestershire sauce is 1:1) Add a splash of dry white wine to marinade. Marinate for at least 20 minutes, up to one day.

(To my vegetarian friends, I apologize for the carnage in this post both in prose and in pictures!!!)

During marinating process prepare mushroom/onion mixture:
Slice onion into thin rings. Cook over med-high heat for 10 minutes, until soft and translucent. (you have the option here to add thinly sliced potatoes and cook until tender.) Add sliced mushrooms. Add salt and pepper. Cook for 3 minutes. Add 2-3 white wine splashes.

Cook until alcohol smell is gone and liquid is mostly reduced. Lower heat to low.

Remove meat from marinade and coat with flour.
Heat oil in large sautée pan over med-high heat. Cook steak in small batches, adding garlic cloves and splash of white wine to each batch.

(sorry this photo is so unappetizing...believe me, it looks so tasty when it's all assembled!)

Cook until browned and crispy.

Top cooked rice with beef, then with mushroom mixture. (Prof. Hubs prefers to mix in a large dollop of sour cream (of course) before eating.)

Enjoy!!!


Tuesday, December 22, 2009

Oatmeal at its Best


I've been on a breakfast food kick this Holiday season. So here's another favorite recipefrom the vault:

Several Summers ago I had the opportunity to sing with a wonderful little company in Indiana called THE WAGON WHEEL THEATRE. Located in the metropolis of Warsaw, (that is used ironically for those readers who are not familiar with Indiana's geography) the Wagon Wheel puts together an amazing season of performances. I highly recommend checking it out if you ever find yourself in Northern Indiana in Summer craving showtunes... or delicious breakfast foods. During my time in Warsaw my colleagues and I would pile in a car for almost an hour to eat a bowl of oatmeal-the very special Amish Baked Oatmeal at a little restaurant called the Corner Cafe in Nappanee, Indiana. In fact, this oatmeal was so special that one of us would call the restaurant at 6am to ask them to set aside some pieces of baked oatmeal so that the trip would be worthwhile.
It's been years since I had a bowl of that oatmeal-so rich and nutty, so tender and sweet... It haunts me. Or it did until I figured out an approximate recipe:

AMISH BAKED OATMEAL
(makes 6 servings...though I can eat 4 of them myself in one sitting...that's how good this is)

1.5 cups oats (I like the regular kind, not the slow cooking Irish or the quick cooking)
1/2 cup brown sugar (sometimes I use agave if I'm feeling particularly healthy)
1/2 cup milk
1/4 cup butter, melted
1 egg
1 tsp baking powder
3/4 tsp salt
2 tsp vanilla

(This recipe can be assembled the night before and baked in the morning... but it's not necessary)
Preheat oven to 350.
Combine all ingredients in a large bowl.

Pour into a greased 8X8 glass baking dish.

Bake for 25 minutes, until edges are golden brown.
Cool Slightly, then cut into squares. Serving suggestions:
top with brown sugar, milk, nuts, bananas, raisins, etc...
(my personal favorite is brown sugar, toasted walnuts, and milk)


Thursday, December 17, 2009

Popovers


In my childhood home my Mom must have baked fresh popovers every Winter weekend. I fondly remember tearing into the warm, puffy crust and feeling enthralled as I watched the steam rush skyward before I took my first bite. Each of my two brothers must have eaten their weight in popovers during the 1980's... This is why whenever I see/smell/taste/even think of popovers I feel intense happy family nostalgia.
My friend Claire (of Claire's Limey Salad fame) recently prepared popovers at a dinner she hosted and I was instantly taken back to those childhood weekend breakfasts. With this in mind I decided to prepare a Desperate Housediva version of this family favorite. I added some magical White Whole Wheat flour in order to make it a bit healthier and included the melted butter in the batter itself to add a flaky/pastry component to the dish. They did not disappoint: not only do they live up to my popover nostalgia but they also feel healthier (and no less delicious) with the addition of the white whole wheat flour.
If you have never had the pleasure of enjoying a fresh popover (which was Prof. Hubs' situation before this morning) the only way I can describe them is to say they are something like a Yorkshire Pudding...if that doesn't help you, just taste them. Prof. Hubs said that they are like the best parts of bread combined with the bests part of eggs. This is a somewhat literal description for those who really have no previous popover/yorkshire pudding experience.
No matter what, you should make them...like NOW.


POPOVERS
(adapted from the Moosewood cookbook)
2 to 4 Tbsp melted butter
2 eggs
1 cup Milk
1/2 cup white whole wheat flour
1/2 cup all purpose flour
1/2 tsp salt
(NOTE: In the original recipe one can use up to 4 eggs depending on your egginess preferences. If using more than 2 eggs, add a 1/4 each of milk and all purpose flour.)

Preheat oven to 375. Grease muffin tin/popover tin.


In a large bowl combine all ingredients well. A few lumps are okay.

(NOTE: some people use the melted butter to grease the tin. Others add the melted butter to the batter. I do the latter and it creates a wonderfully flaky popover, but if you're looking for a silkier, less flaky popover omit the butter from the batter.)
Pour batter into muffin tins filling them 1/2 to 2/3 full. Bake for 25 minutes (Add 5 minutes
per egg if you added more than 2 to your batter.) DO NOT open oven while popovers are baking!!!!!
After the alotted cooking time has passed remove popovers immediately and prick the puffy part with a knife to allow steam to escape and to help them hold their unique shape.
Serve immediately. I like mine plain or with this...