Saturday, December 26, 2009

Wisdom from my Mother-In-Law


Prof. Hubs and I just got back from a relaxing holiday visit with his family. We saw movies (Avatar in 3d is so wonderful!!! Young Victoria is a gem!) read, relaxed, went for walks, bonded, and feasted our way through the days...I think just about every meal we ate in the last seven days included pie of some kind... I'll really need to do some detoxing in the new year (and my posts will reflect this so keep checking in.)
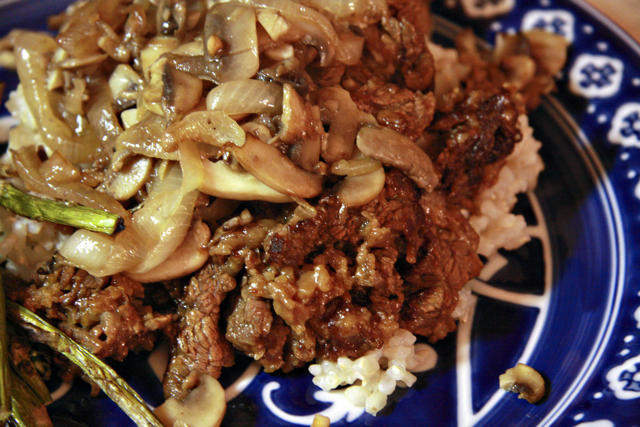
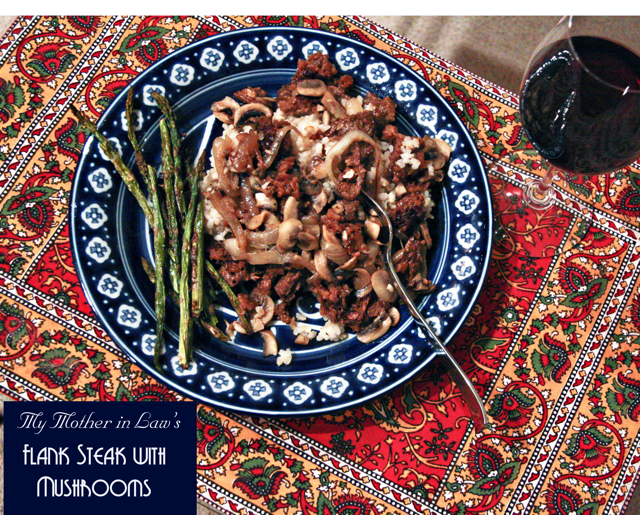
In addition to being a brilliant professor, scholar and mother of four, my mother-in-law is a really good cook-the intuitive kind. No recipes used in her kitchen-she cooks based on her 'sense' of what will be delicious and beautiful. (And what can be combined in a a MAGIC BULLET...she loves her infomercial finds!) She really produced some delectable meals during our visit and the following recipe is one I asked her to make twice I liked it so much. And I also made it first thing upon arriving back in Midwestia. I learn so much from watching her cook and this quick and inexpensive meal is a new favorite.


Flank Steak (1-1.25 lbs.)
Worcestershire sauce (I used 1/3 of a bottle)
Soy sauce (again, I used 1/3 of a bottle)
Flour (for dredging)
White wine (Mother-in-law says the cheaper the better)
2 cloves Garlic, chopped

1 Onion
1/2 container of mushrooms, sliced
1 large Potato(optional)
White wine
sour cream (optional)

Rice (best with long grain white basmati, but we enjoy it with short grain brown rice.)

Start to cook rice.
Slice flank steak into very thin pieces. Put sliced beef in a bowl and add enough soy sauce and worcestershire sauce to cover (ratio of soy to worcestershire sauce is 1:1) Add a splash of dry white wine to marinade. Marinate for at least 20 minutes, up to one day.

(To my vegetarian friends, I apologize for the carnage in this post both in prose and in pictures!!!)

During marinating process prepare mushroom/onion mixture:
Slice onion into thin rings. Cook over med-high heat for 10 minutes, until soft and translucent. (you have the option here to add thinly sliced potatoes and cook until tender.) Add sliced mushrooms. Add salt and pepper. Cook for 3 minutes. Add 2-3 white wine splashes.

Cook until alcohol smell is gone and liquid is mostly reduced. Lower heat to low.

Remove meat from marinade and coat with flour.
Heat oil in large sautée pan over med-high heat. Cook steak in small batches, adding garlic cloves and splash of white wine to each batch.

(sorry this photo is so unappetizing...believe me, it looks so tasty when it's all assembled!)

Cook until browned and crispy.

Top cooked rice with beef, then with mushroom mixture. (Prof. Hubs prefers to mix in a large dollop of sour cream (of course) before eating.)

Enjoy!!!


Tuesday, December 22, 2009

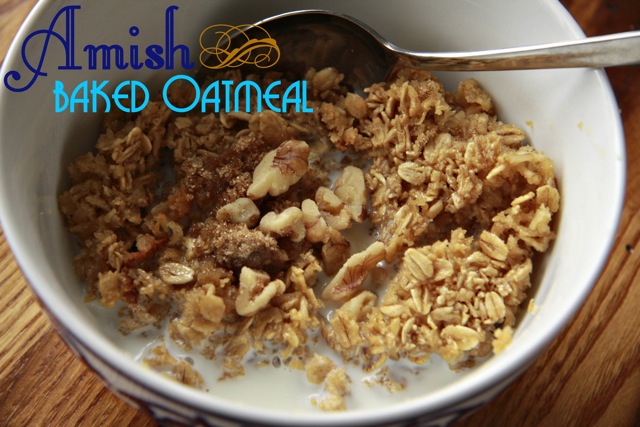
Oatmeal at its Best


I've been on a breakfast food kick this Holiday season. So here's another favorite recipefrom the vault:

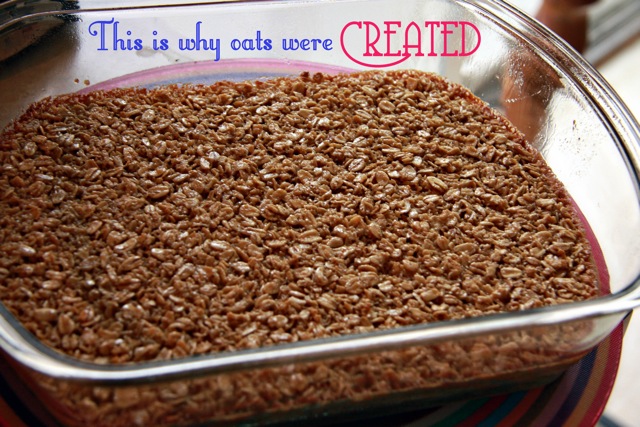
Several Summers ago I had the opportunity to sing with a wonderful little company in Indiana called THE WAGON WHEEL THEATRE. Located in the metropolis of Warsaw, (that is used ironically for those readers who are not familiar with Indiana's geography) the Wagon Wheel puts together an amazing season of performances. I highly recommend checking it out if you ever find yourself in Northern Indiana in Summer craving showtunes... or delicious breakfast foods. During my time in Warsaw my colleagues and I would pile in a car for almost an hour to eat a bowl of oatmeal-the very special Amish Baked Oatmeal at a little restaurant called the Corner Cafe in Nappanee, Indiana. In fact, this oatmeal was so special that one of us would call the restaurant at 6am to ask them to set aside some pieces of baked oatmeal so that the trip would be worthwhile.
It's been years since I had a bowl of that oatmeal-so rich and nutty, so tender and sweet... It haunts me. Or it did until I figured out an approximate recipe:

AMISH BAKED OATMEAL
(makes 6 servings...though I can eat 4 of them myself in one sitting...that's how good this is)

1.5 cups oats (I like the regular kind, not the slow cooking Irish or the quick cooking)
1/2 cup brown sugar (sometimes I use agave if I'm feeling particularly healthy)
1/2 cup milk
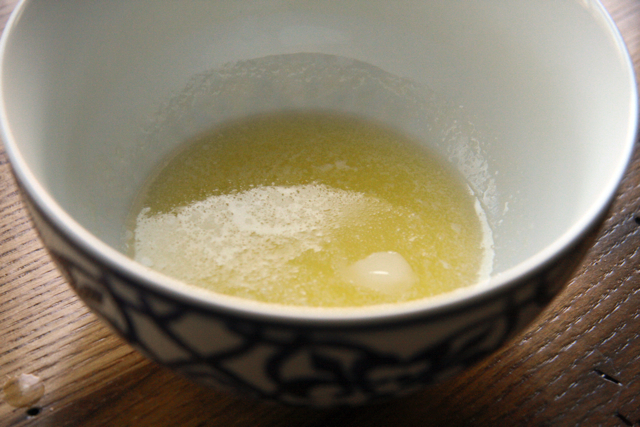
1/4 cup butter, melted
1 egg
1 tsp baking powder
3/4 tsp salt
2 tsp vanilla

(This recipe can be assembled the night before and baked in the morning... but it's not necessary)
Preheat oven to 350.
Combine all ingredients in a large bowl.

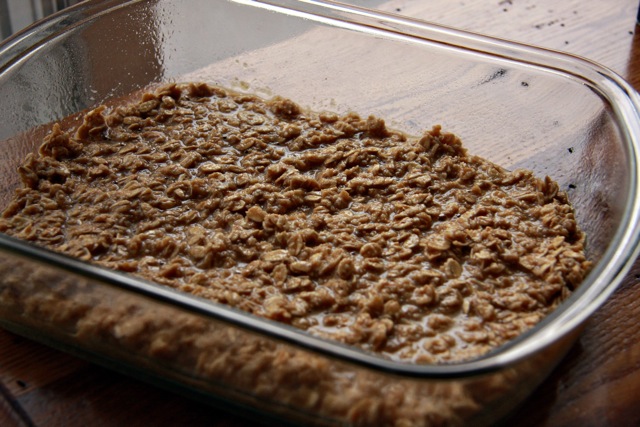
Pour into a greased 8X8 glass baking dish.

Bake for 25 minutes, until edges are golden brown.
Cool Slightly, then cut into squares. Serving suggestions:
top with brown sugar, milk, nuts, bananas, raisins, etc...
(my personal favorite is brown sugar, toasted walnuts, and milk)


Thursday, December 17, 2009

Popovers


In my childhood home my Mom must have baked fresh popovers every Winter weekend. I fondly remember tearing into the warm, puffy crust and feeling enthralled as I watched the steam rush skyward before I took my first bite. Each of my two brothers must have eaten their weight in popovers during the 1980's... This is why whenever I see/smell/taste/even think of popovers I feel intense happy family nostalgia.
My friend Claire (of Claire's Limey Salad fame) recently prepared popovers at a dinner she hosted and I was instantly taken back to those childhood weekend breakfasts. With this in mind I decided to prepare a Desperate Housediva version of this family favorite. I added some magical White Whole Wheat flour in order to make it a bit healthier and included the melted butter in the batter itself to add a flaky/pastry component to the dish. They did not disappoint: not only do they live up to my popover nostalgia but they also feel healthier (and no less delicious) with the addition of the white whole wheat flour.
If you have never had the pleasure of enjoying a fresh popover (which was Prof. Hubs' situation before this morning) the only way I can describe them is to say they are something like a Yorkshire Pudding...if that doesn't help you, just taste them. Prof. Hubs said that they are like the best parts of bread combined with the bests part of eggs. This is a somewhat literal description for those who really have no previous popover/yorkshire pudding experience.
No matter what, you should make them...like NOW.


POPOVERS
(adapted from the Moosewood cookbook)
2 to 4 Tbsp melted butter
2 eggs
1 cup Milk
1/2 cup white whole wheat flour
1/2 cup all purpose flour
1/2 tsp salt
(NOTE: In the original recipe one can use up to 4 eggs depending on your egginess preferences. If using more than 2 eggs, add a 1/4 each of milk and all purpose flour.)

Preheat oven to 375. Grease muffin tin/popover tin.


In a large bowl combine all ingredients well. A few lumps are okay.

(NOTE: some people use the melted butter to grease the tin. Others add the melted butter to the batter. I do the latter and it creates a wonderfully flaky popover, but if you're looking for a silkier, less flaky popover omit the butter from the batter.)
Pour batter into muffin tins filling them 1/2 to 2/3 full. Bake for 25 minutes (Add 5 minutes
per egg if you added more than 2 to your batter.) DO NOT open oven while popovers are baking!!!!!
After the alotted cooking time has passed remove popovers immediately and prick the puffy part with a knife to allow steam to escape and to help them hold their unique shape.
Serve immediately. I like mine plain or with this...


Monday, December 14, 2009

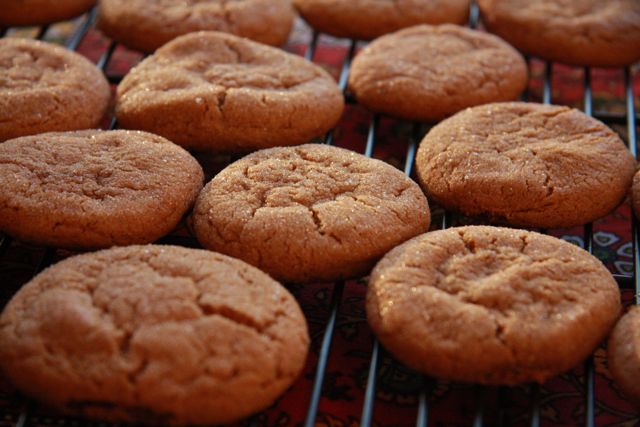
The Ginger Cookies of life


Let me begin this post by stating that, thanks to my dear friend Jessica's post on winter cravings,
I am no longer craving sweets with the same voracity. Thus, I can now make Holiday cookies
without being a slave to them. With this new freedom in mind I share with you one of my favorite
cookie recipes.
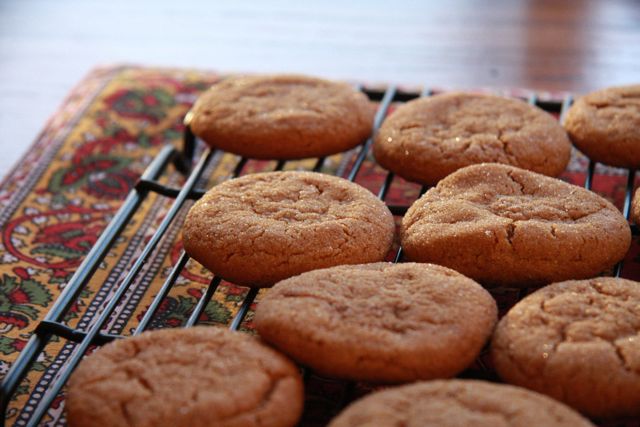
Last Winter during one of my visits to Prof. Hubs in Boston, my friend Evelyn and I found ourselves in her kitchen craving Chrismas cookies. In the end, we couldn't agree on what kind of cookies to make so we decided there was no harm in making two recipes. The Russian Tea cakes were good enough, but it was this Ginger cookie recipe that was the great success of the afternoon. I must have made them 50 times since that fateful afternoon with Evelyn. They are the most perfect, chewy, ginger-y snaps... This week I have been invited to my first cookie swap (girlie night of gossip and cookie noshing? SIGN ME UP!) and I think I may bring these-it will be the second time in 3 days that I've made them...they're that good. I have passed the recipe on to many of my nearest and dearest and here I share it with you:

Ginger Cookies
thank you, thank you, Paula Deen...
xo, Desperate Housediva

Ingredients

  • 3/4 cup vegetable shortening
  • 1 cup sugar, plus more for rolling
  • 1 large egg
  • 1/4 cup molasses
  • 2 cups sifted all-purpose flour
  • 2 teaspoons baking soda
  • 1 teaspoon ground cinnamon
  • 2 teaspoon ground ginger
  • 1/2 teaspoon ground cloves
  • 1/2 teaspoon salt

Directions

Preheat the oven to 350 degrees F.

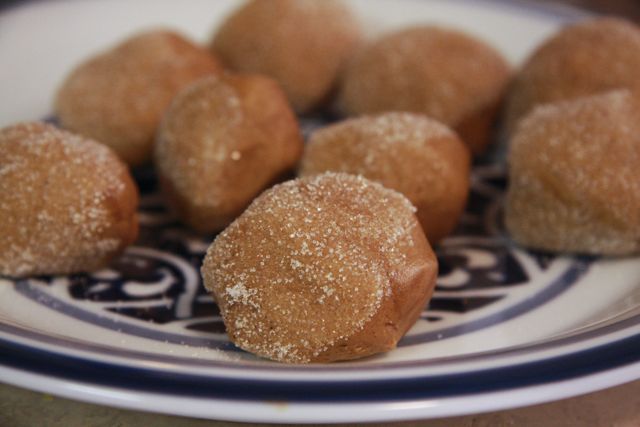
Line cookie sheets with parchment paper or nonstick baking mats. Using an electric mixer at low speed, cream the shortening and sugar until thoroughly combined. Add the egg and molasses and beat until completely incorporated. Sift together the flour, baking soda, cinnamon, ginger, cloves and salt and add to the mixture. Stir until combined. Roll the dough into balls about 1-inch in diameter. Roll the balls in sugar.


Place 1/2-inch apart on the prepared cookie sheets. Flatten the balls slightly with your fingertips. Bake for 12 minutes. Cool on wire racks.


Best Chocolate Chip Cookies (so far...)


The following is a recipe that came together after scouring other blogs that claim to have found a replica recipe for the famous
Levain Bakery Chocolate Chip Walnut Cookie. The truth is, after attempting each of the recipes I could find,
I can say with certainty that none of the replica recipes comes close to the taste of a real Levain cookie.
And yet each of them makes a pretty fantastic chocolate chip cookie in their own right.
After putting together this recipe, I had my dear friend and recipe tester, Ana, give them a try.
She gave them rave reviews and said they reminded of Mrs. Fields cookies.
So it's back to the drawing board in terms of Levain replicas... In the meantime,
Mrs. Fields still makes a mean cookie so the recipe's worth trying.
So far, this is the best Chocolate Chip cookie recipe I've come up with.

Don't forget these cookie baking tips:
-when you're ready to store any cookies: Put them in a sealed container atop a slice of soft bread.
It really keeps them moist and chewy (if, like me, you love a chewy cookie.)
-chilling the dough and the cookie sheet will make for less cookie spread (if you are looking for a thicker cookie)
-Chilling the dough overnight makes for the best chocolate chip cookies, no matter what recipe you're using
(that tip is from Maury of THE CITY BAKERY himself!)


The Best Chocolate Chip Cookies (so Far)
1 stick butter, cold and cubed
1 c. brown sugar
1 egg
In an electric mixer, or by hand cream all above ingredients
add:
3/4 c. all purpose flour (using only BLEACHED flour will result in less cookie spread)
3/4 c. white whole wheat flour
1/2 Tbsp. baking powder
1/2 tsp. baking soda
1/2 tsp. salt
1 tsp. vanilla
1/2 Tbsp. Cornstarch
Mix all ingredients with an electric beater until incorporated and a thick, creamy dough is created. Then mix in:
1/2 cups of crushed walnuts
1 cup of {good quality, small} semi-sweet chocolate chips
Beat again with electric mixer.

please excuse my graphic design additions...I've been going a bit photoshop crazy these days...

If you have the time, do take the time to work these a bit by hand (knead) like a bread dough. It's not necessary, but they are a bit more Levain-y that way :)

Drop large balls of dough on cookie sheet covered in parchment or, my fave: silpat mat.

Bake 350 degrees for 10-15 minutes (depending on desired gooey-ness), or until the tips of the cookies have turned light brown. Remove from cookie sheet. Cool and ENJOY!!!!


Wednesday, December 9, 2009

Festival of Lights

It's that time of year again: Chanukah!
In my family Chanukah is synonymous with Latkes. Usually my Dad (though on occasion, my Mom) prepares them annually to celebrate
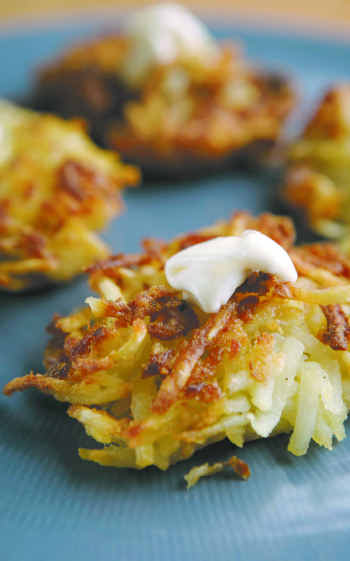
this. As a child I used to invite a friend or two over (usually non-Jewish friends as there weren't a large number of other Jewish families in our town) to light the candles, eat latkes, exchange gifts, and play dreidel. One of these childhood friends wrote to me a couple of days ago requesting that I write a post divulging the secrets of my family's famous Latkes. It warmed my heart in the most wonderful way that she remembered: how amazing to think that the little Chanukkah dinner we shared as children stuck with her after all this time. In her honor I dedicate this:

The Famous Family Latkes
(From the complete American-Jewish cookbook, edited by Anne London and Bertha Kahn Bishov, 1971)

6 medium potatoes
1 small onion
2 eggs slightly beaten
3 Tbsp flour
1/4 tsp pepper
1 tsp salt
1/2 tsp baking powder

Peel and grate potatoes and onion.

Let stand 10 minutes so liquid will rise to top. Remove liquid.

Stir in eggs.

Add other ingredients.

Drop by spoonfuls into hot, well-greased skillet. (my Dad uses canola oil)

Brown on both sides.

Drain on absorbent paper.

Serve hot with applesauce, or sour cream. (I like both)


Saturday, December 5, 2009

Russian Feast, also known as how I spent my Thursday

In honor of semester's end at the College of Midwestia Prof. Hubs and I decided to throw a little party for the Russian students to celebrate all that they accomplished during the past few months...and mostly to bribe them into continuing their studies with the Russian program...
In my eagerness to prepare traditional Russian recipes I decided to (ambitiously) prepare not only a traditional borscht (beet soup,) but also pirozhki (little pies filled with a cabbage mixture,) Khatchapuri (the most delicious cheese bread known to humankind) and an apple cake... I was cooking for more than 10 hours, people (which is why I poached a borscht photo from some other website-I was too busy kneading fresh pirozhki dough to snap pics...) It was actually a lot of fun-though somewhat stressful (I needed Prof. Hubs to stage a Borscht intervention somewhere around 9pm on Thursday and he came to my rescue with more beets, etc.) and I haven't had such sore feet since my days working in the restaurant business. No wonder they require food service workers to wear those dansko clogs!
After all that cooking we finally got to enjoy the goodies-and they were wonderful. Even the actual Russians at the feast found them to be authentically delish (though, admittedly the whole wheat dough that I used for the cabbage pirozhki was not nearly as supple and light as the white dough I made for the cheese Khatchapuri...nor nearly as authentic.) I have included the Borscht recipe and the Khatchapuri recipe, because they were the most beloved (and I already shared the amazing Jewish apple cake recipe in a previous post.) Though the borscht has multiple parts it's worth the effort on a cold winter's day. And you can always do something else (like make Khatchapuri) while the various parts are cooking...

FUN WITH BORSCHT
based on several recipes, including on on SIMPLY RECIPES, one on EPICURIOUS and several featured on prominent Russian cooking websites
(note: this makes enough borscht to fill a large stockpot...or a lot of people.)

INGREDIENTS
vegetable oil
2lbs beef shortribs (the British cut, thick squares, on the bone, as opposed to the thin, long cuts)
1 onion, quartered
16 cups (4 containers) beef broth (low sodium)
8 beets
8 carrots, peeled, chopped into 1/2 inch bites
5 med potatoes, peeled, chopped into 1/2 inch bites
6 cups white cabbage chopped into 1/2 inch square shreds
1 cup dill, chopped
sour cream
s&p

PART I
In a large stockpot heat a bit of vegetable oil to med-hi. Add shortribs. Brown on all sides (total of about 8 minutes) then add onion. Then add one container (4 cups) broth. Bring to a boil, lower to a simmer, cover. Cook for 2.5 hours. After that time remove from heat. Transfer shortribs to plate. Trim of bone and fat, shred meat. Set aside shredded beef in fridge. Allow broth to cool (this takes at least 4 hours) and then skim fat from the top.

PART II
Boil beets in water for 25 minutes. Transfer to a plate.
Allow to cool, then peel and chop into 1/2 inch bites.
Continue with all of the other vegetable chopping.
Bring skimmed back to stove. Add remaining stock and bring to a boil. Add all chopped vegetables (beets, carrots, potato.) Then lower heat to simmer soup, covered for at least an hour. Stir in meat.
Now you are FINALLY ready to enjoy the fruits of your labor-
Serve soup with a large dollop of sourcream, dill, and salt and pepper to taste.


KHATCHAPURI (Georgian cheese bread)

(note: I'm sure you could just use refrigerated pizza dough rolled very thin for this, but if you have the time, this dough is so silky and supple.)


DOUGH
(recipe by Gil Marks)
1 package active dry yeast
1/4 cup warm water plus 2/3 cup warm water or milk
3 tsp sugar or honey
2 large eggs
1/4 cup butter melted
1.5 tsp salt
about 3.5 cups unbleached all purpose flour

In a large bowl dissolve the yeast in 1/4 cup of the warm water. Stir in 1 tsp of the sugar and let stand until foamy. Stir in the remaining water, the remaining 2 tsp sugar, the eggs, butter, salt,and 2 cups of the flour. Gradually add enough of the remaining flour to make a workable dough.
Knead dough until smooth and elastic. Place in a greased large bowl, turning to coat. cover loosely with plastic wrap or a damp towel and let rise in a warm, draft-free place until nearly doubled in bulk, about 1.5 hours. Punch down and knead again before use or cover and refrigerate for up to 24 hours.


FILLING
1 cup ricotta cheese
1.5 blocks of feta cheese, crumbled
half a bag shredded part-skim mozzarella cheese
1 egg

Combine all cheeses and egg.

ASSEMBLY:
Preheat oven to 350. Roll out dough to 1/2'' to 3/4'' thick. Cut into rounds (my rounds were about 6'' in diameter.) Fill the rounds with a layer of cheese mixture, leaving room at the edges. Cover with another round and pinch edges closed. (for extra pretty brown-ness, brush little pies with a mix of 1 egg and 1 tbsp water before baking.) Place on a greased baking sheet and bake until lightly browned (in my oven, about 10 minutes.)
I warn you-this is the tastiest cheesy bread product you will EVER EAT:
ENJOY WITH CAUTION-HIGHLY ADDICTIVE